

Can You Save Zinnia Seeds After a Frost or Freeze?

*As an Amazon Associate, I earn from qualifying purchases. This post contains other affiliate links too for your convenience. Click here to read my full disclosure policy.
If you’re like me, you may have walked outside one chilly morning to find your zinnias covered in frost and thought—“Well, that’s it.” But don’t grab the compost bin just yet! You might still be able to save seeds for next year.
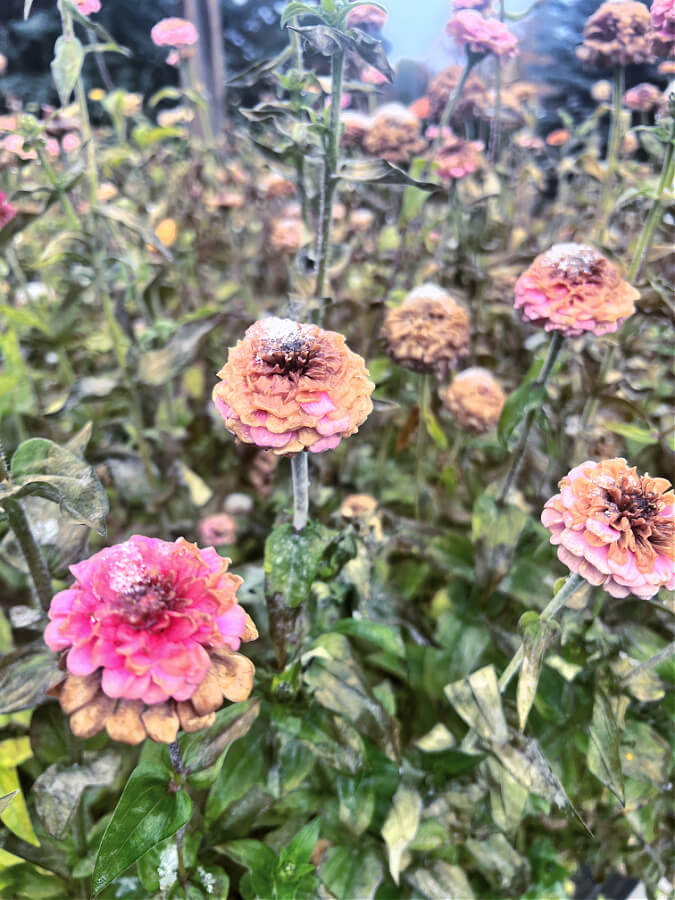
Zinnias are tough little flowers, and their seeds often survive a light frost if they’ve had time to mature. The trick is knowing which blooms are worth saving and which ones to skip. So let’s get to it so you can save those seeds for next year’s zinnias!
smarter not harder
START YOUR LAZY GIRL FLOWER GARDEN
Shop my Lazy Girl Guides for simple, beginner-friendly help.
Light Frost vs. Hard Freeze
The short answer is YES you can! Read on for the details so you do it correctly.
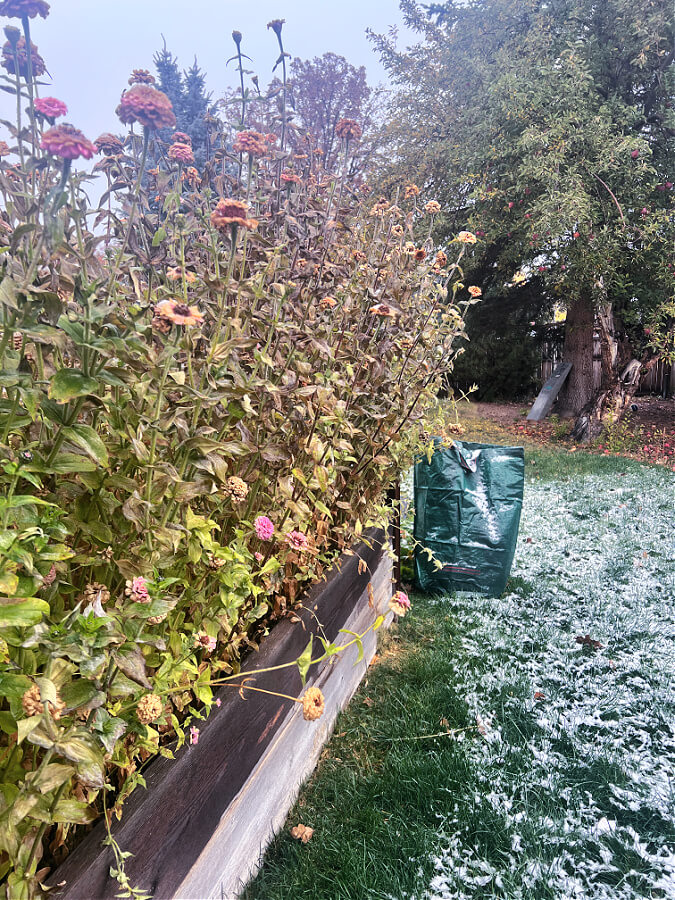
After a light frost (around 32°F):
Good news! The seeds inside your mature, dry flower heads are likely still fine.
- Wait until things thaw mid-morning.
- Snip off any brown, papery seed heads.
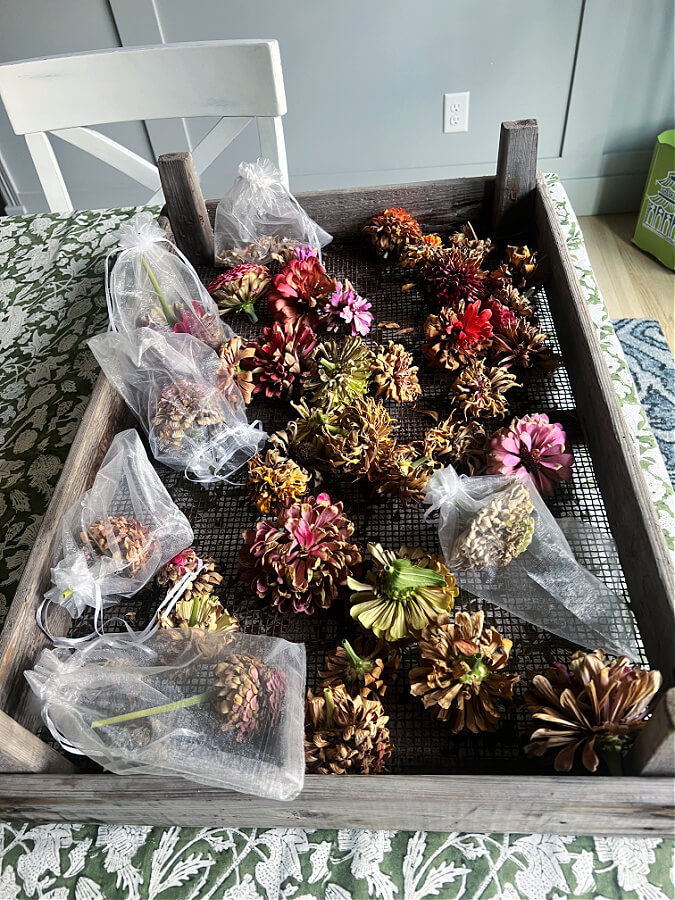
- Bring them indoors to finish drying for about a week.
If they were damp from dew or frost, lay them out on paper towels or a tray in a warm, airy spot. I usually set them out on my dining room table on a drying rack. Anything that has a breathable or mesh bottom works best for airflow.
After a hard freeze (below 28°F):
This is when the damage sets in. Blooms that were still green, soft, or freshly cut likely didn’t have time to mature before freezing. But most likely there are still some out there that can be saved! It just might not be as many.
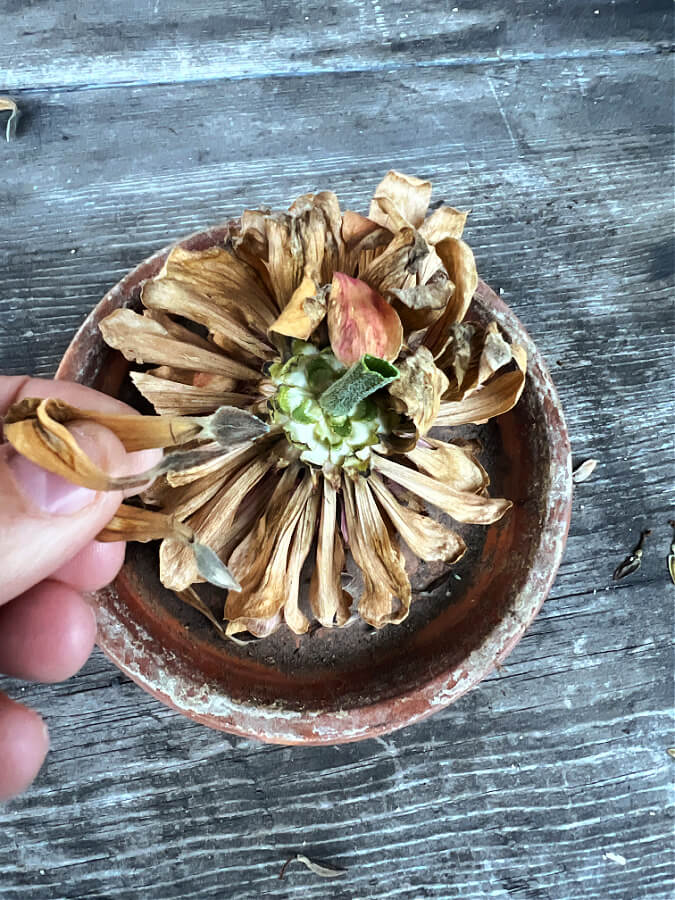
- Focus on collecting only the fully dry, brown, crispy blooms.
- Avoid any that turned black or mushy—they’re probably too far gone.
- Make sure to fully dry these for two weeks or more inside.
Lazy Girl Secret Trick: Silica Gel Packets
Here’s my little lazy girl secret for saving seeds—especially after a frosty morning.
Once you’ve gathered and dried your zinnia heads, tuck a silica gel packet (the kind that comes in shoe boxes or vitamin bottles) into the container or bag with your dried blooms or seeds.
These tiny packets help absorb extra moisture and prevent mold, especially if you live in a humid area or are storing seeds in a spot that isn’t perfectly climate controlled.
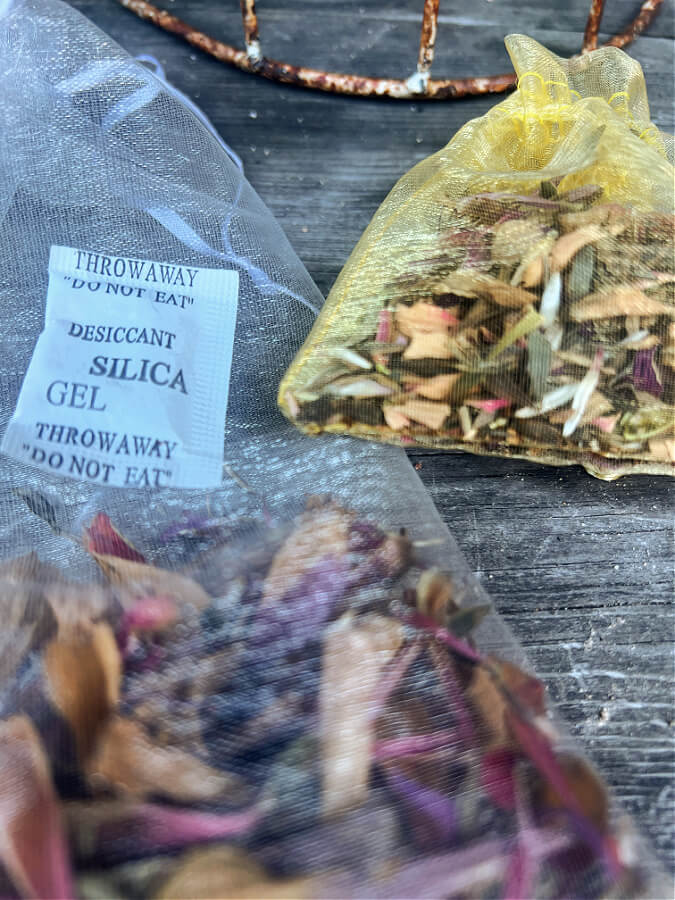
Tip: If you’re reusing old packets, make sure they still work! You can refresh them by placing them in a warm oven (around 250°F for 10–15 minutes) to dry them out before using again.
It’s a super simple step that helps ensure your hard-earned seeds stay dry and viable all winter long.
The Lazy Girl Seed Test: Are They Even Good?
Wondering if your seeds are still viable? Try this:
- Crack one flower head open gently and remove seeds.
- If it’s dark, thick, and firm—not bendable—you’ve got a good seed!
- If it’s white, thin, or flimsy, it didn’t mature enough before the frost.
But if you want to be extra sure your seeds are still alive and ready to grow next year, try my Lazy Girl Paper Towel Test—a trick straight from my kindergarten teaching days!
Here’s how to do it:
1. Dampen a paper towel (not dripping wet, just moist).
2. Place about 10 zinnia seeds on one half, then fold it over gently.
3. Slide the paper towel into a zip-top bag, seal it, and hang it in a sunny window or warm spot.
4. Check after 7–10 days—if most of the seeds have sprouted tiny roots, they’re good to go!
This little test is an easy way to check germination before planting season—and it’s surprisingly fun to watch those tiny roots peek out!
All the best tips
Preparing Your Raised Beds for Winter: Fall Clean Up Guide
Your flowers are done, now what? Learn the options and start preparing for next season!
Keep Learning: More Lazy Girl Zinnia Tips
Now that you know how to save zinnia seeds even after frost, here are a few more posts that will help you take your garden to the next level:
A Guide to Harvesting Zinnia Seeds
Learn exactly where to find zinnia seeds on the flower head, how to separate chaff from viable seeds, and how to store them for maximum germination next year.
The Lazy Girl’s Guide to Growing Zinnias
From soil prep to pinching tips, this post walks you through the easy, low-maintenance way to grow a zinnia patch that blooms all summer long.
Each of these posts builds on what you’ve learned here—because once you fall in love with zinnias, the fun never really ends!
All the best tips
My Go To Seed Saving Supplies
Check out my tried and true supplies for saving zinnias seeds the lazy girl way!
You Can Save Zinnia Seeds After a Frost or Freeze
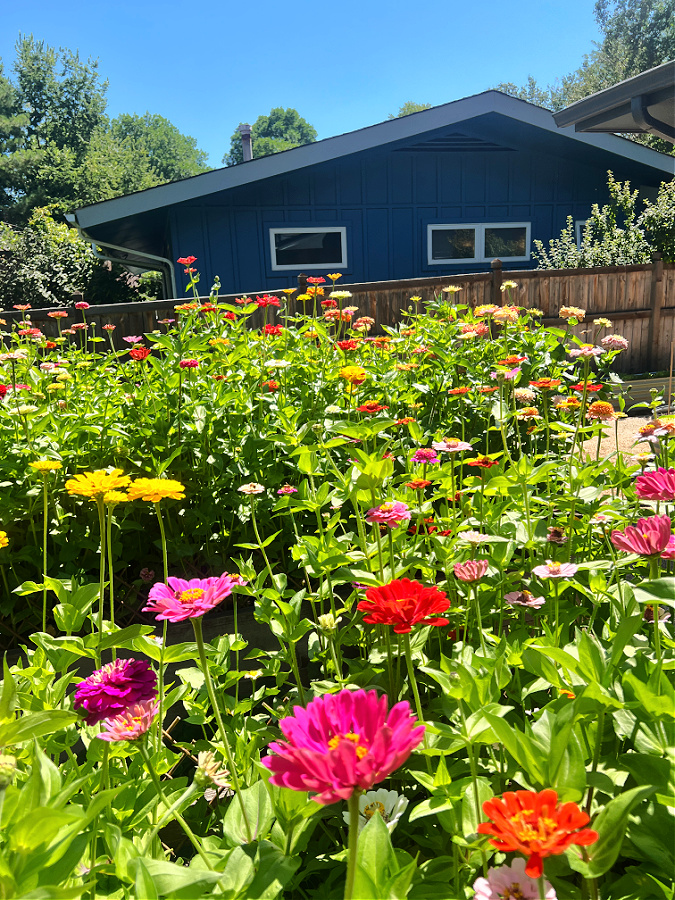
Even after frost hits, your garden can still give one last gift—next year’s flowers. Collecting and drying zinnia seeds only takes a few minutes, and it’s such a satisfying way to wrap up the season.
So grab your coffee, your garden snips, and a handful of organza bags, and go save what you can. Because once you’ve grown zinnias once, you’ll want them every year.
Have any questions for me? Leave a comment below!
I’d love to have you hang out with me some more! Feel free to follow along with me on any of the platforms linked below.
LTK | Facebook | Instagram | Pinterest | Amazon

My zinnia have two kinds of seeds..one that’s almost triangle in shape on the outside of the seed pod and the rest are more oval shaped and tucked inside a thin, papery covering. There are maybe 10 – 12 thick seeds and then these smaller, thinner type. Are both viable? I don’t want to go to the effort of saving the seeds if only the thicker, outside ones will work.
Thanks
The thick ones for sure are viable and the middle thin ones, it’s hard to say. The white papery covering is chaff and not the seed. If the seed inside is dark there is a good chance it will be viable. Sometimes I keep it all just to make sure. You could also try popping a few of the seeds you aren’t sure of in a damp paper towel for a few days to see if they sprout! Hope that helps a little.
When I retired from 29 years in a primary classroom, not kindergarten, I started to become a lazy gardener too. I guess it should have been the other way around since I had more time. This past summer, my vegetable garden was a fiasco. I really didn’t reap anything at all. My soil is failing me. I have decided that maybe it’s time to start buying my veggies from local farmers. I’ve had good success with some flowers though.
Right now, my new name is Seed Saver. I’ve collected several kinds of milkweed (which are my favorite seeds), blanket flower, coreopsis, zinnia, salvia, and a few others. My OCD has me filling a paper plate with what I retrieve and picking out the seeds one by one. It’s quite therapeutic. The ones I truly recognize, go in one pile, and the chaff and questionable ones go in another pile. I’ll plant the “real” ones where needed, and the “rejects” go in my “wildflower” garden to bloom or compost. That way everything is back in the soil.
Hi Karen! I love that we share the teaching bond! You made me laugh, it’s true we have more time now out of the classroom than we ever did! I’m not a veggie girl either and I learn every year just how important the soil really is! Enjoy your seed saving and I have to say I love your methods! Thankful you stopped by!