

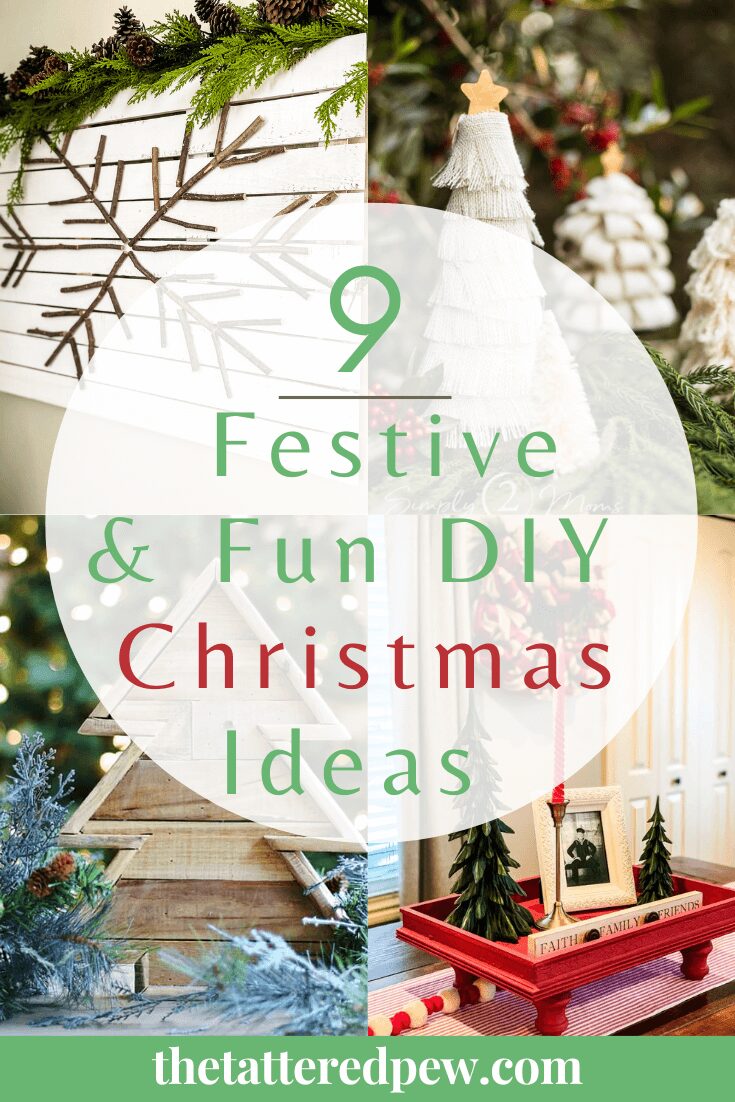
Step-by-Step Guide to Asymmetrical Christmas Mantel Garland Layering
Discover the art of embracing asymmetry in your holiday decor with this step-by-step guide to crafting an enchanting asymmetrical Christmas mantel garland.

Step-by-Step Guide to Asymmetrical Christmas Mantel Garland Layering
Ah, the holiday season is upon us, and it’s time to deck the halls with boughs of holly – or in our case, a magnificent asymmetrical Christmas mantel garland. If you’re tired of the same old symmetrical garlands and want to infuse a bit of whimsy and creativity into your holiday decor, you’re in the right place. In this step-by-step guide, I’ll show you how to craft an asymmetrical mantel garland that will have your guests oohing and aahing at your festive flair.
*As an Amazon Associate, I earn from qualifying purchases. This post contains other affiliate links too for your convenience. Click here to read my full disclosure policy.
Should Mantel Decor Be Symmetrical?
The age-old debate: should your mantel decor be symmetrical? Well, my friend, let me break it down for you.
Here’s the thing: while symmetrical mantel decor has its own classic charm (see mine from last year), there’s absolutely no rule in the holiday handbook that says you can’t embrace the beauty of asymmetry.
Why be bound by the shackles of balance when you can let your creative spirit run wild?
Sure, the symmetrical route has its perks. It’s orderly, predictable, and screams timeless elegance.
But let’s be real – asymmetry brings a sense of playfulness and individuality to the party. It’s like letting your mantel dance to its own festive beat, and who doesn’t love a good dance party during the holidays?
Think about it this way: symmetrical is like a perfectly wrapped present with crisp corners and a bow sitting dead center.
It’s nice, it’s neat, but sometimes you just want to tear into that gift with reckless abandon, right? That’s the kind of joy an asymmetrical mantel can bring – a little bit of unpredictability and a whole lot of fun and whimsy.
In the grand scheme of holiday decor, your mantel is a showcase, a statement piece.
In the end, it’s all about what makes you smile when you walk into the room. Whether you lean towards the crisp lines of symmetry or the free-spirited vibe of asymmetry, there’s no wrong answer. So, my friend, should mantel decor be symmetrical? That’s entirely up to you and your holiday-loving heart.
Gather Your Supplies for your Asymmetrical Christmas Mantel
Before you dive into crafting your asymmetrical mantel garland, it’s essential to gather all the necessary supplies. You’ll need:
- Garland: opt for a pre-made garland base or create your own using fresh or faux greenery.
- Ornaments: Choose a variety of ornaments, both in terms of size and style, to add visual interest. My new favorite is this ornament garland!
- Lights: Twinkle lights or LED fairy string lights can make your garland shine.
- Garland ties or floral wire, nails, command hooks: These will help secure your elements to the garland. (Floral wire, garland ties, command hooks.)
- Scissors: For trimming and shaping as needed.
- Decor: Art, trees, stockings, candle, etc.

The Best Christmas Garlands for Mantels and Banisters
Ok so if you hang around my blog and social media long enough you know that I rave about the real touch Norfolk pine garland. It sells out every year wherever it is sold. I just found the 15ft length on sale at Kirklands though. (They usually have the best price each year!)
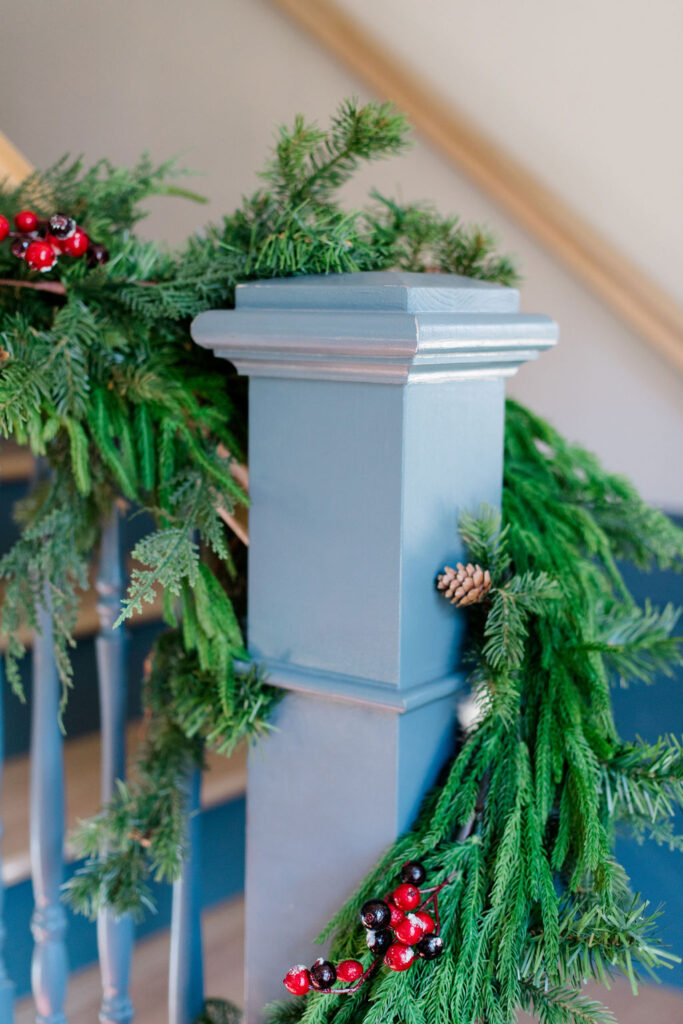
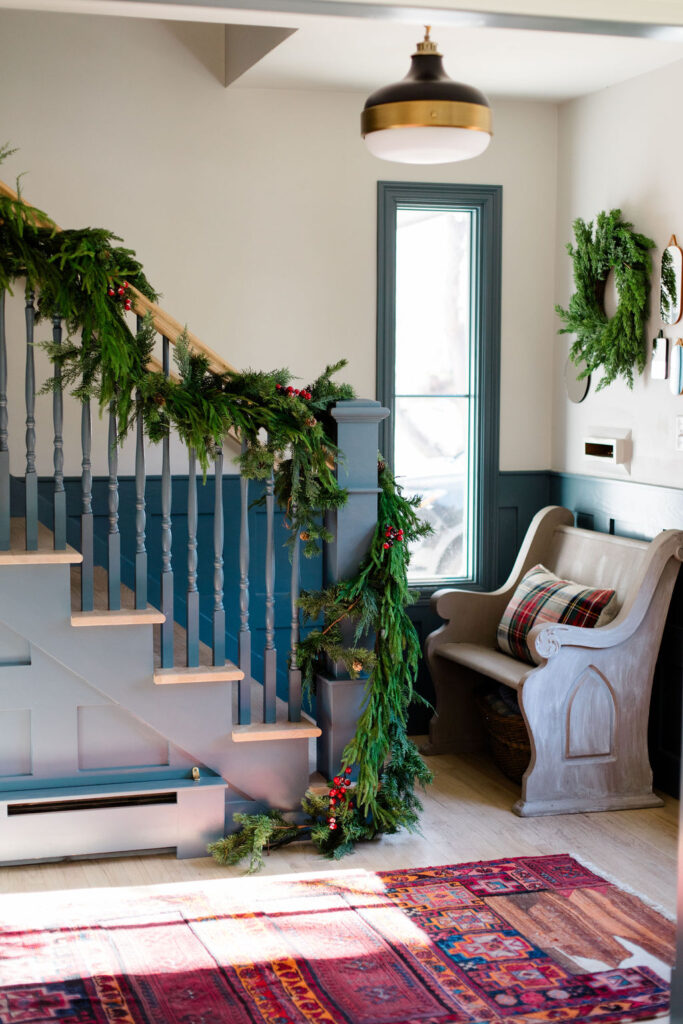
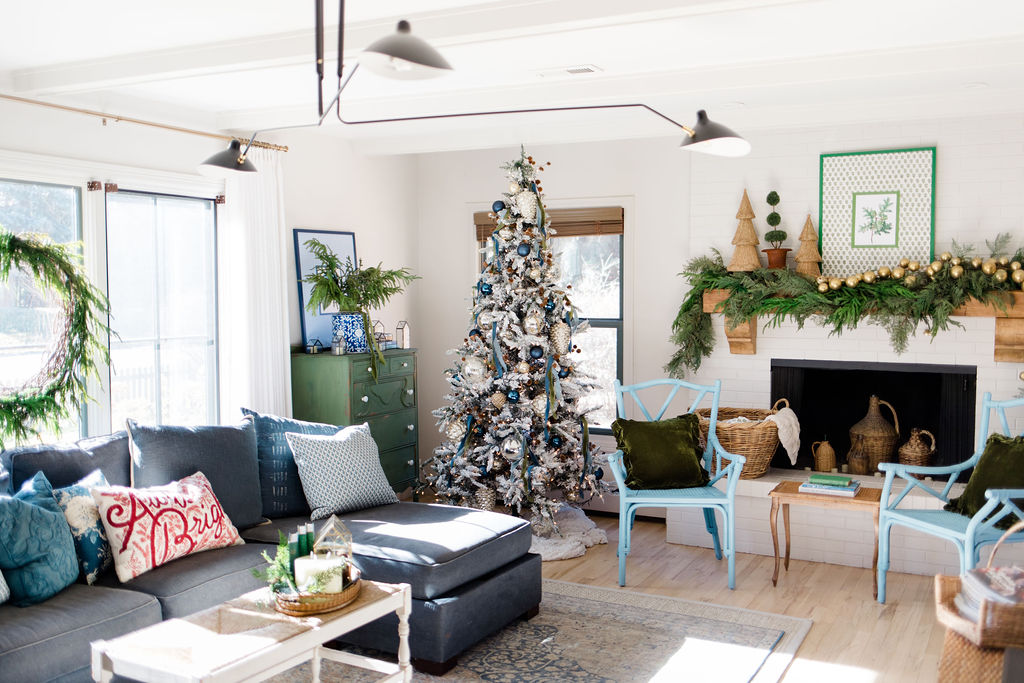
I have 6 of the 5ft garlands and use them all over our house. I used them on our mantel this year along with our banister seen below.
But my secret is that I layer it with very inexpensive garland from Walmart usually. It can be your old garland you have had for years or new cheap garland you find at the Dollar store. The layer underneath the real touch Norfolk pine garland just help give it a fuller look that I love!
Places I have found that sell this fabulous garland!
- Amazon–my last resort because these can be hit or miss.
- Afloral– (sold out currently) But they did add a pre-lit version this year!
- Kirklands– the best place to get it because it it often on sale!
- ETSY– can be pricey but I can always find it here! Search for it because multiple sellers have it!
How Do You Hang Asymmetrical Garland On a Mantel? 10 Easy Steps
Step 1: Choose a Focal Point
Decide where you want your focal point to be on the mantel. It could be right in the center, off to one side, or even draped diagonally. Your choice will determine the overall asymmetrical look of the garland.
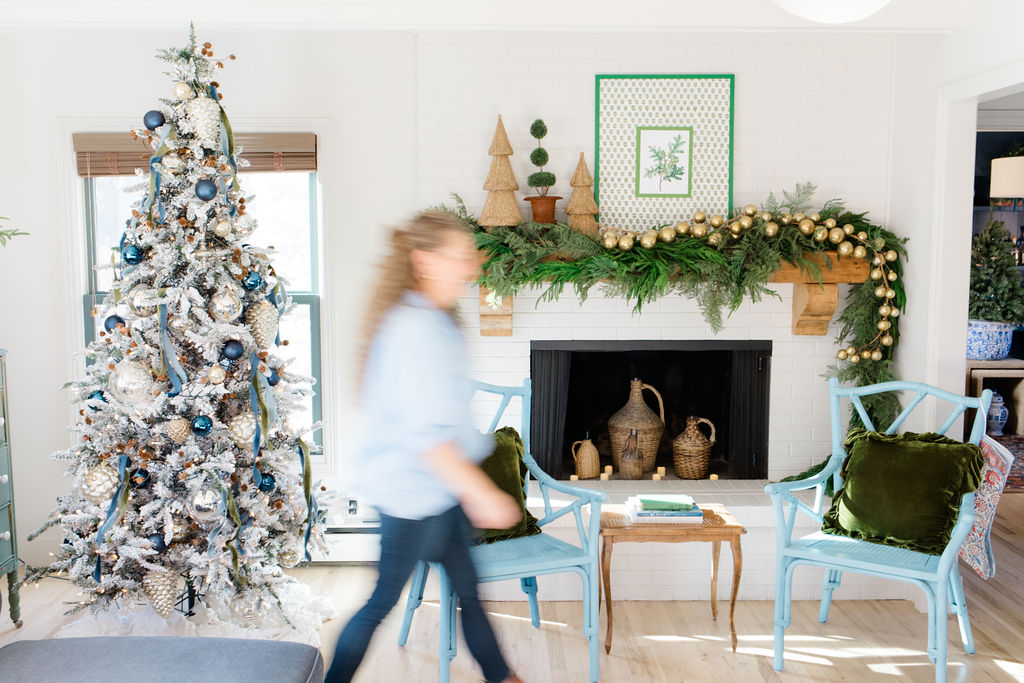
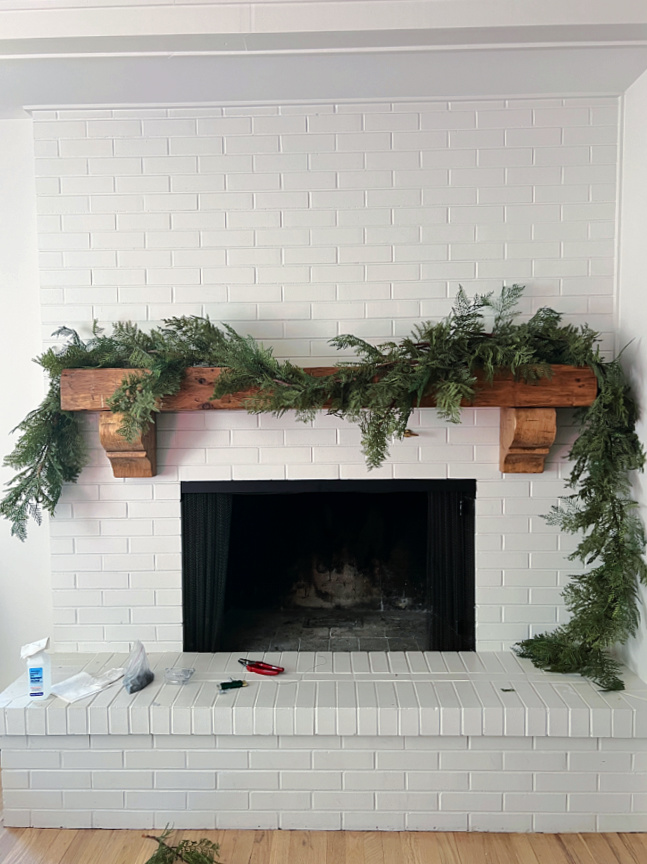
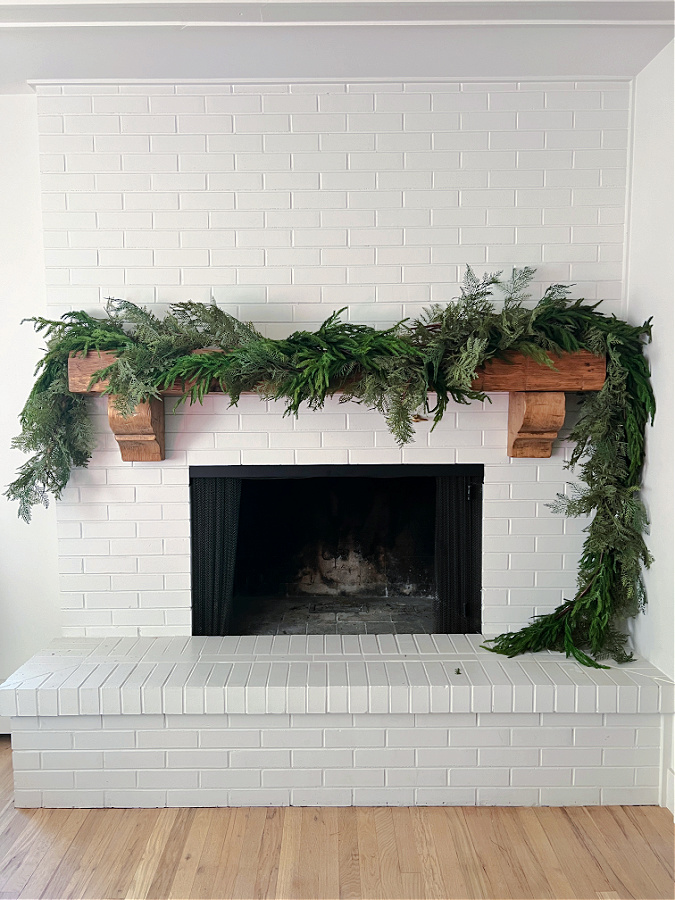
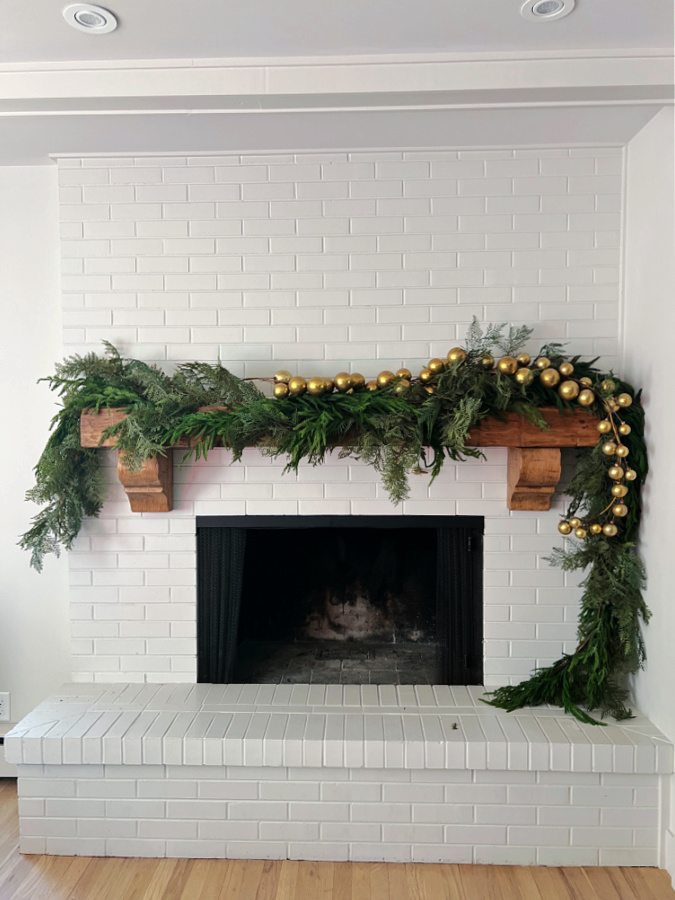
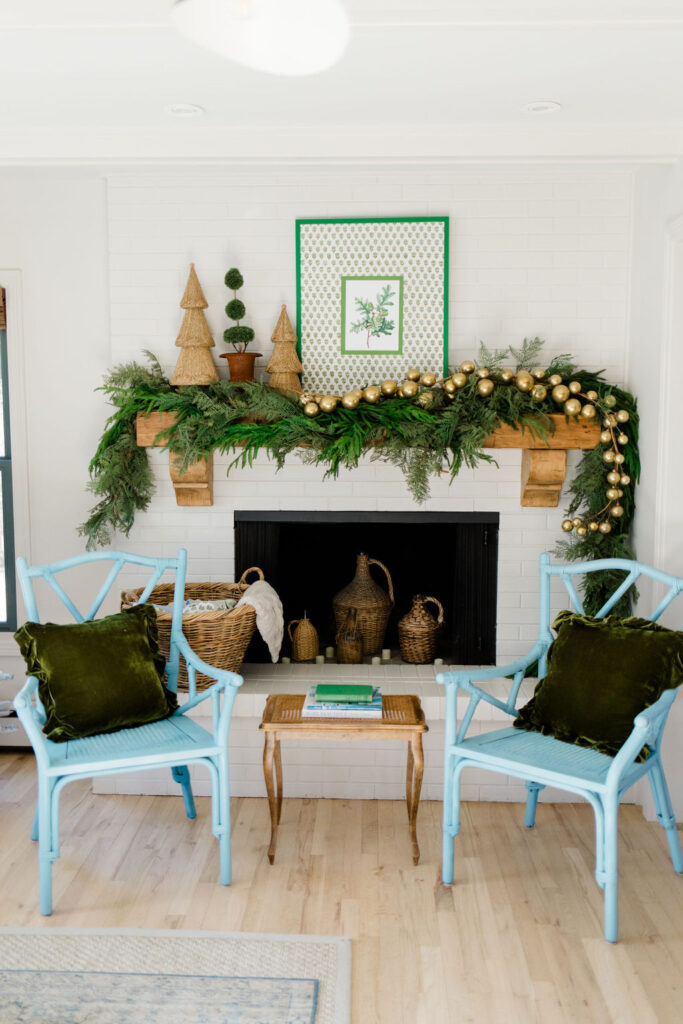
For our mantel this year I decided that I wanted my garland to flow down on the right side of our mantel. I also wanted a small swoop in the middles front.
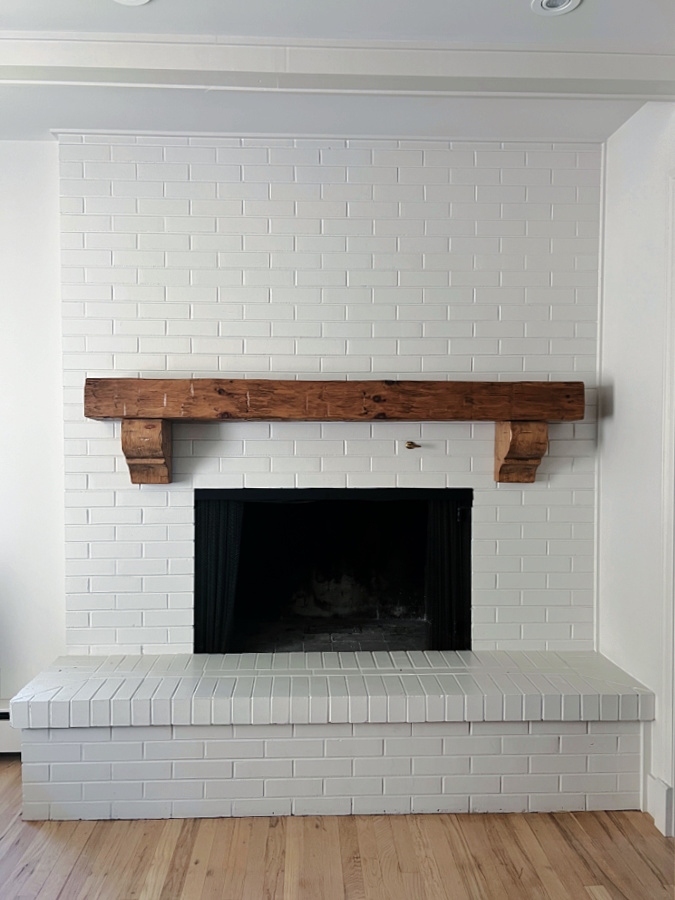
Step 2: Hang the Base Garland
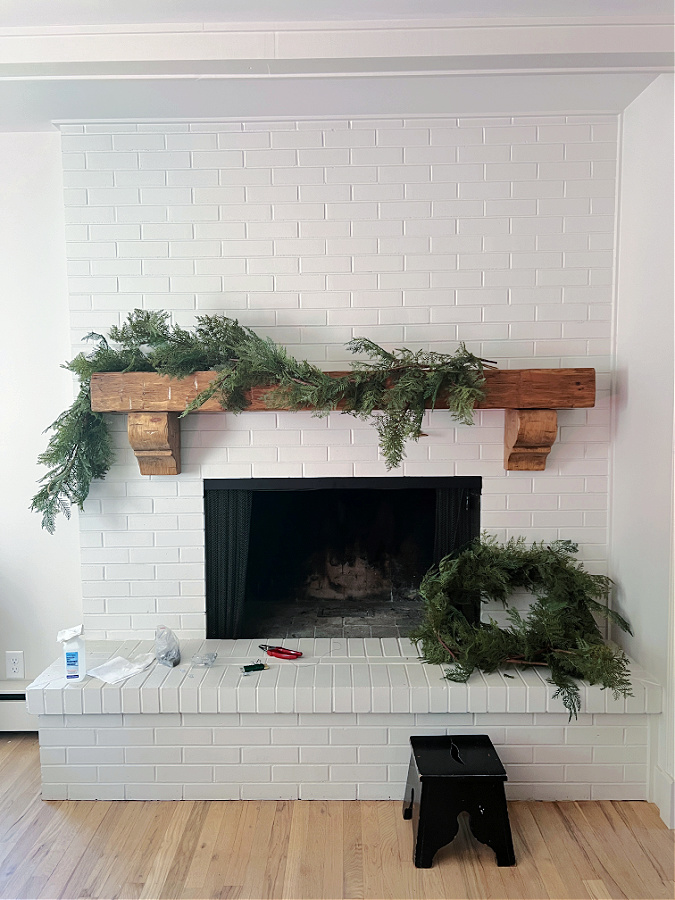
First, start by laying your garland out on the mantel. I always do a dry run before securing it. This year my mantel required two base garlands.
The one you see in the picture is a garland I have had for years.
I always step back and look at it from a distance and adjust as necessary before securing them.
Step 3: How to Secure Garland on a Mantel
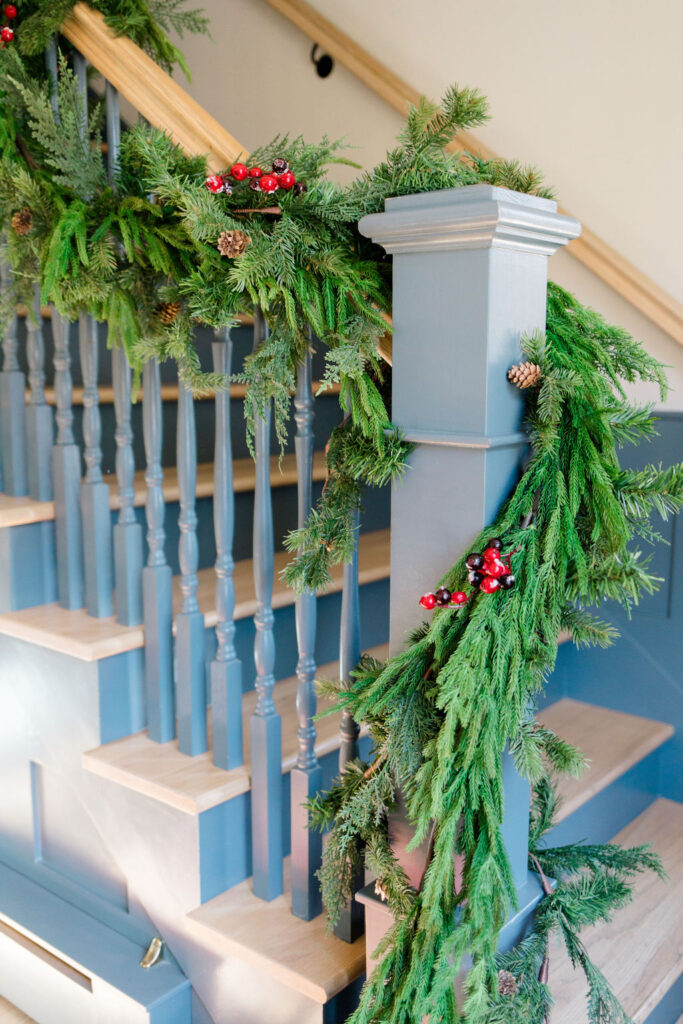
To make sure everything stays in place, use nails or command hooks along with floral wire to secure your garland.
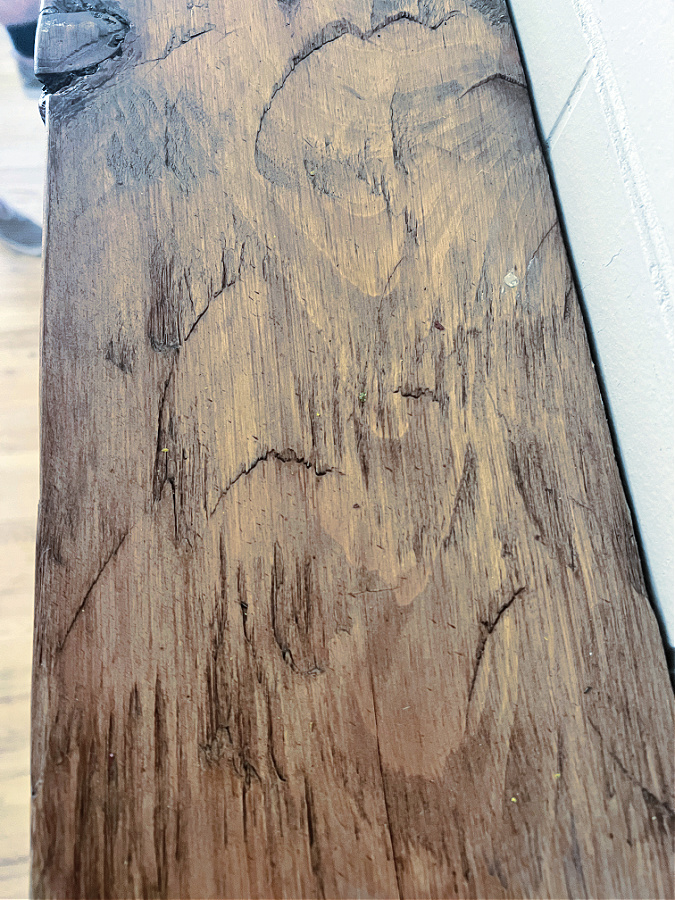
I used both nails and command hooks since my mantel is very grooved as you can see in the picture below. A lot of people worry about using nails but most mantels are high up and you rarely look at the top of them. Plus, I use small nails and love the fact that they are very secure.
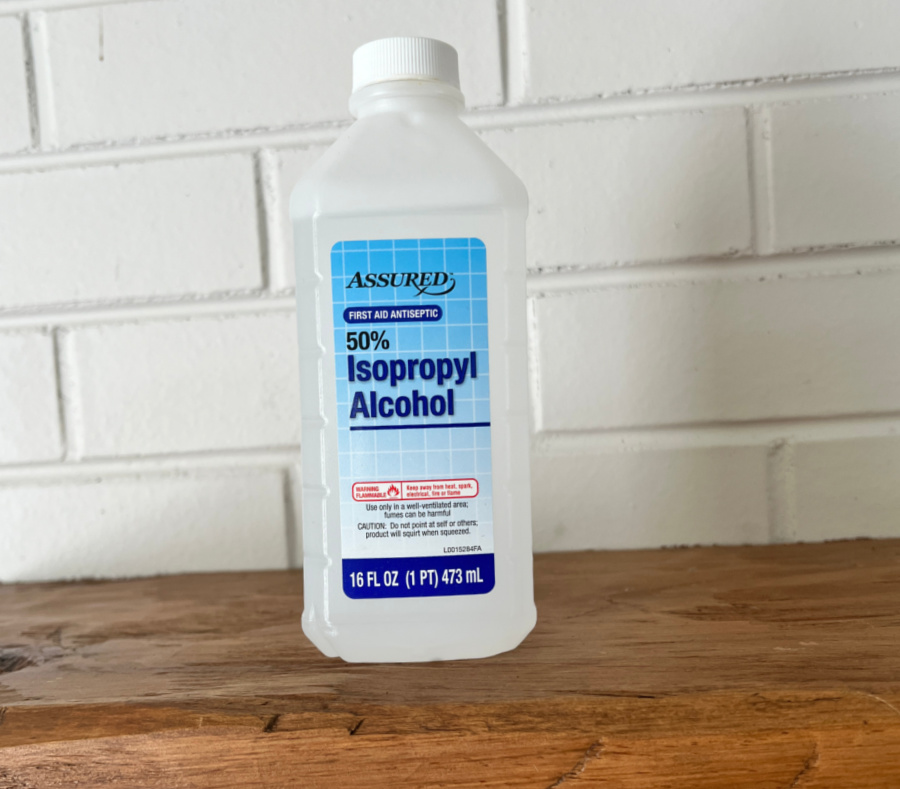
I have had some trouble in the past with command hooks popping off of my mantel. This is usually from the weight of the garland, so my mom suggested I cleaned the mantel with alcohol where I was securing the hooks. So far they have stayed on!
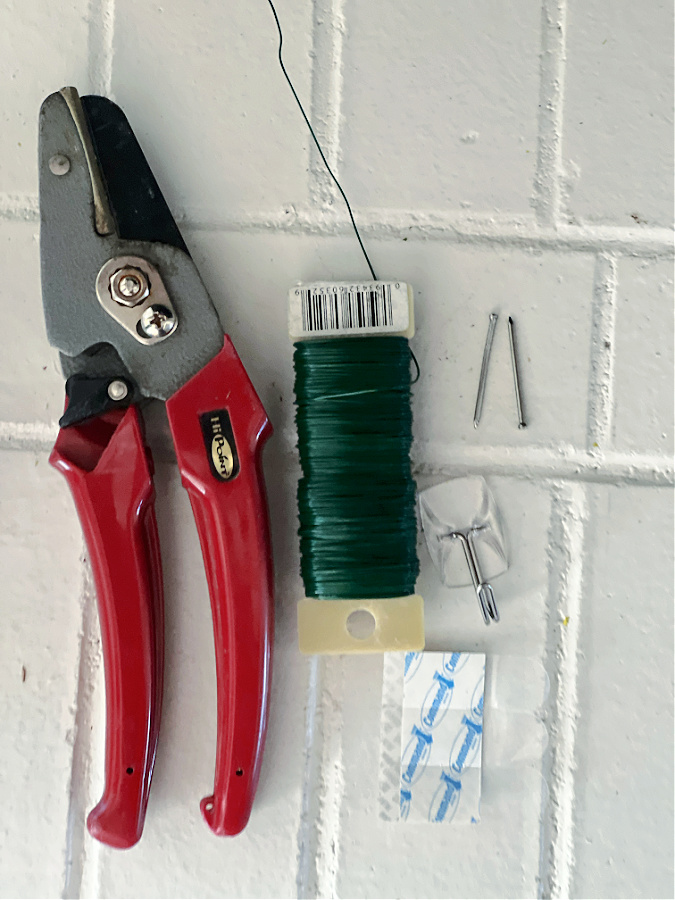
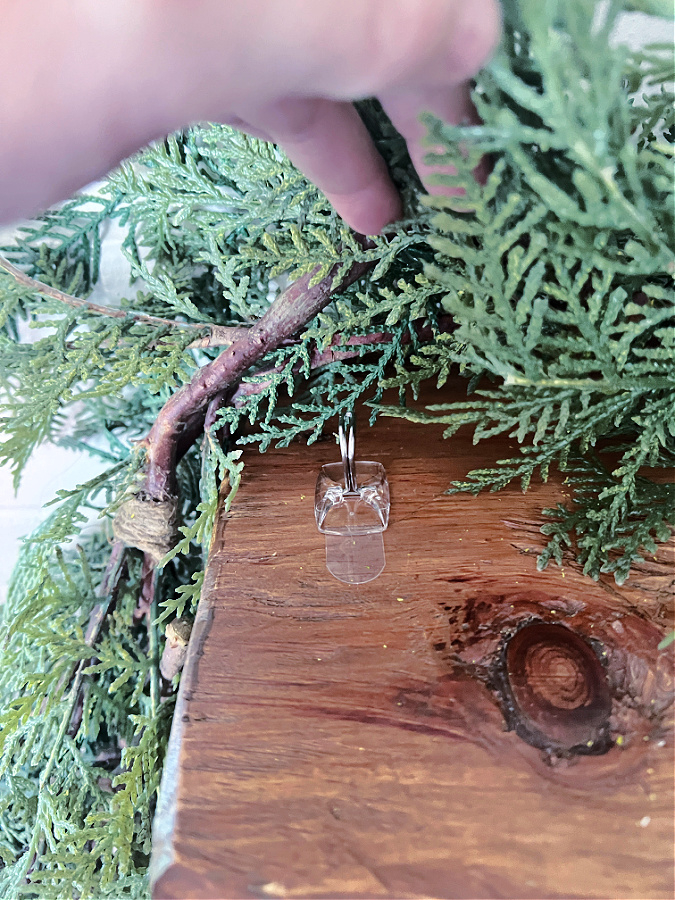
I suggest adding hooks on the ends and the middle. You can add nails where you garland feel the heaviest too. Green floral wire is best for its flexibility and color for blending in to your garland. It holds the garland perfectly on to the hooks or nails if you wrap it tightly!
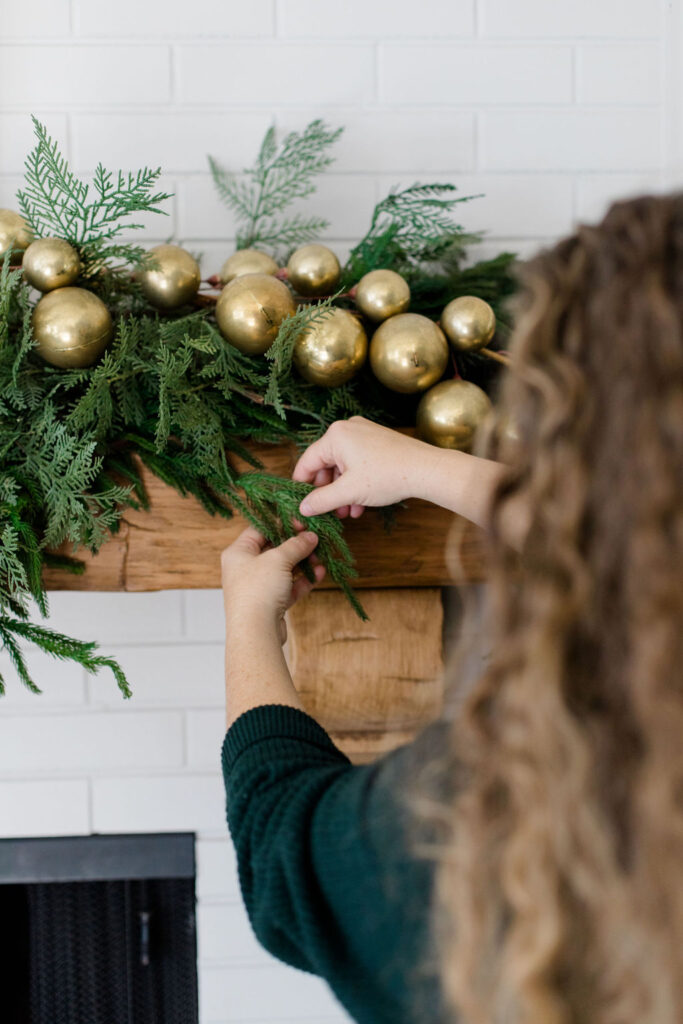
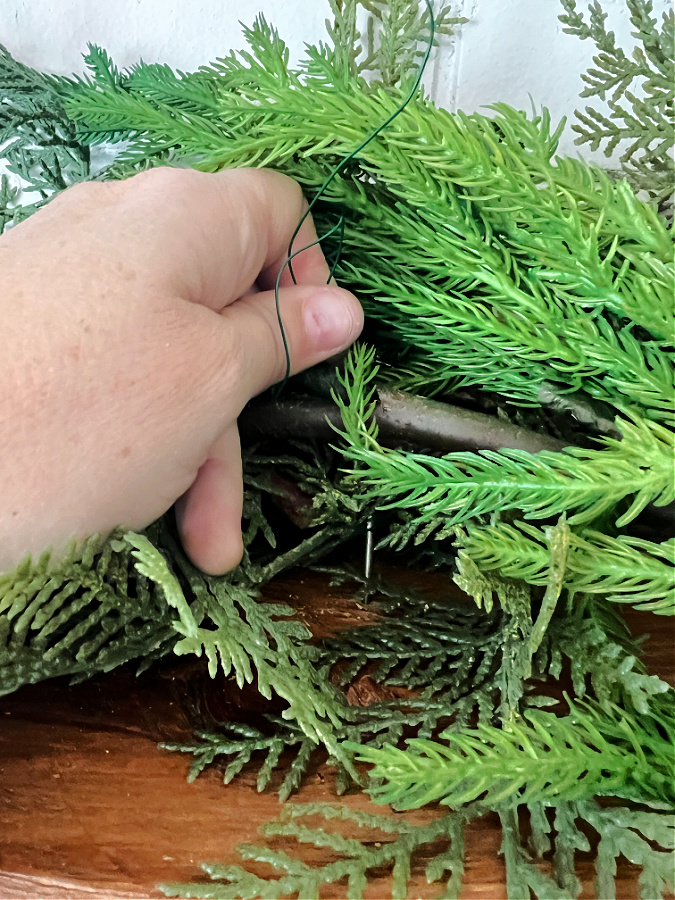
Step 4: Layer Your Next Garland
Now comes the fun part – this is where you will layer on your second more realistic looking garland! I like to weave in to the first garland and move around the branches to make it blend in. This is a good time to make sure you like the overall look as well.
Once your next pieces of garland are layered on and cover the original garland you can once again secure it to your nails and hooks with more floral wire.
Step 5: Build on Your Design
Now you can decide if you want to layer on ornaments, wood beads garlands or other embellishments. I love to choose items that will contrast against the green of the garland and have a different texture.
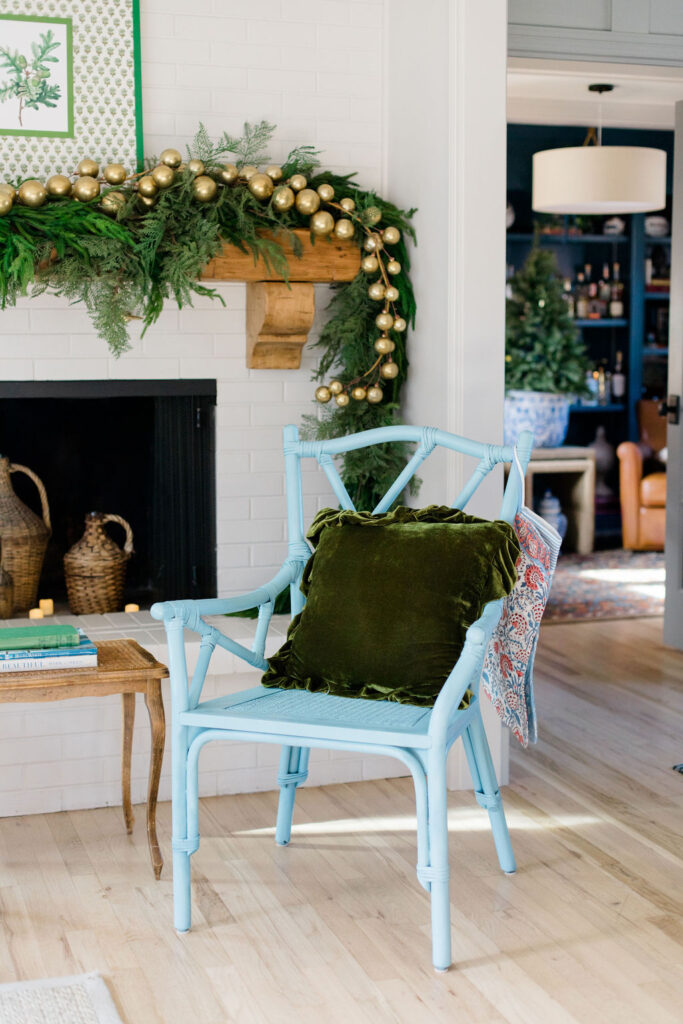
I chose to simply layer a gold ornament ball garland on the far right of the mantel to really accentuate that asymmetrical look. Plus I loved how it contrasted against the green.
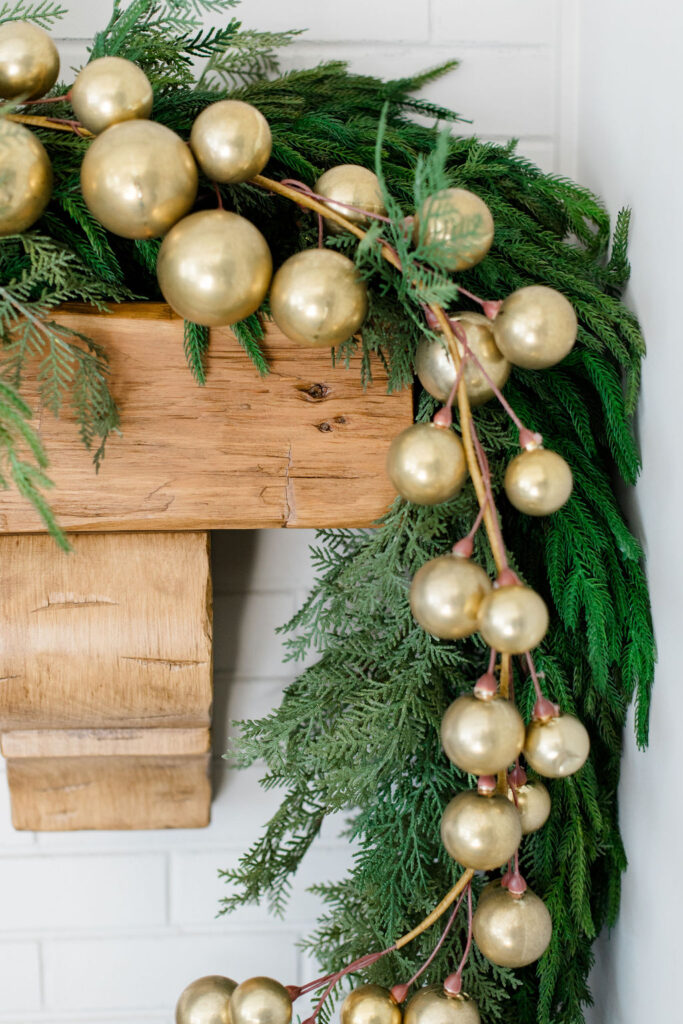
Don’t be afraid to let some elements drape down or extend beyond the edges for that wonderfully asymmetrical look.
Step 6: Incorporate Ribbon, Bells or Stockings
This year I kept things simple but in years past I have used ribbons, bells and stockings. This is personal and depends on your look , style and theme you are going for.
Use your ribbon to create bows or loops, and then attach them at different points along the garland. The ribbon adds a lovely textural element to your design. Then echo them with bells. If you add stocking they would look great on the opposite side of your asymmetrical garland for a balanced look.
Step 7: Add Lights
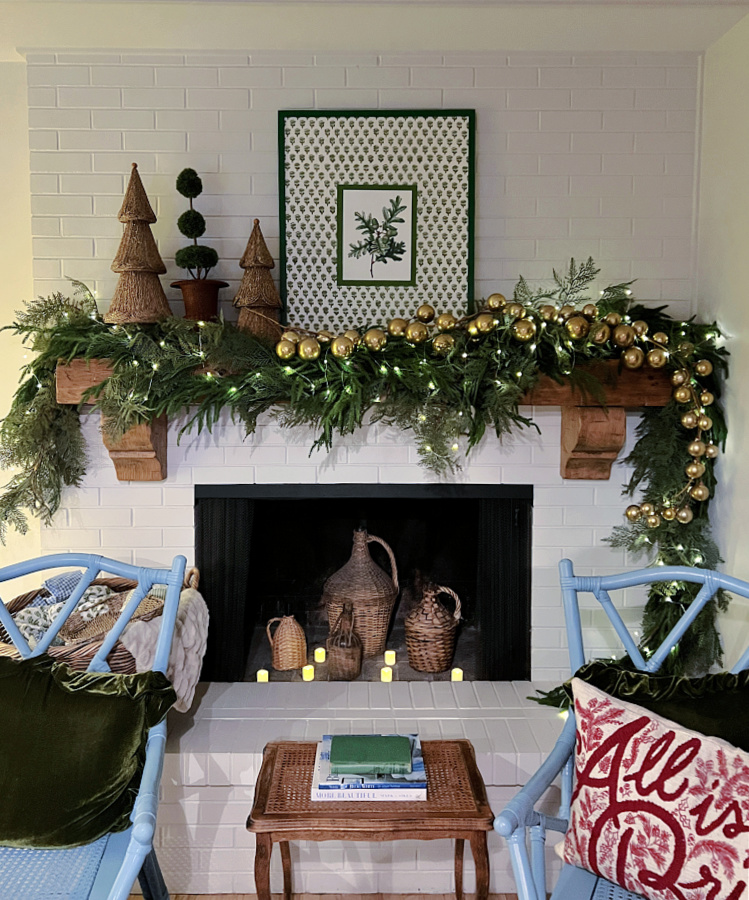
To create a warm and inviting ambiance, weave your string lights or twinkle lights throughout the garland. The soft glow will add a touch of magic to your mantel. I use fairy lights so I can use a remote and not have to worry about hiding a cord.
This might be my favorite part! Lighting enhances everything, especially at Christmas!
Step 8: Step Back and Adjust
Take a step back to assess your design and make any necessary adjustments. Tweak the placement of your asymmetrical Christmas mantel garland, ornaments or lights until you’re satisfied with the overall look.
Step 9: Personalize Your Mantel
Finally, add your personal touch to the mantel by incorporating other decor items like framed photos, stockings, or candles. Make it uniquely yours!
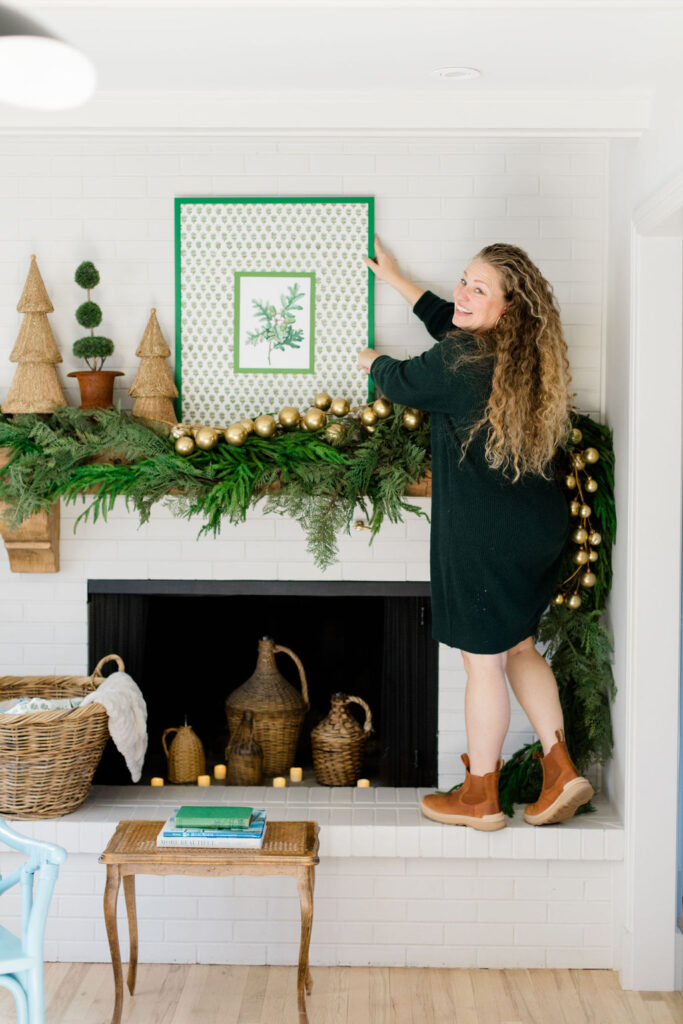
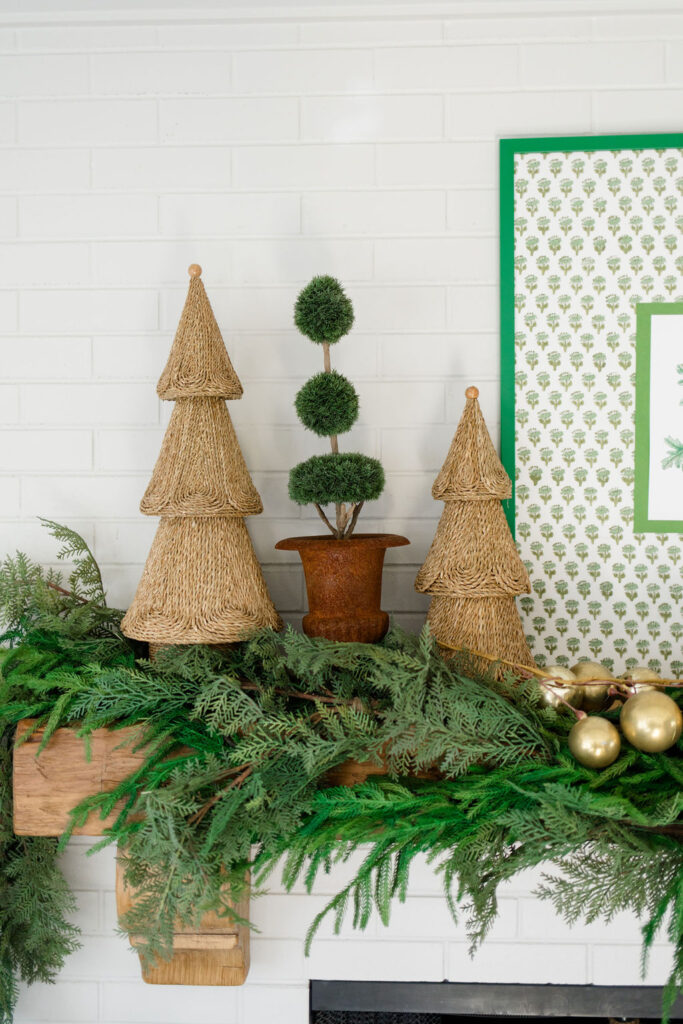
I had fun adding some DIY art I made out of a tablecloth and downloadable print from Etsy. It needed some height so I found these awesome woven trees at Home Goods and mixed in a topiary with them that I already had. I simply placed it in an old rusty earn that I thrifted. I love how it balanced out the swoop in the garland and added height to the mantel on the left.
Step 10: Enjoy and Share the Joy!
Now that you’ve completed your asymmetrical mantel garland, it’s time to bask in the holiday spirit and share your masterpiece with friends and family. Be sure to take plenty of photos to capture the festive atmosphere.
Frequently Asked Questions About Christmas Mantel Garland
- What type of garland works best for a Christmas mantel?
- Opt for pre-made artificial garlands for convenience.
- Fresh greenery adds a natural touch but requires more maintenance.
- How do I determine the right length for my mantel garland?
- Measure the length of your mantel and add a bit for a draped effect.
- Consider the style – a dramatic cascade may need more length.
- Should I choose a theme for my mantel garland?
- A themed garland can create a cohesive look.
- Mix and match ornaments for a more eclectic feel.
- How do I secure the garland to the mantel?
- Command hooks or removable clips are great for preventing damage. But small nails truly do the job!
- Floral wire or garland ties work well for heavier or fresh garlands.
- Any tips for adding lights to the mantel garland?
- Weave lights throughout for an enchanting glow.
- Battery operated fairy lights elimnate the need for a cord.
- LED lights are safer and more energy-efficient than traditional bulbs.
- Can I mix and match different garlands for a unique look?
- Absolutely! Combining different textures and styles adds depth.
- Ensure a cohesive color palette for a polished appearance.
- What’s the secret to achieving an asymmetrical design?
- Start with a focal point and build around it.
- Let elements drape and extend for a whimsical, asymmetrical vibe.
- How do I prevent the garland from looking too cluttered?
- Space out ornaments, lights, and ribbon evenly.
- Step back periodically to assess and make adjustments.
- Any ideas for personalizing my mantel with the garland?
- Integrate personal items like family photos or sentimental ornaments.
- Coordinate the garland with your existing decor style.
- Can I repurpose my mantel garland for other occasions?
- Absolutely! Swap out Christmas-specific elements for versatility.
- Consider adding seasonal touches for various holidays or events.
- How do I store my mantel garland for the next year?
- Use a storage container to prevent damage.
- Consider disassembling and storing components separately for easier handling.
Shop The Post
Step-by-Step Guide to Asymmetrical Christmas Mantel Garland Layering
Creating an asymmetrical Christmas mantel garland is not only a fantastic way to express your creativity but also a wonderful tradition that can bring joy year after year. So, this holiday season, let your imagination run wild, embrace the delightful chaos of asymmetry, and make your mantel the talk of the town. Happy decorating!
And now if you are in need of some more mantel inspiration you can visit 9 more of my blogging friends sharing their take on mantel styling! Just scroll down and click on the links to visit each post. And a huge thank you to Jennifer from tatertots and jello for hosting us all!
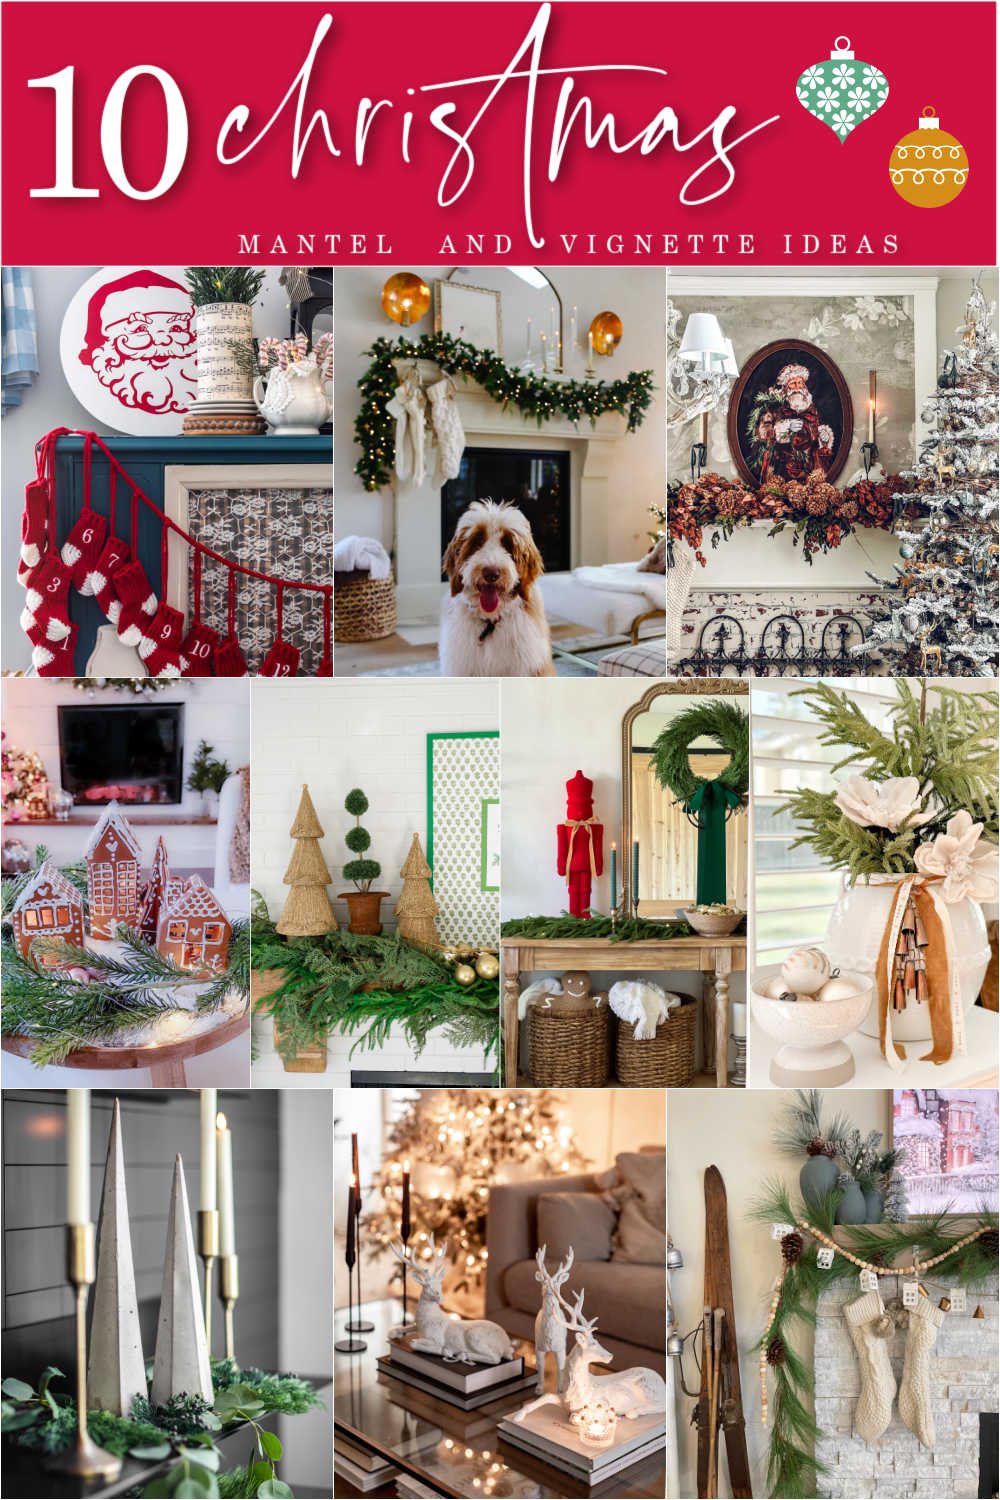
DIY Beautify: Ideas for Styling Christmas Vignettes | Modern Glam: Organic Modern Christmas Mantel | LeCultivateur: A Natural Christmas Mantel | Tatertots and Jello: Christmas Painted Gingerbread House Vignette | The Tattered Pew: Guide to Asymmetrical Christmas Mantel Garland Layering | Lolly Jane: Thrifted Christmas Entryway Decor | Pasha is Home: How to Use Christmas Ornaments as Decor | My Sweet Savannah: DIY Modern Concrete Christmas Trees | Craftberry Bush: Coffee Table Christmas Vignette | The Happy Housie: Cozy Layered Christmas Mantel and Living Room
I’d love to have you hang out with me some more! Feel free to follow along with me on any of the platforms linked below.
LTK | Facebook | Instagram | Pinterest | Amazon

Great tips for this popular look! xoxo
Bloody good idea, I so liked this post
Even though I struggle with needing things symmetrical for my sanity, I love asymmetry. Your mantel is beautiful and love the warmth it gives to your entire room. And how have I never noticed your giant light fixture? It’s amazing! And your outfit with those adorable boots – you look so cute!!! Merry Christmas
Kelly – your mantel is so pretty! I love the asymmetrical look and the gold elements! So cute! Pinned! Thanks for joining us!
xoxo
Love the look of your asymmetrical mantel Kelly! The finished look is so festive and fun!
Okay the gold ornaments are perfect for that garland, love the combo!
So pretty, Kelly! I love the layers, and the asymmetrical styling looks perfect on your fireplace mantel. Merry Christmas!