

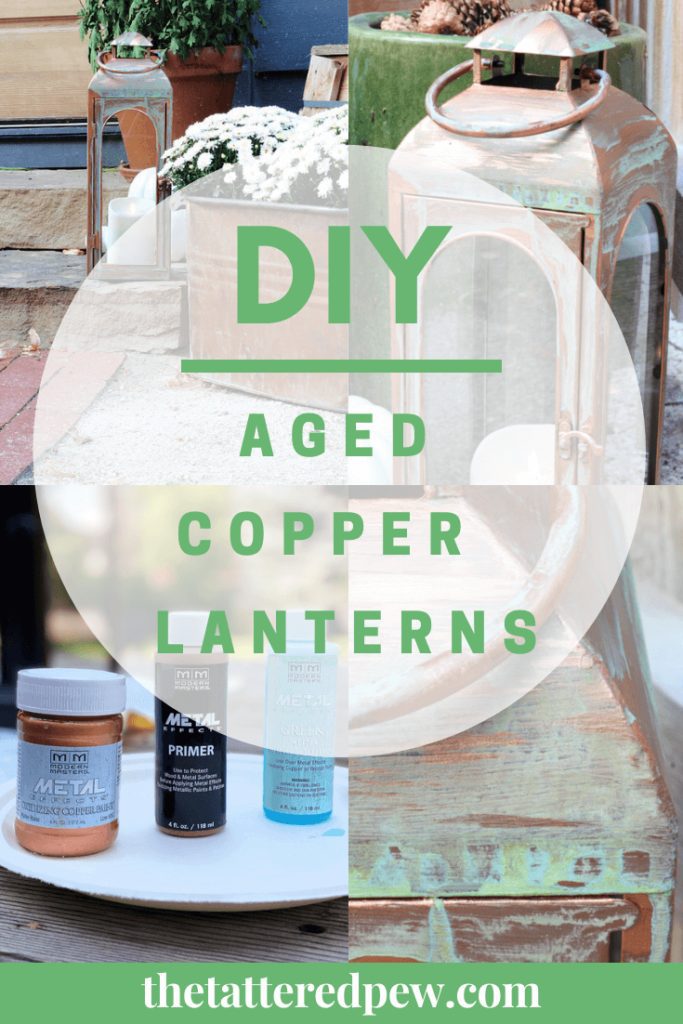
How To Quickly Get The Look Of Aged Copper
Learn how to quickly get the look of aged copper with this easy and affordable technique.
Is it just me or is there something extremely intriguing about vintage copper? I especially love the pieces that have that beautiful green and blue patina on them!
Well once I discovered that our new house had a copper mail slot, doorbell and outdoor light I knew I wanted to incorporate some copper lanterns into our outdoor Fall decor.
So I began searching for copper lanterns. I found some beautiful ones but they were all very pricey!
Aren’t these copper lanterns from frontgate.com just beautiful? They just aren’t in my budget!
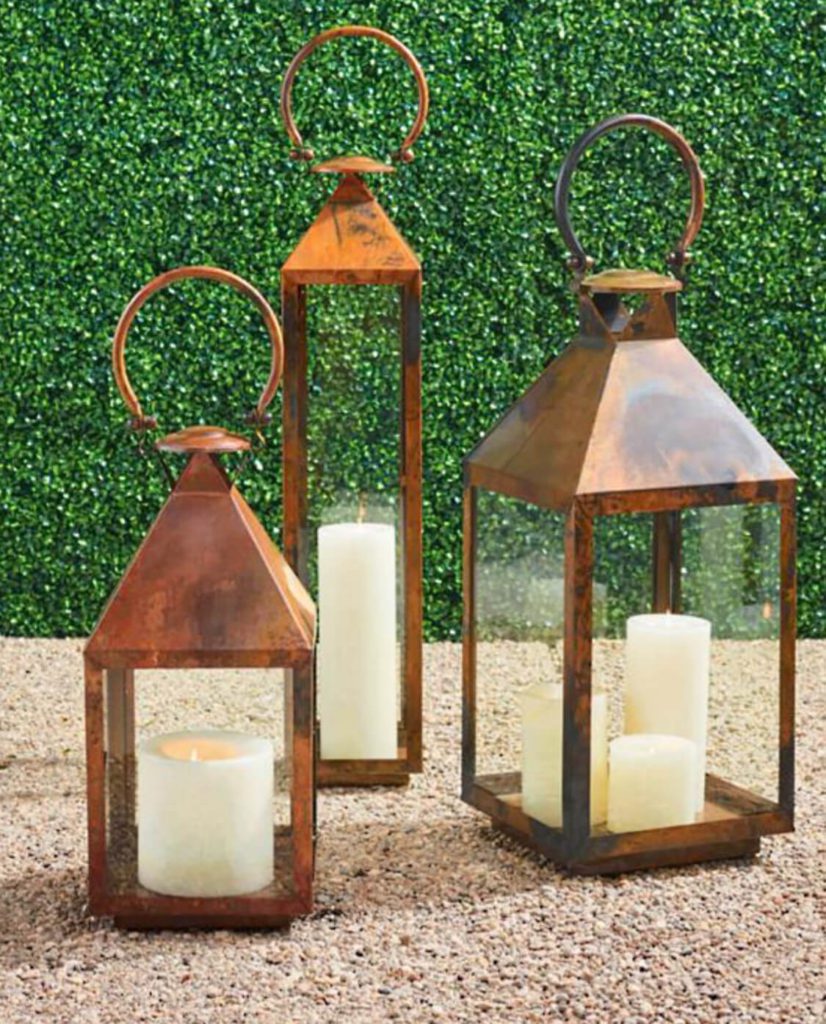
I knew that I didn’t want to pay a crazy high price tag so I decided that a thrifty DIY was the way to go!
Today I am so excited to share with you how to quickly get the look of aged copper on a budget for my September Thrifty Style Team project hosted by Julie of Redhead Can Decorate. You will be in awe with how quick, cost effective and beautiful DIY aged copper with patina can be!
How To Quickly Get The Look Of Aged Copper
First, you may be asking what copper “patina” even is? Patina is the greenish or bluish color that develops on copper and some other metals when it is exposed to natural elements over a long period of time. Oxygen starts a reaction with the chemicals in the copper and this is called oxidation. This chemical reaction results in patina!
How Do You Make Copper Patina?
After finding those gorgeous lanterns and envisioning them on our fall front steps I just couldn’t get them out of my head!
Next I did a bit of research on Google and I was able to find a couple of different methods for how to make copper patina. Of course both of these options are budget friendly and quick. Can I get an AMEN?!
- First, I found out that you can soak copper in white vinegar and salt and this will give your copper a nice blue and green patina.
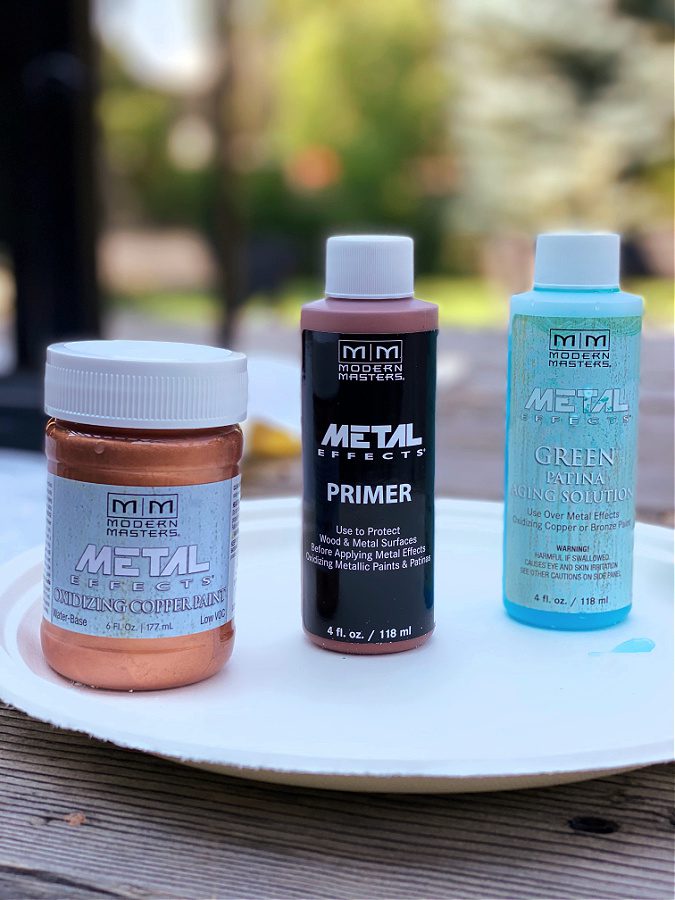
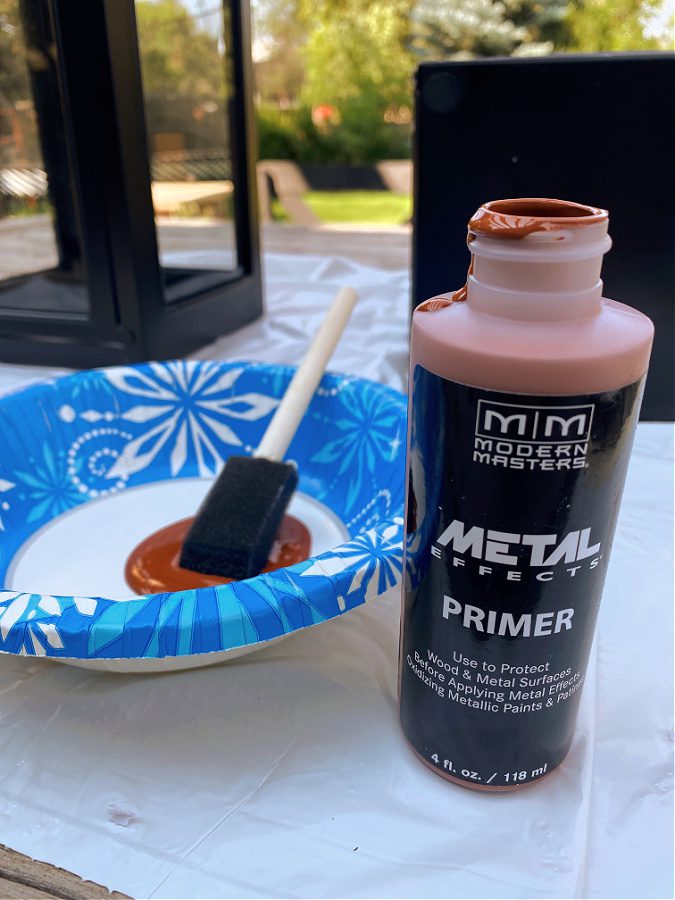
- Second, I discovered a faux painting technique (which was the route I chose). There is an actual copper paint , primer and patina kit from Modern Masters: Metal Effects that turns metal or wood objects into copper with a patina. I found mine on Amazon but I’m pretty sure JOANN sells it as well.
Decorative Lanterns to Give A Faux Copper Patina Look
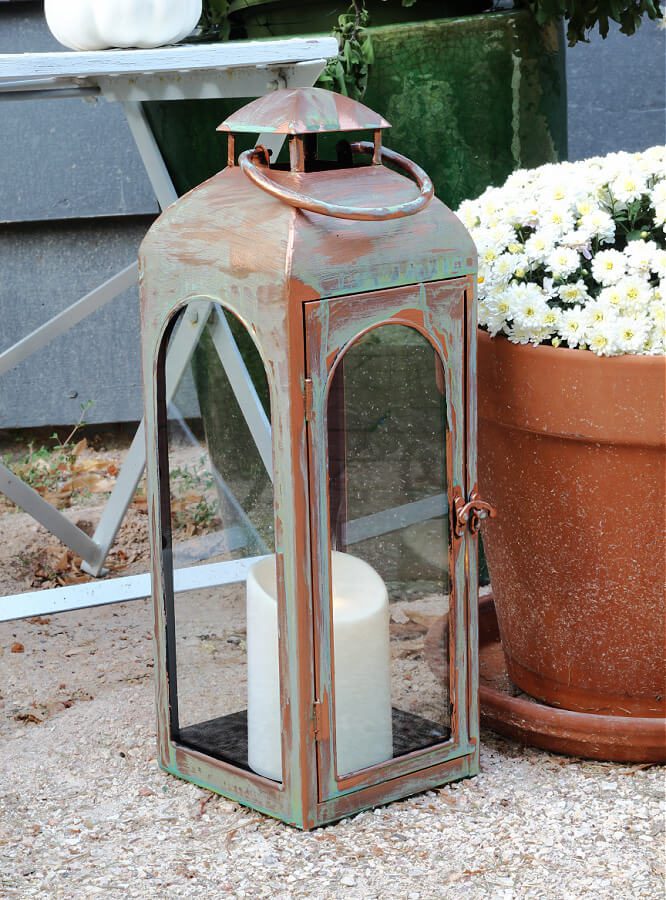
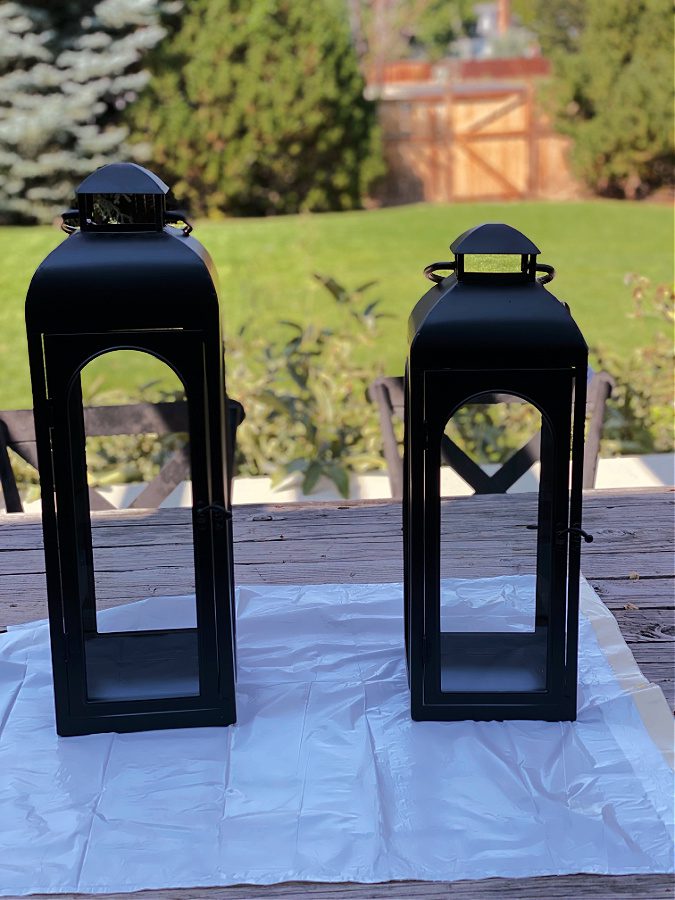
Once I discovered this incredible Metal Masters paint and patina kit all I needed was some lanterns to makeover. Of course my first thought was to look at Walmart because they always have the best look alike popular outdoor items in their Better Homes and Gardens collection.
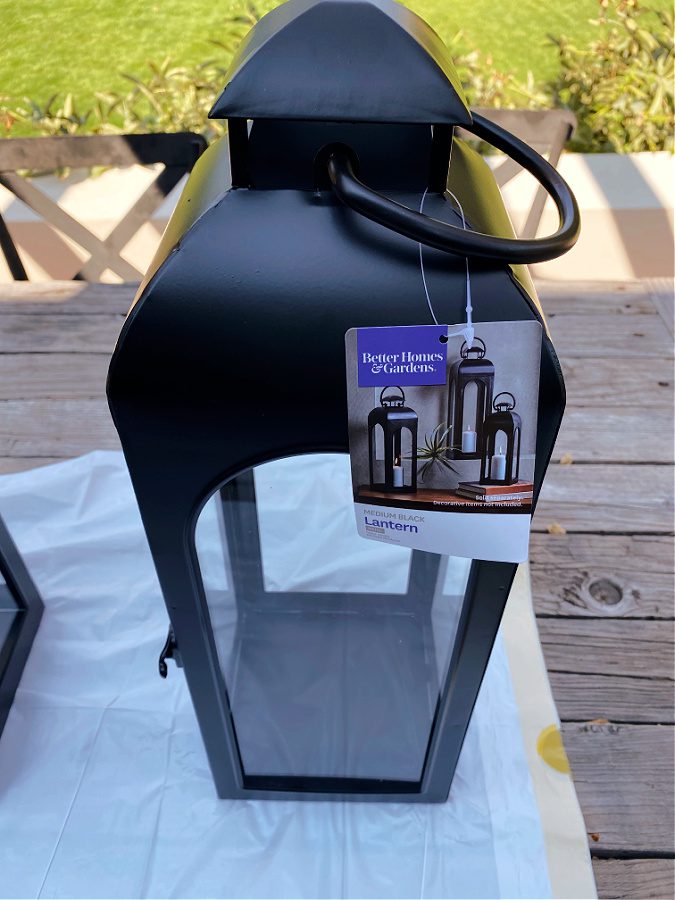
And once again Walmart came through for me with these gorgeous outdoor lanterns! I chose to paint their medium size lantern.
Let me Show You How to Create a Faux Copper Patina Look
Friends you are going to be hooked on this gorgeous and easy method for transforming any metal or woods objects into stunning patinaed copper beauties!
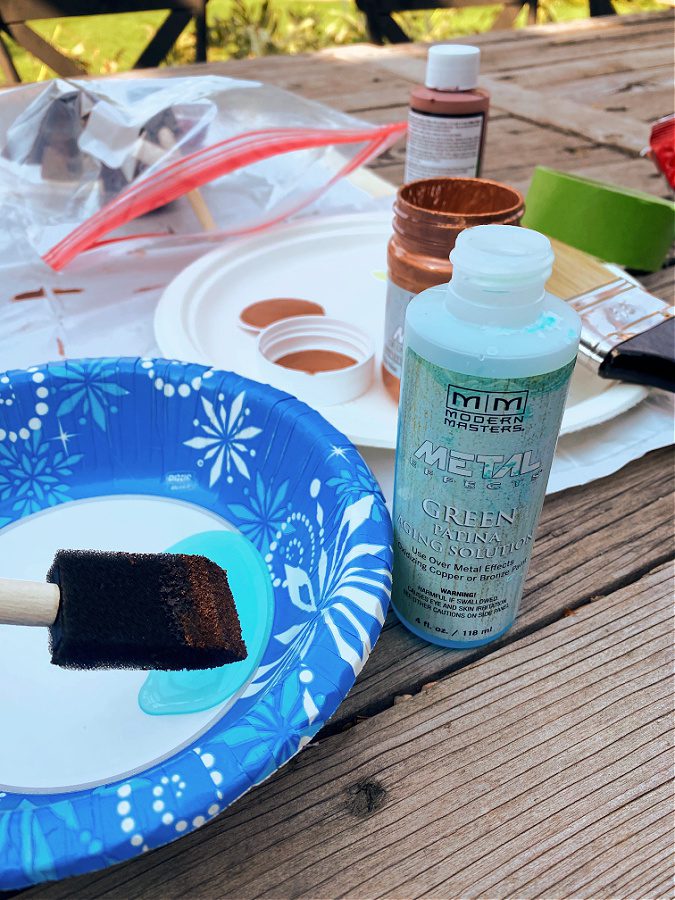
Supplies Needed DIY Copper Patina
- Metal Masters Patina Kit (for large projects) or individual sizes of Metal Effects oxidizing copper paint, primer, and green patina aging solution.
- paint brush and sponge brush or spray bottle (for patina aging solution)
- garbage bag or newspaper to protect your work surface
- decorative lanterns (I used these from Walmart)
- paper bowls for the paint and aging solution
- tape (optional)
Step 1
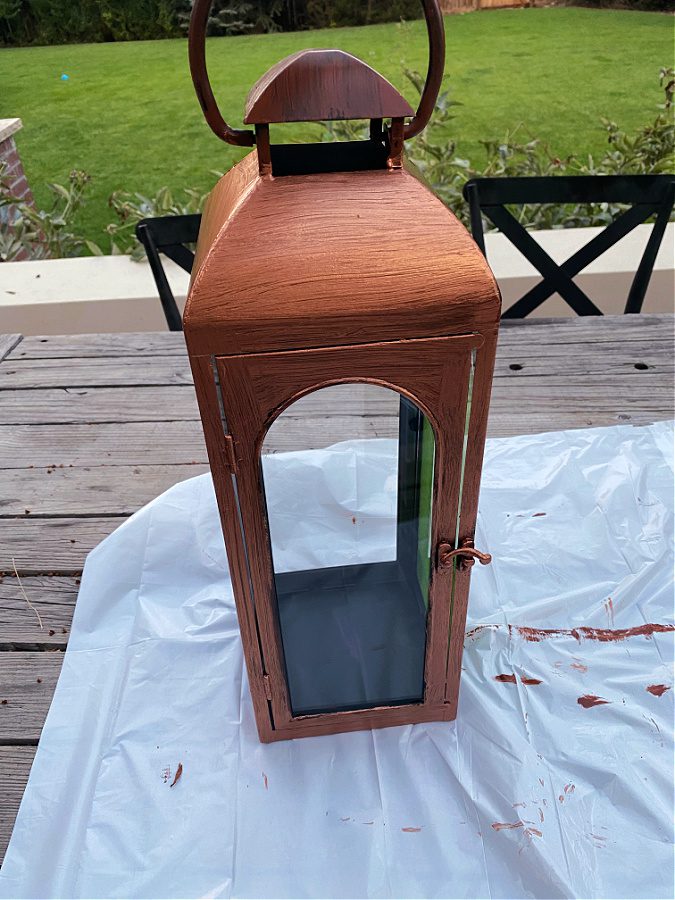
The first step in making your lanterns look like aged copper involves preparation. Make sure to have a large, clean work space. I used our outdoor table and laid a garbage bag down to protect the wood. At first I tried taping around the glass on the lanterns but this was tedious and I found it to not be necessary. This is of course my personal preference and probably the result of me being impatient! Finally, I wiped down the lanterns to make sure they were clean and ready to be painted.
Step 2
This second step is very important. This is where you apply not one but two coats of the Metal Effects copper primer to your surface. I read the back of the bottle and they suggest you let the primer dry and cure before applying the second coat. I personally wanted some of the black to show through for a more authentic look so I didn’t worry too much about the primer coating the entire lantern.
Step 3
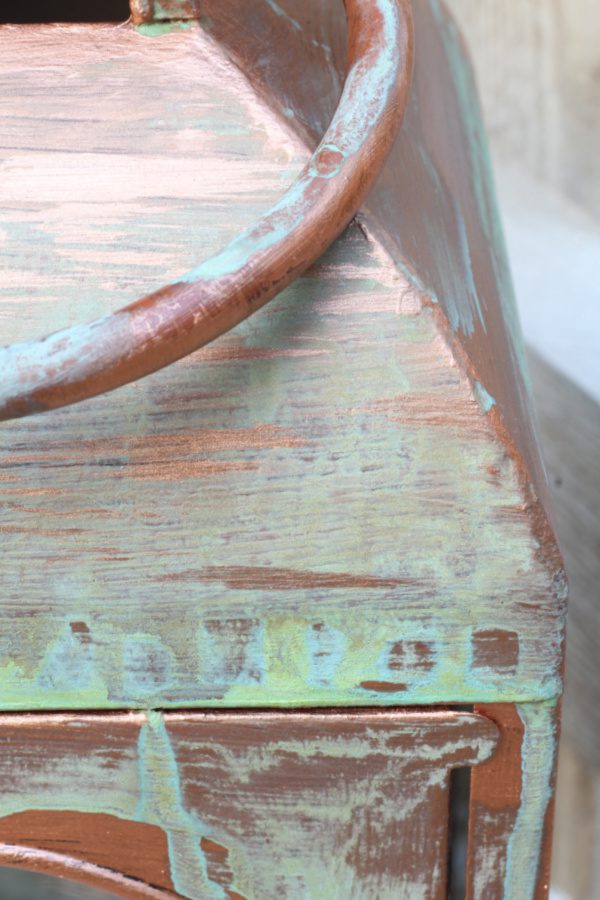
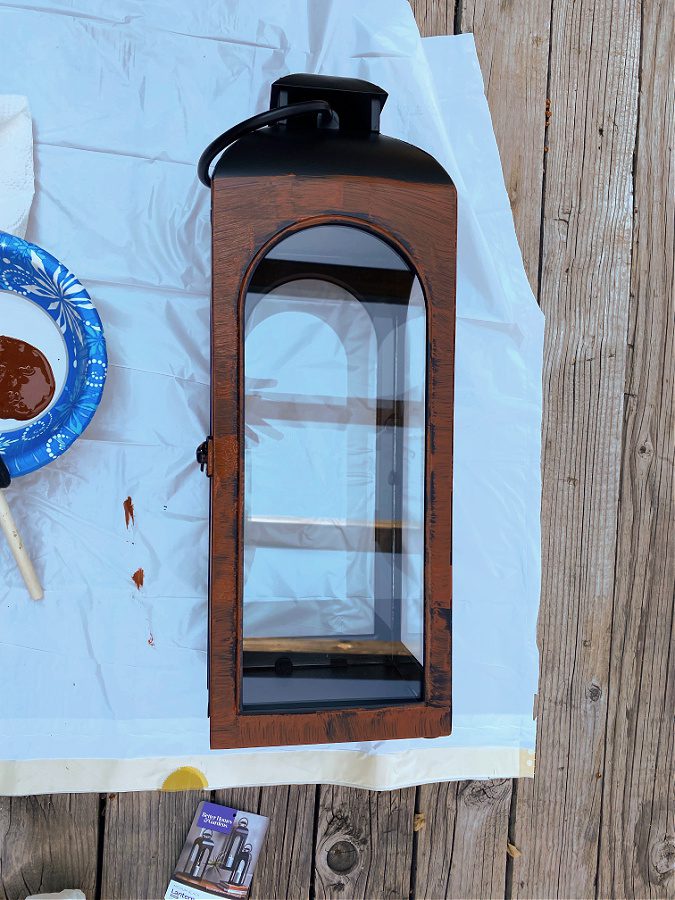
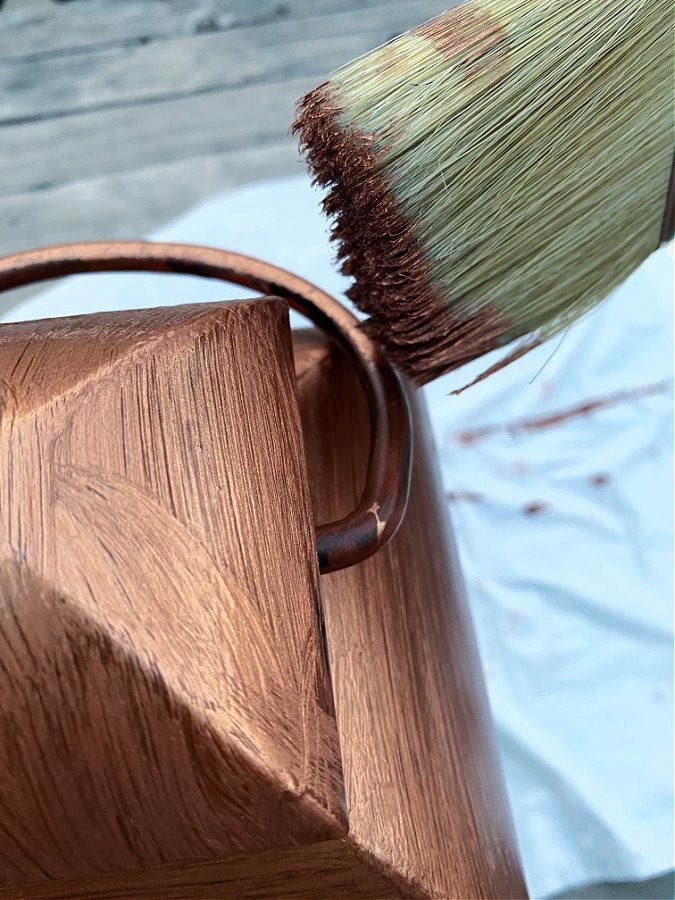
Once your primer is completely dry you will add your first coat of the Metal Effects copper oxidizing paint. This paint has real metal particles and leaves an oxidized metal finish. The first coat went on and looked a bit rough. I honestly wasn’t so sure this would all work but I kept up in hopes that it would.
Step 4
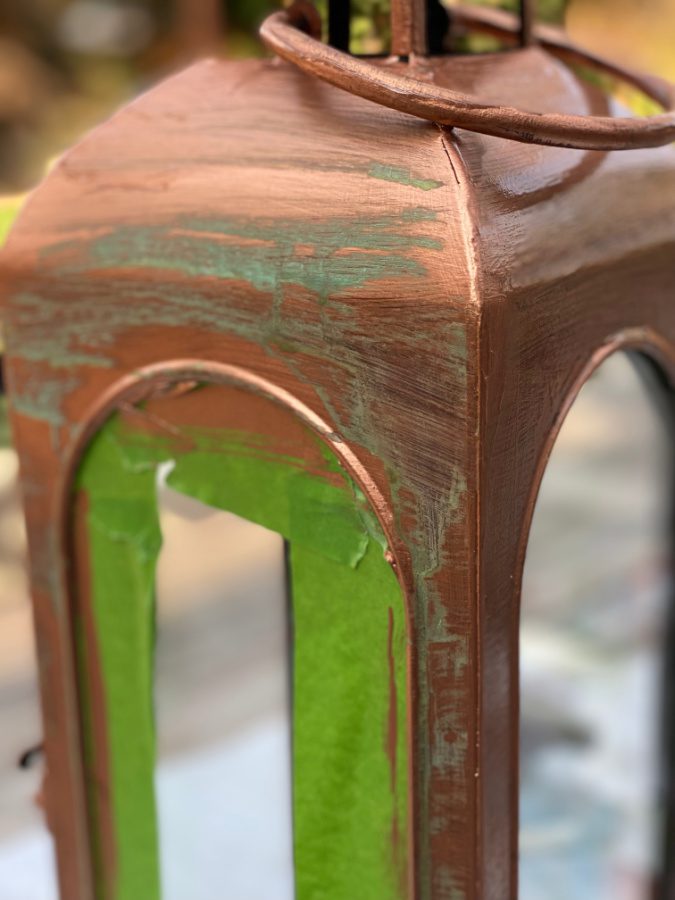
For the fourth step, as per directions on the bottle, you are to wait until the first coat of paint is dry and then apply your second coat of copper paint. While the second coat is still wet you add your green patina aging solution.
You can sponge it on like I did or spray it on with a spray bottle. Either method seems to work just fine! I really lathered it on all over the entire lanterns. This was once again a personal preference and you can add as much or as little as you want. The more solution you add the more patina you will have!
Step 5
Wait and watch the magic happen! Honestly I started seeing the solution work its magic in a matter of minutes. The patina was showing through and looked beautiful. I was amazed and so pleased with the results.
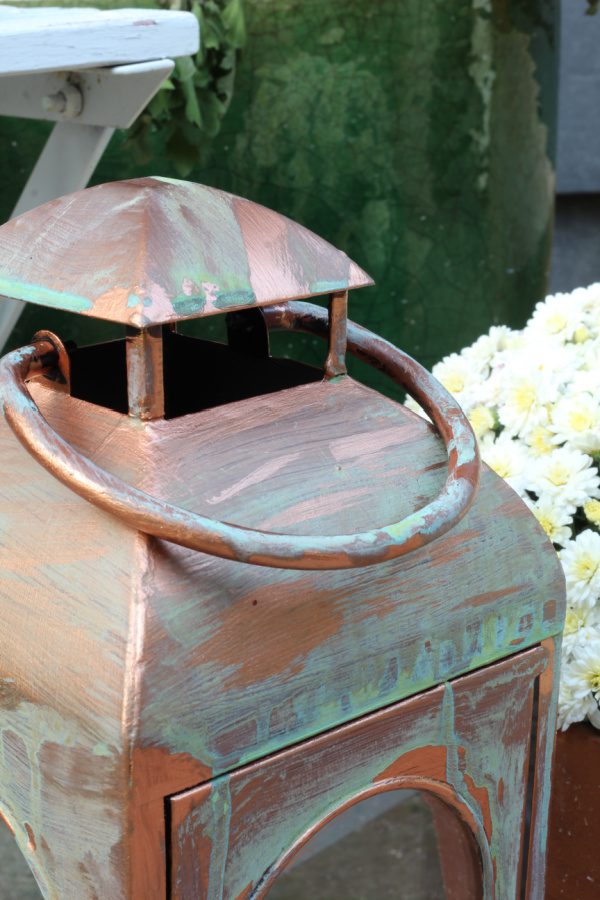
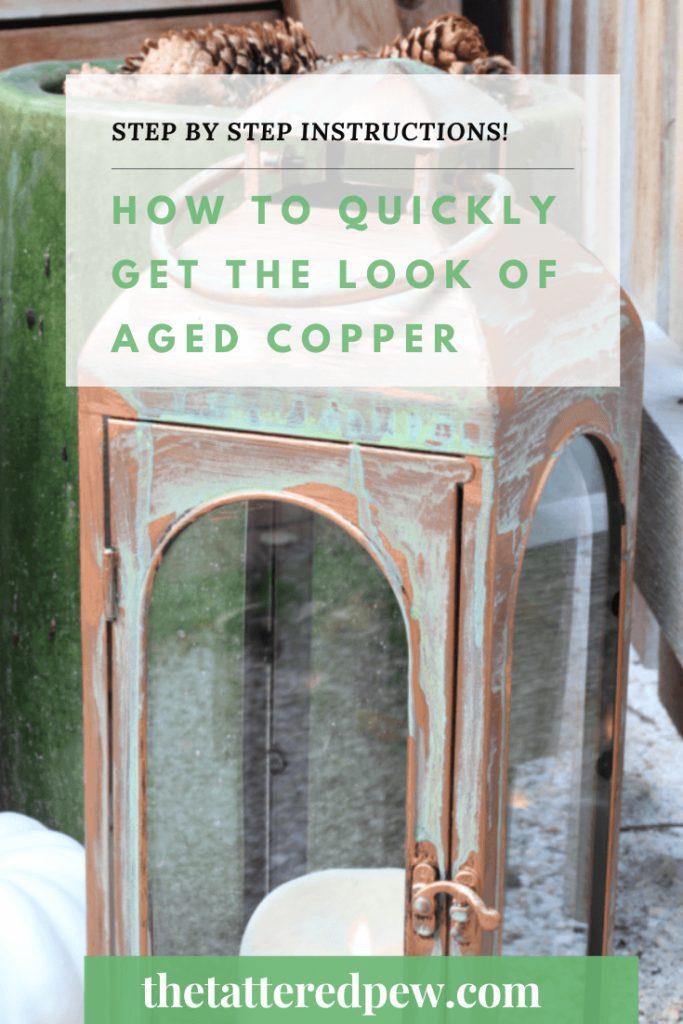
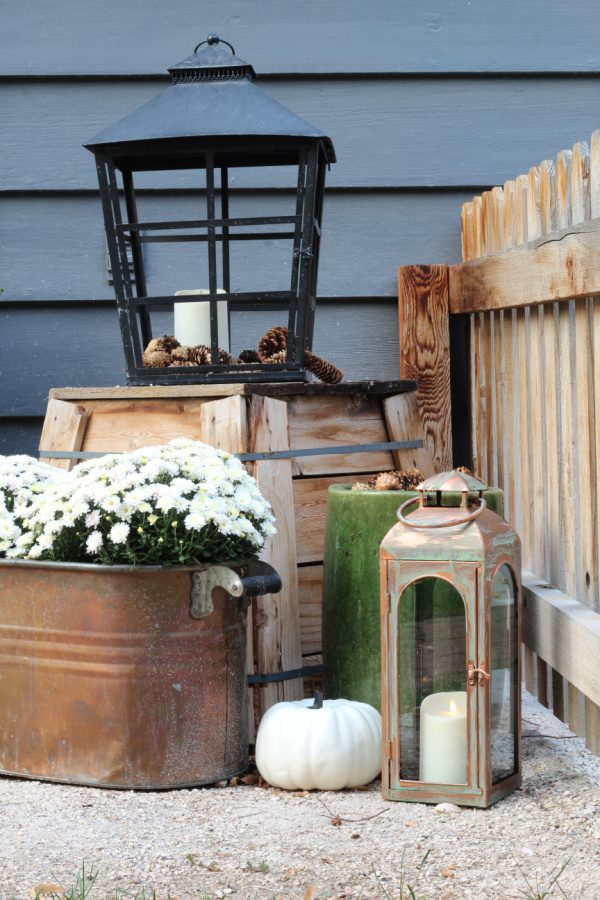
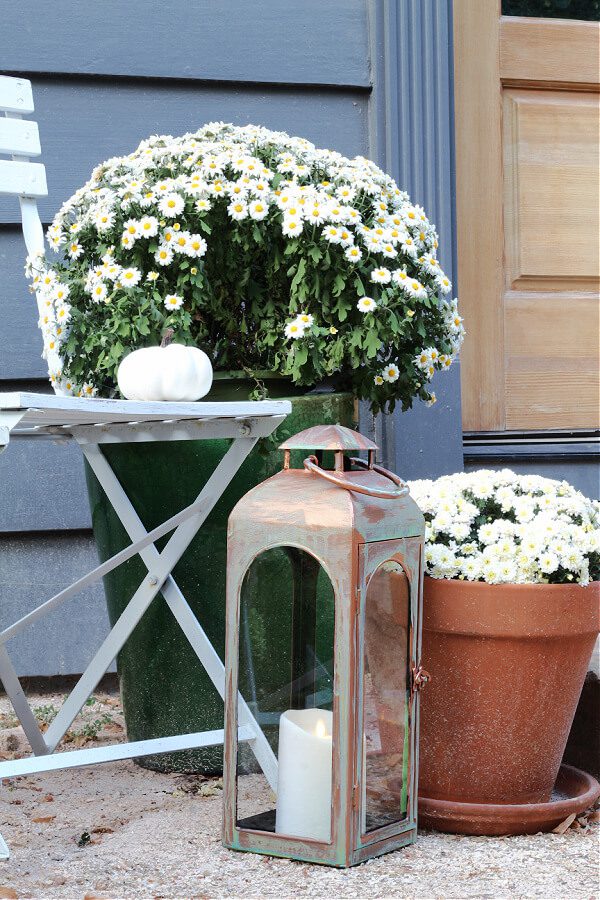
Doesn’t she look perfect on my Fall steps? I styled her next to my mom’s real copper planter and my vintage copper boiler pot.
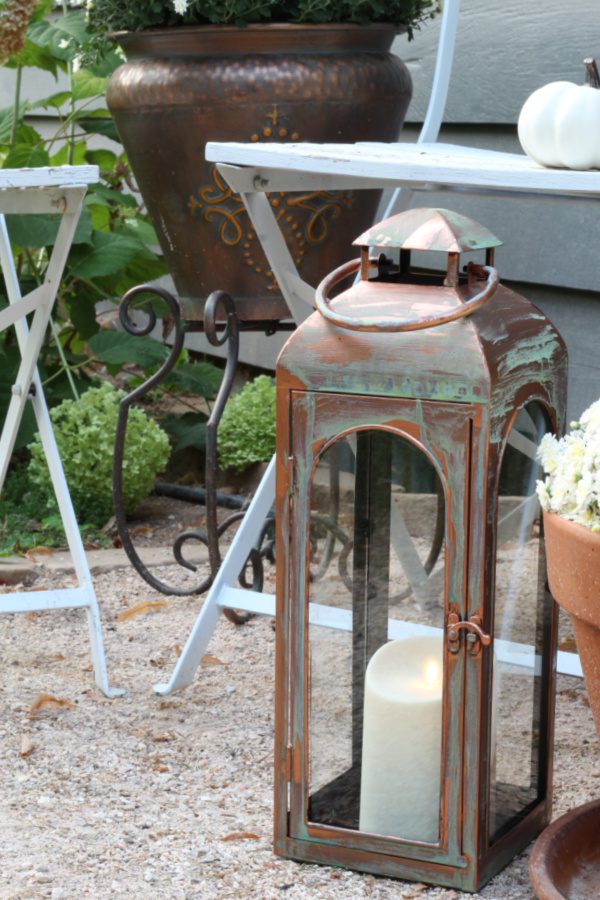
I really feel that this paint kit gave me that authentic copper and patina look that I was hoping for. Most people wouldn’t be able to tell that this was a faux copper lantern!
How To Quickly Get The Look Of Aged Copper
To say that I am in love with how my copper aged lantern turned out would be an understatement. I can hardly believe how quick and budget friendly this DIY was. Now I can’t wait to find another project to turn into a vintage looking copper piece with patina and charm!
Do you love copper too? I would love to hear about your favorite piece or how you use it in your decor! Leave me a comment below. Also, I would love to hang out with you some more…you can subscribe to the blog so you never miss a thing! Or follow me over on Instagram, Facebook or Pinterest.
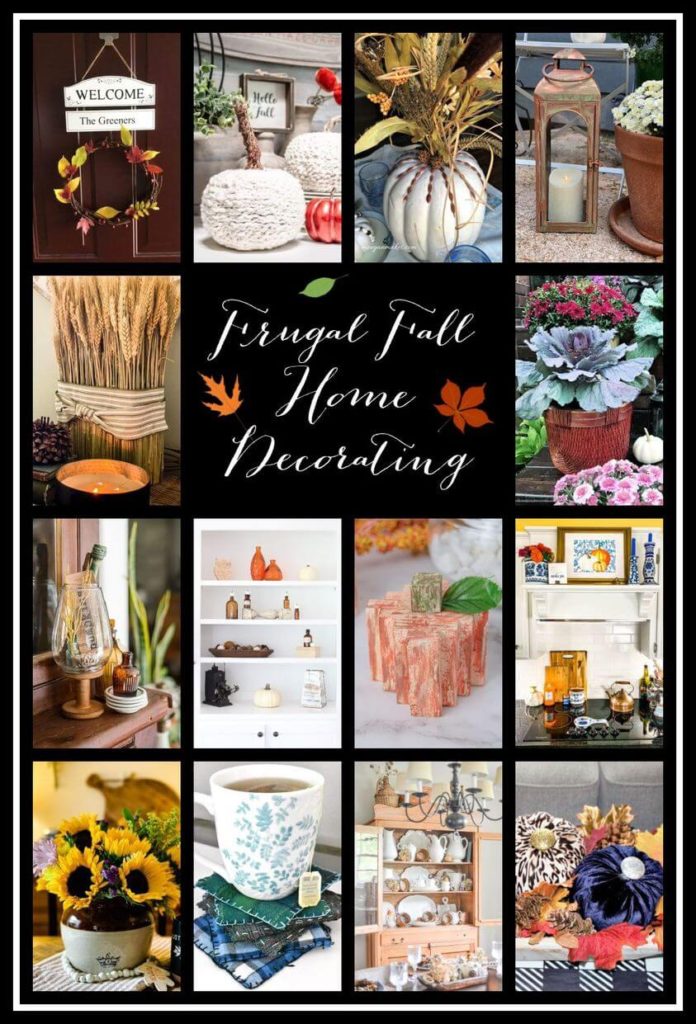
Now make sure to visit all of the Fall Thrifty Style Team projects linked below!
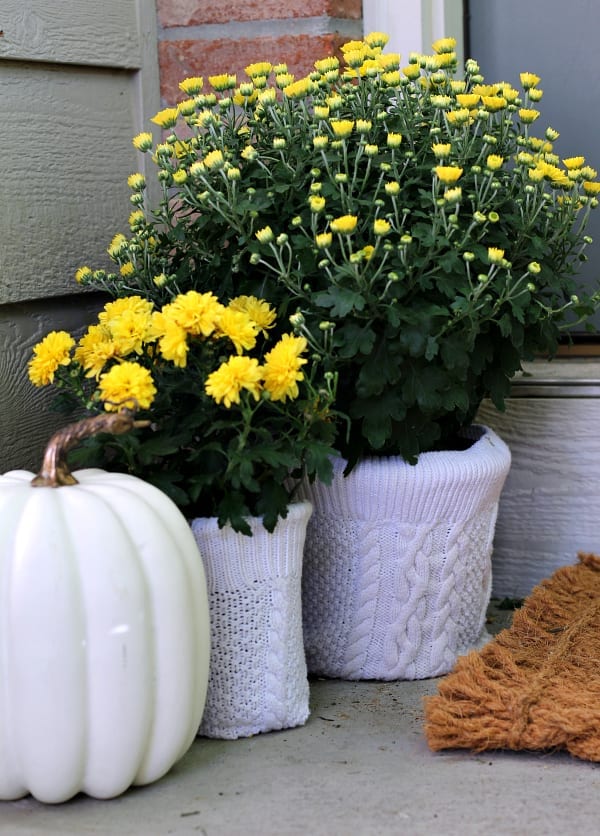
3 Thrifty Fall Planter Cover Ideas
Our Crafty Mom – Dollar Store Pumpkin Makeover With Velvet
DIY Beautify – Easy Crochet Chain Sweater Pumpkins
2 Bees In A Pod – Fall Living Room with Thrifted Decor
The How To Home – Vintage Bean Pot Vase filled with a Sunflower Bouquet
Vinyet Etc. – Fall Cloche with Thrifted Finds
Sweet Pea – Dollar Tree Tumbling Tower Block Pumpkins
What Meegan Makes – How To Make a Faux Pumpkin Centerpiece
Postcards From The Ridge – Decorating Ideas That Will Make Your Wallet Happy
Lora B. Create & Ponder – DIY Plaid Flannel CoastersThe Tattered Pew – How To Quickly Get The Look of Aged Copper
I Should Be Mopping The Floor –White and Blue Fall Decor in the Kitchen
Chas’ Crazy Creations – Fall Nature Decorating An Easy How To Guide
Cottage On Bunker Hill – Dried Wheat Centerpiece
xoxo,
Kelly
Did you like this post? PIN it for later!
I love this easy method to get that gorgeous copper patina! Thanks for sharing Kelly!
Thanks Cindy! SO fun, right?
Kelly,
Your lantern looks amazing!! I love it and love your step-to-step instructions! Sounds and looks so easy! Thanks for sharing! Pinning!!!!:)
This turned out so good! We will definitely have to try this ourselves. Love the look.
Kelly, thus us exactly what I have been planning to do to my lanterns.
Price is the only draw back. It’s kind of pricey. However, now after seeing it I may have to go for it.
This is such a great step by step and your lantern looks amazing! Thanks for sharing!
This is such a great idea, Kelly! I love how your lanterns look after their makeover.
Kelly,
This is so cool! I am going to have to try this on some black lanterns that I have.
Thanks so much for sharing.
Have a beautiful weekend,
Brendt
Thanks, Brendt! You have to try this it’s so easy and fun!
Ooooh…this is awesome!!! I definitely have to try this kit!! I love those lanterns from Wallyworld too.
What fun way to creative a lovely patina. You are so talented. Thanks for the simple and detailed patina. Pinned.
Oh, I never thought of making something copper. This is a great budget friendly idea. Love it❤️Thank you for sharing this.
Wow, this turned out great, Kelly! Now I’m looking around, wondering what I can turn into copper;) Pinned!