

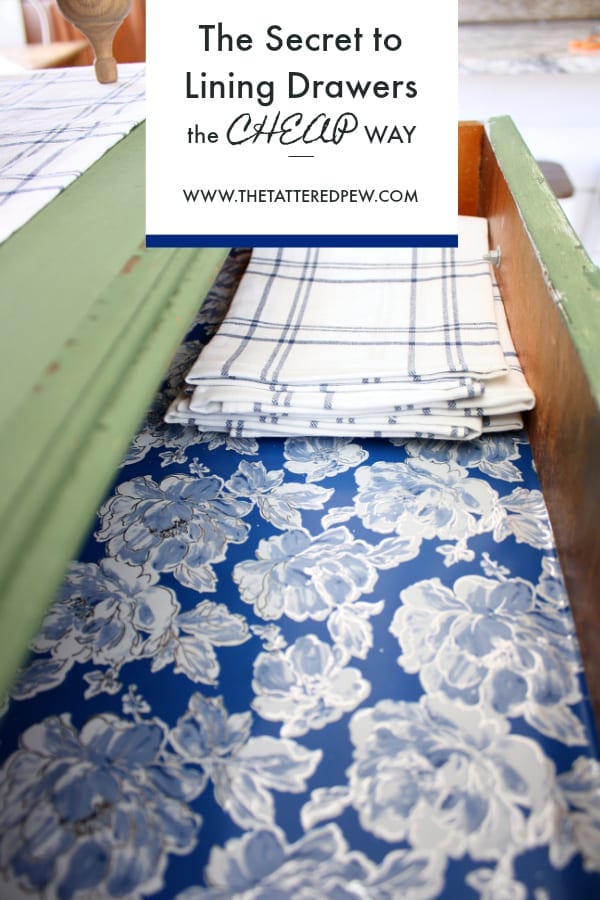
The Secret to Lining Drawers the Cheap Way
If you love the idea of freshening up your furniture but think you have to splurge on fancy liners, think again! There’s a simple, budget-friendly trick that can turn tired drawers into stylish storage spaces without draining your wallet. In this post, I’ll show you the secret to lining drawers the cheap way—no special tools or pricey materials required—so you can add personality, protection, and a polished look to every nook of your home.
*As an Amazon Associate, I earn from qualifying purchases. This post contains other affiliate links too for your convenience. Click here to read my full disclosure policy.
The Secret to Lining Drawers the Cheap Way
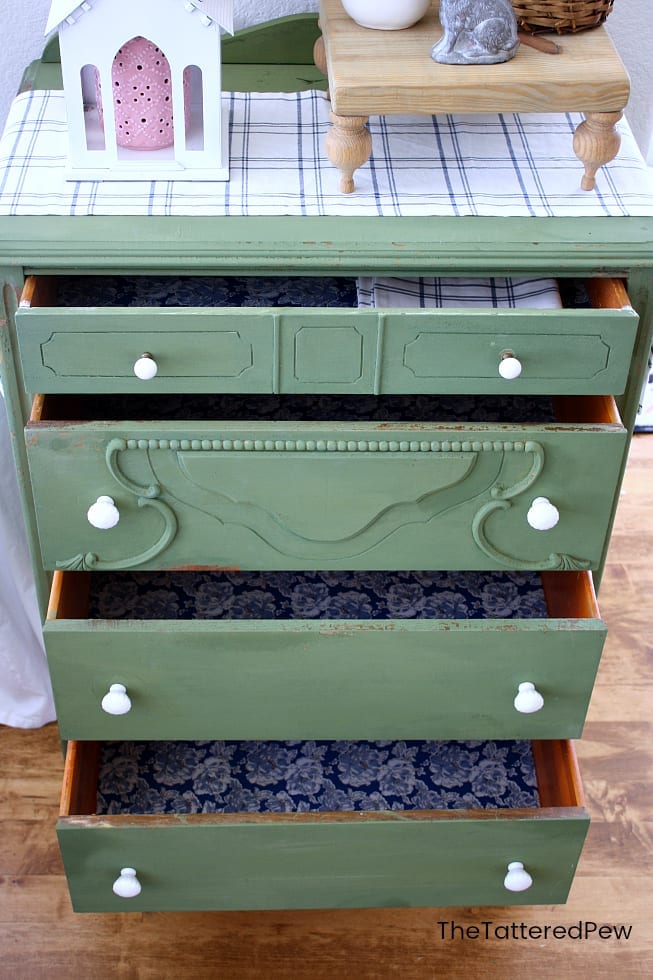
It’s a busy time of year and I have had all kinds of fun doing little projects around the house while I take a break from the garden. Today I wanted to share one of those projects with you… the secret to lining dresser drawers the cheap way!
This idea was inspired by a friend of mine over on Instagram (Abbey/ @paintedhomegoods). She posted her freshly painted dresser lined with none other than wrapping paper! I instantly thought this was genius! I’ve always loved the look of lined drawers but knew that the paper can get expensive. (Especially the kind I usually like! 😉 ) When I asked her about it she said she usually finds the best wrapping paper at Home Goods, TJ Maxx or Marshalls! Luckily I shop at those stores all the time! Then she said the secret to keeping the paper down was by using spray adhesive! Genius!

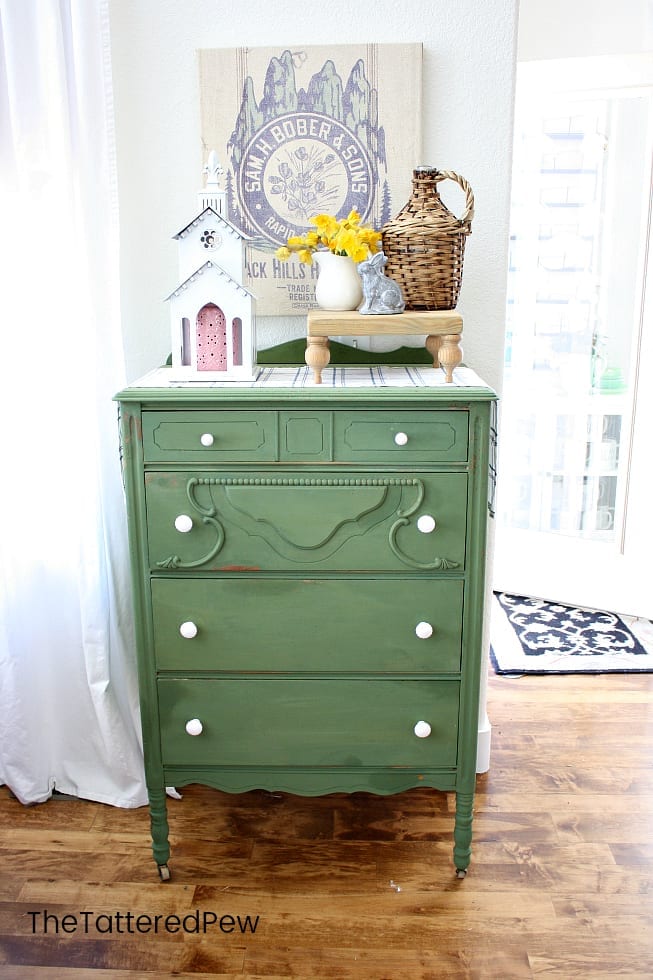
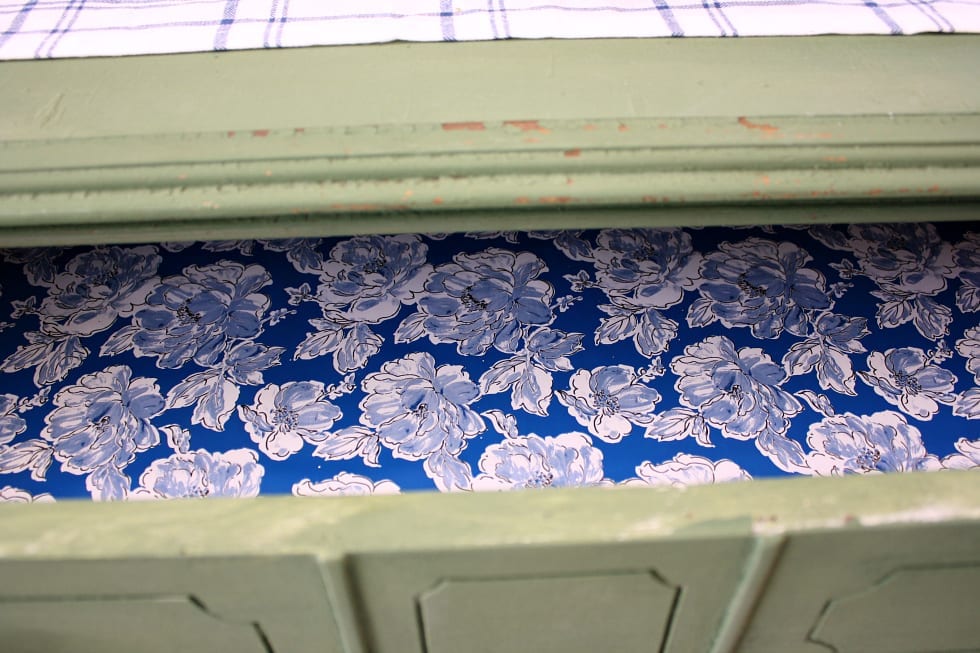
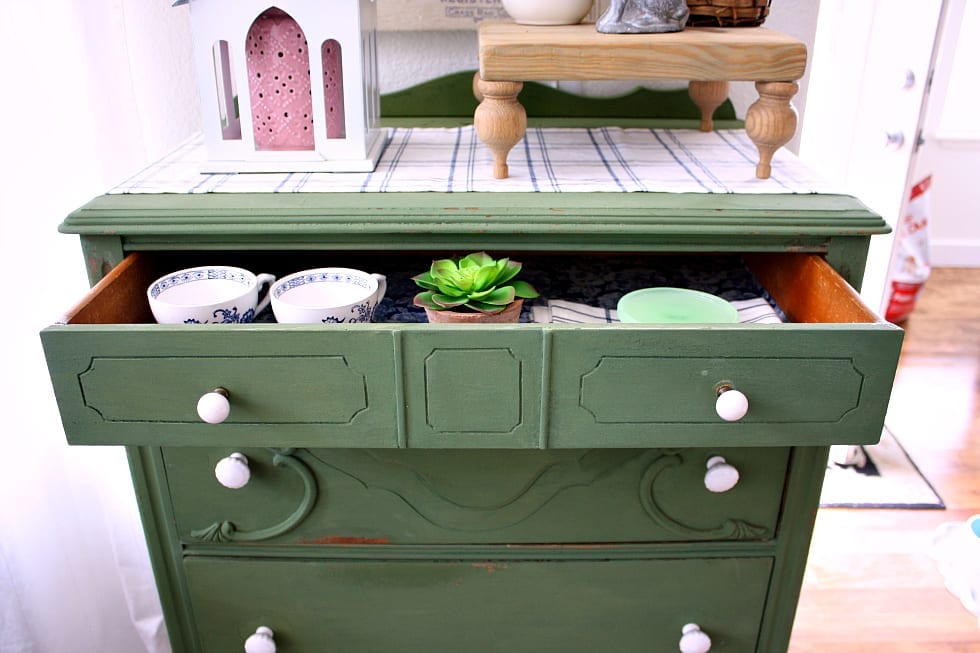
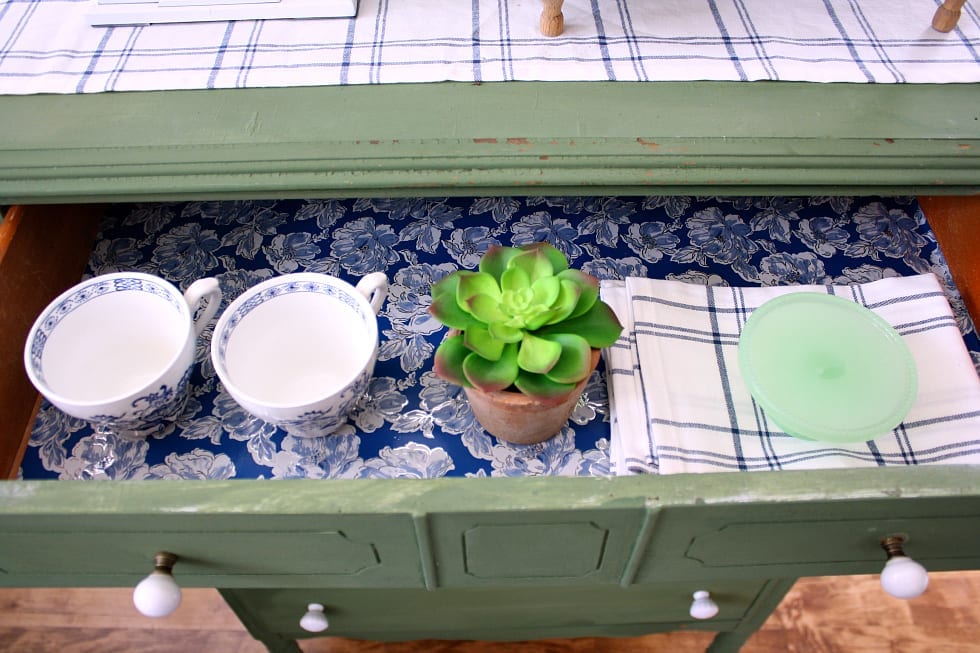
So I attempted it on my recently painted MMS boxwood green dresser (see all the details here)and BAM! Instant magic!
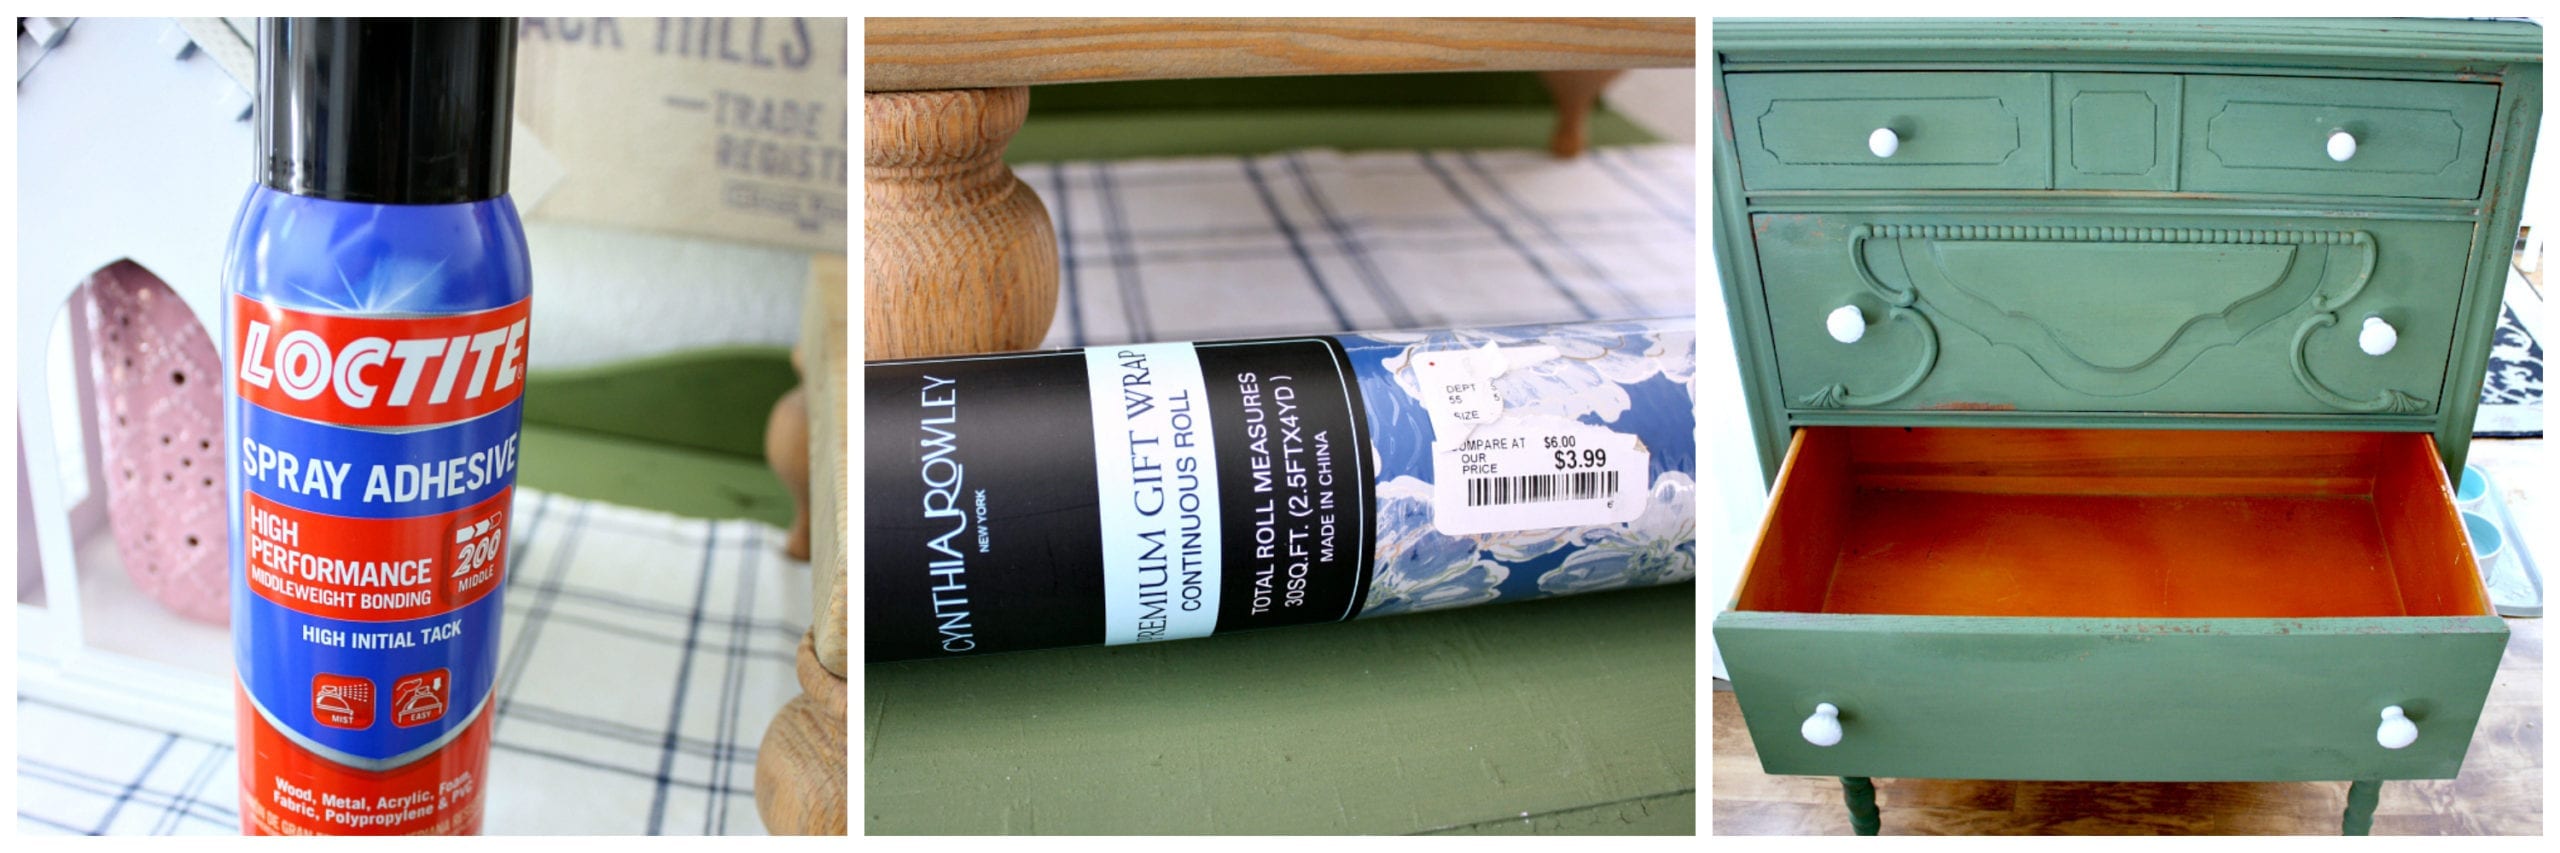
So easy, right?!This is a quick, easy and inexpensive DIY that anyone can do! Here is what you will need.
Supplies for Lining Drawers the Cheap Way
- *Spray Adhesive
- *Wrapping Paper
- *Drawers to Line
- * Scissors
The Steps for Lining Your Drawers
Step 1: Remove and Clean Your Drawers
Begin by taking out all of the drawers from the piece of furniture you want to line. Give them a good wipe-down to remove any dust, dirt, or debris. This will ensure that the adhesive sticks properly and your lined drawers turn out beautifully.

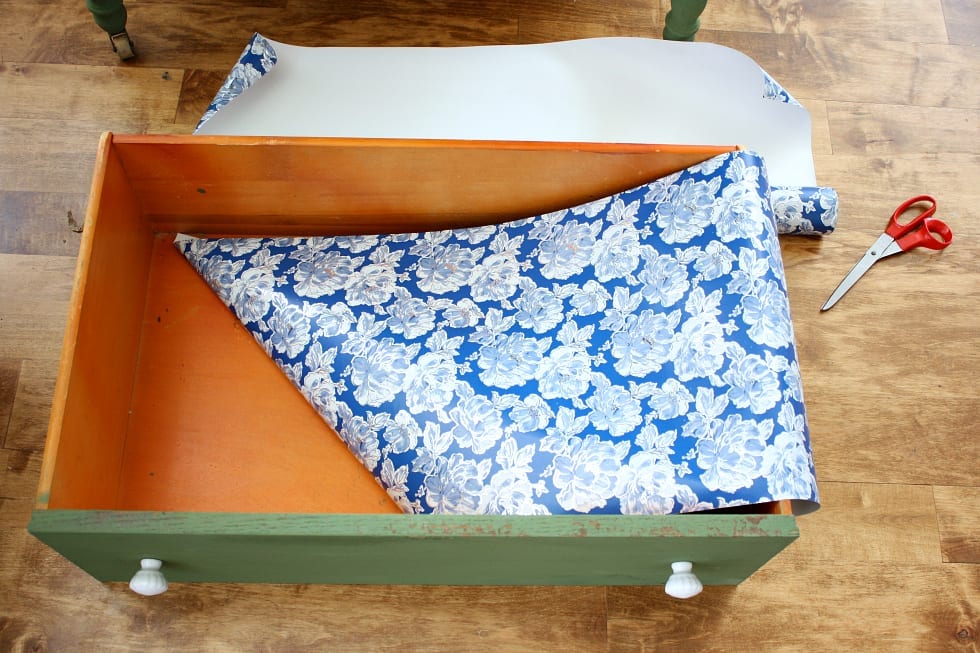
Step 2: Measure and Cut the Wrapping Paper
Now, it’s time to choose your wrapping paper. The best part is, you don’t need to splurge on expensive options! Visit your local Home Goods, TJ Maxx, or Marshalls, where you can often find unique and affordable wrapping paper designs. Once you’ve found the perfect paper, measure the interior of each drawer and cut the wrapping paper to fit. I also have an Amazon List HERE with some of my favorite wrapping paper options!
Step 3: Prepare the Spray Adhesive
Here’s the secret weapon: spray adhesive! This handy product will keep your wrapping paper securely in place. Find a well-ventilated area, preferably outdoors or in a garage, and lay down some newspapers or a drop cloth to protect your workspace. Shake the spray adhesive can well according to the manufacturer’s instructions.
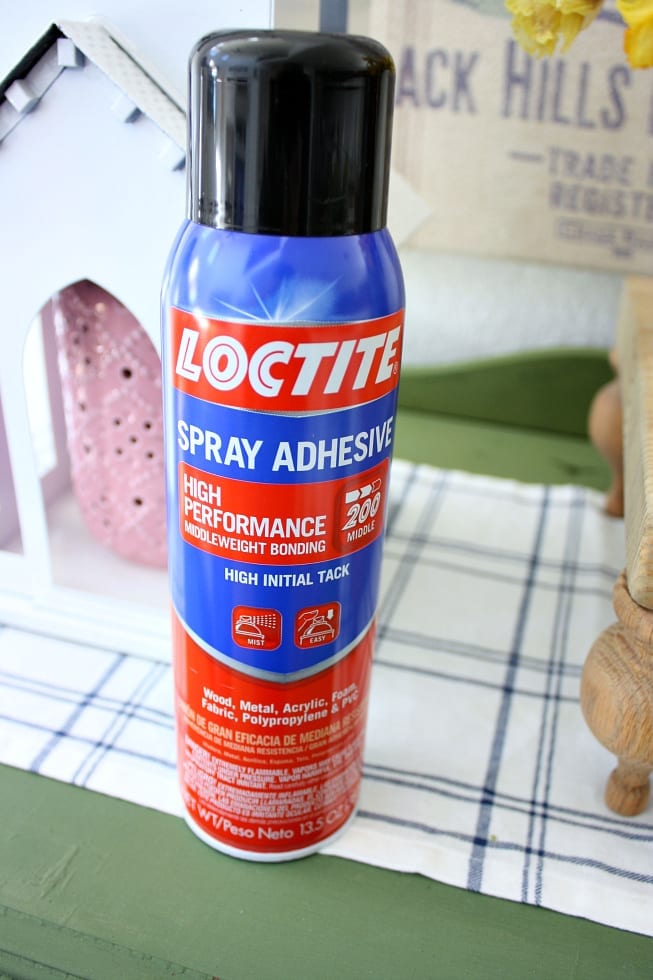
Step 4: Apply the Spray Adhesive
Hold the can of spray adhesive about 8-10 inches away from the bottom of the first drawer. Evenly spray a thin, uniform layer of adhesive across the entire surface. Be careful not to overspray, as this can create a sticky mess. Follow the instructions on the can regarding drying time, as it may vary depending on the product you’re using.
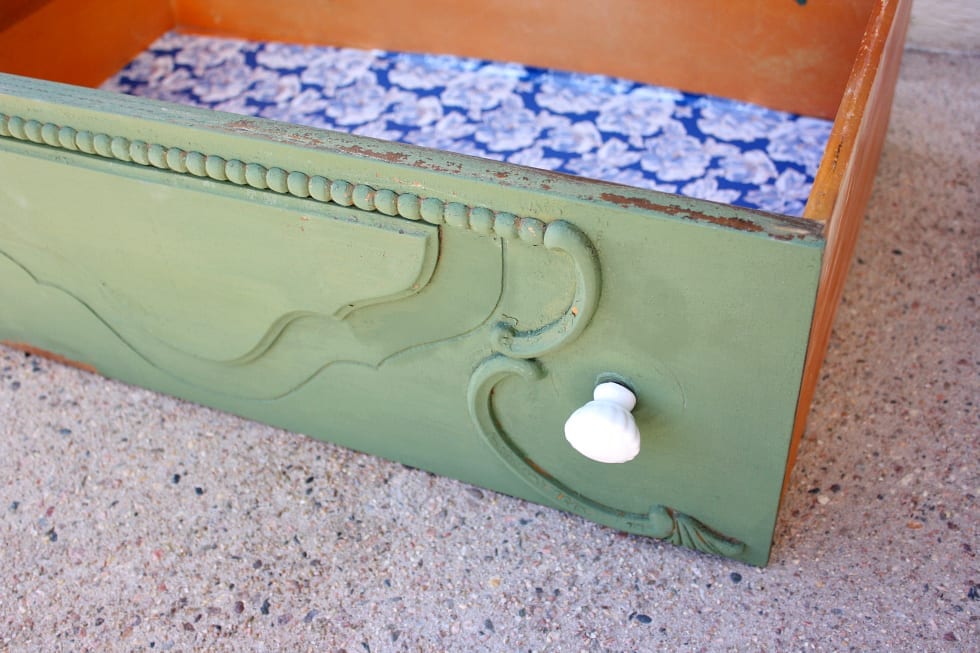
Step 5: Firmly Press the Wrapping Paper
Once the adhesive has dried to the touch, carefully place the cut wrapping paper on top of the drawer, ensuring that it lines up with the edges. Gently press the paper down, starting from the center and working your way out towards the edges. This will help eliminate any bubbles or wrinkles. Make sure the paper is firmly adhered to the drawer.
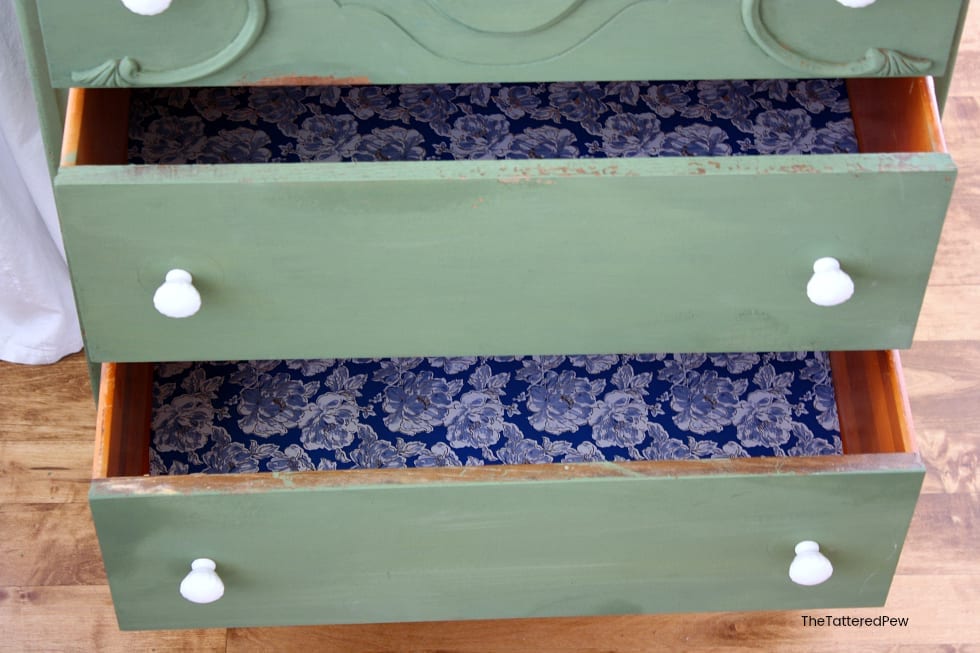
Step 6: Repeat for the Remaining Drawers
Continue with the same process for each remaining drawer. Clean, measure, cut, apply adhesive, and press the wrapping paper down firmly. Take your time and enjoy the process. It’s a fantastic opportunity to express your personal style and add a touch of elegance to your furniture.
Step 7: Enjoy Your Inexpensive and Quick DIY
Once all the drawers are lined and the adhesive is completely dry, carefully slide them back into the furniture. Step back and admire the transformation! You’ve successfully lined your drawers on a budget, and they look amazing. Now you can enjoy the beauty and functionality of lined drawers without spending a fortune.
Lazy Girl’s Garden Club
Become a VIP Subscriber
Here at Lazy Girl’s Garden Club we love all things home and garden and keeping it simple. Sign up for our weekly emails, free pintables & more!
The Secret to Lining Drawers the Cheap Way
There you have it, the secret to lining your drawers the cheap way. By using affordable wrapping paper and spray adhesive, you can achieve a stunning result without breaking the bank. Remember to choose unique wrapping paper designs that resonate with your personal style, and have fun with the process. Thanks for joining me on this DIY journey. Stay tuned for more budget-friendly tips and tricks here at The Tattered Pew. Happy crafting!
More DIY Projects

How to Prepare Pinecones for Crafts
How to Mod Podge Seas Shells for Decor
How to Make Pool Noodle Art in a Frame
If you’re coming from Jennifer over at Noting Grace, wasn’t her glass insert just amazing?! Make sure to visit the other bloggers’ links at the bottom of my post. There are some incredible DIYs you won’t want to miss! Next up on the blog hop is Kendra over at Joy In Our Home. She is sharing some beautiful DIY embroidery wreaths for Spring.
I’d love to have you hang out with me some more! Feel free to follow along with me on any of the platforms linked below.
LTK | Facebook | Instagram | Pinterest | Amazon
xoxo,
Kelly
Spring I DIYed That
A Cuter Tutor | The Homemaking Momma | Noting Grace
The Tattered Pew | Joy in Our Home
Little by Little Farmhouse | My 100 Year Old Home | Repurpose and Upcycle
Pennies From Heaven Home | Uniquely Taylor Made
Did you like this post? PIN it for later!


Kelly, that paper is so perfect for this piece! What a lovely addition to a beautiful piece!
Thank you Bree! Such a quick DIY with a fun and beautiful impact!
Love that paper, might have to make a run to Homegoods!
Thank you! Isn’t it such a fun pattern? Good luck !
I love how this freshens up the look of an old dresser! This is too cute.
Thank you Lindsey! I love it too! So easy,right?
Oh my! A wonderful idea. I buy all my wrapping paper at HG. I am going to give this a try. Thank you so much.
Thank you Maxine! You are a very smart woman…I will be buying mine from there from now on as well!
This dresser was already gorgeous, but the addition of that paper has elevated it to amazing! I love this idea and can’t wait to try this on a few pieces of my own at home! Thanks for the inspiration, my friend!
Thank you Jen! I’m hoping you have some luck doing your own drawers!
Oh my.. definitely doing this!! thanks Kelly.
Yay! thanks Brenda…have fun! And will you please share with me if you do this!
Your drawers are beautiful now, Kelly! That wrapping paper is gorgeous!
Thank you so much Leigh!
Such a beautiful dresser and the paper is the perfect finishing touch, Kelly! I never heard of the spray adhesive but so glad to read about it! I’m redoing a dresser right now and the drawers need help and this is the best idea! So fun to be on this blog hop with you!
I absolutely love this idea and can’t wait to implement it somewhere in my own home!
Thank you so much Tara! It’s such a fun little DIY!
I always watch for old rolls of wall paper at the thrift store to use in drawers as liners. I have found some beautiful blue and white striped and other small print wallpapers for like $1.00-$2.00. That also works really good in the drawers and it is thicker. Just wanted to share that so you could watch out for some.
Oh Mary this is such a great tip! Thank you for sharing your secret…I will now keep my eye peeled!
Love this idea!! So pretty and easy to do!
Thank you…and so easy to switch out too!
When our twins were born 45 years ago, I lined their dresser drawers with wrapping paper from the gifts I received at my baby shower!
Oh my goodness this is precious! I love this idea. Thank you for sharing!
Such a great idea. I love the blue paper with the green dresser. Gorgeous!
Thank you, Renae! I love the contrast too!
Such a great idea Kelly.
Thank you, Rachel!
My drawers are lined with wrapping paper but didn’t know about the spray adhesive, thanks for this post I learnt something
Oh good! So glad I could help!
hi Kelly! I paint furniture and I line my drawers with wrapping paper but I have used spray adhesive. thank you for sharing this!! genius!!
Yay so glad it helped. You just never know!