

Simple DIY Tray Made From An Old Shutter
Simple DIY Tray Made From An Old Shutter
Hi again! Sorry I haven’t shared in awhile. Life has been a bit crazy now that I am juggling going back to work and the kids are busy in school and sports. Somehow, I managed to sneak in a little “me” project. Today I want to share an inexpensive and very easy DIY shutter tray that I recently made. I have had some real fun treasure hunting with my mom and sister these past few weeks! On one of those trips I scored this ugly old wood shutter for $10!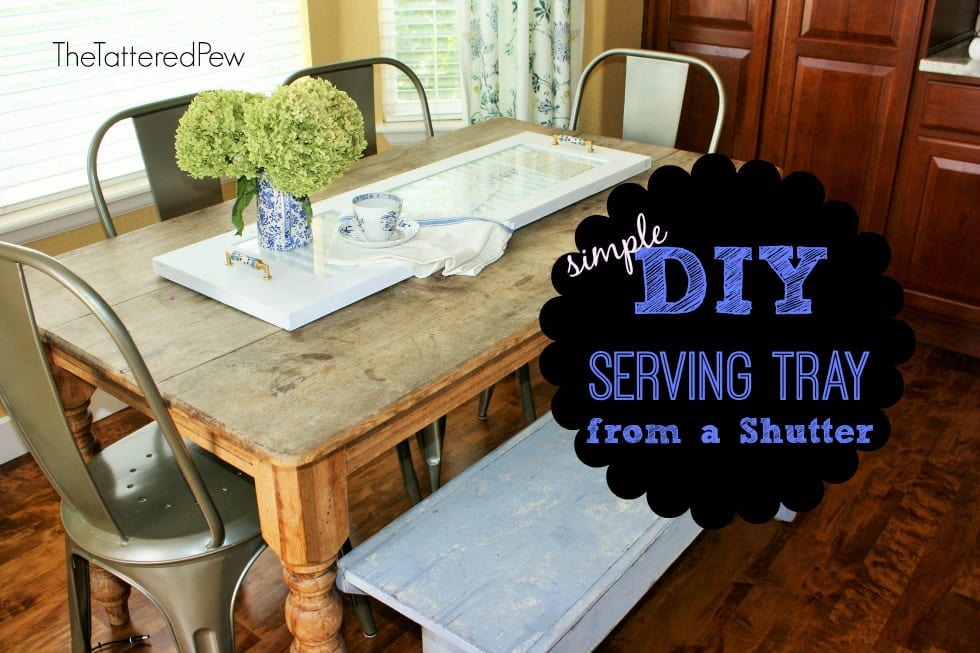
I decided to turn it into a tray. A tray that could either go on my dining room/kitchen table or across my bathtub. I wanted one that was substantial but not expensive. A statement piece if you will!
Now if you knew me at all, you know I am not overly handy with tools. So don’t worry…this will be easy and very attainable, I promise! Just follow these simple steps below!
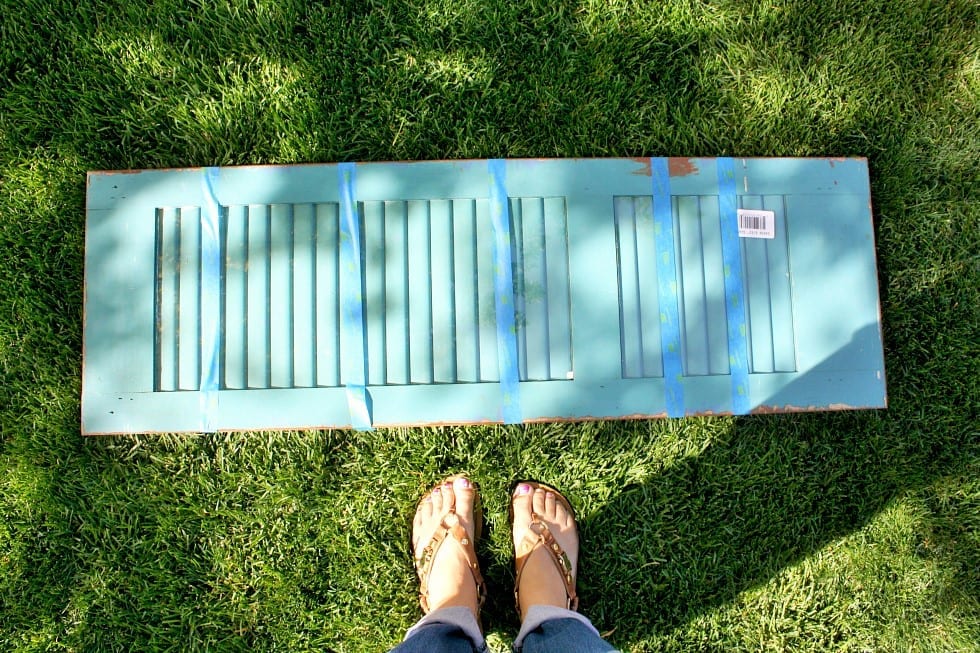
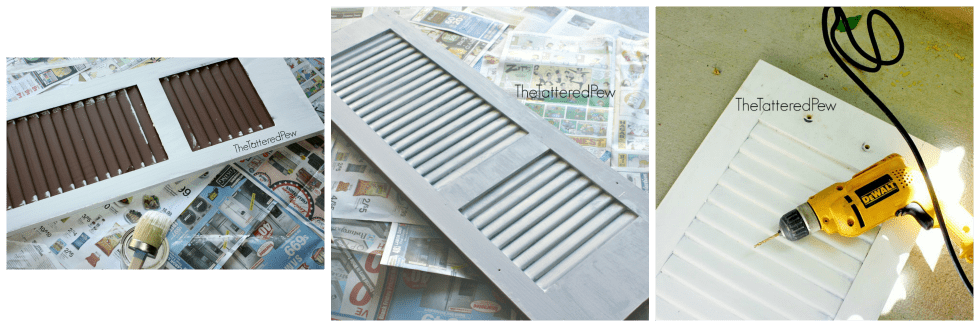
- Find a shutter in the size that you like. My shutter is 43in long x 14in wide. I specifically was looking for a BIG shutter. However, any size will work. It just depends on what you are looking for.
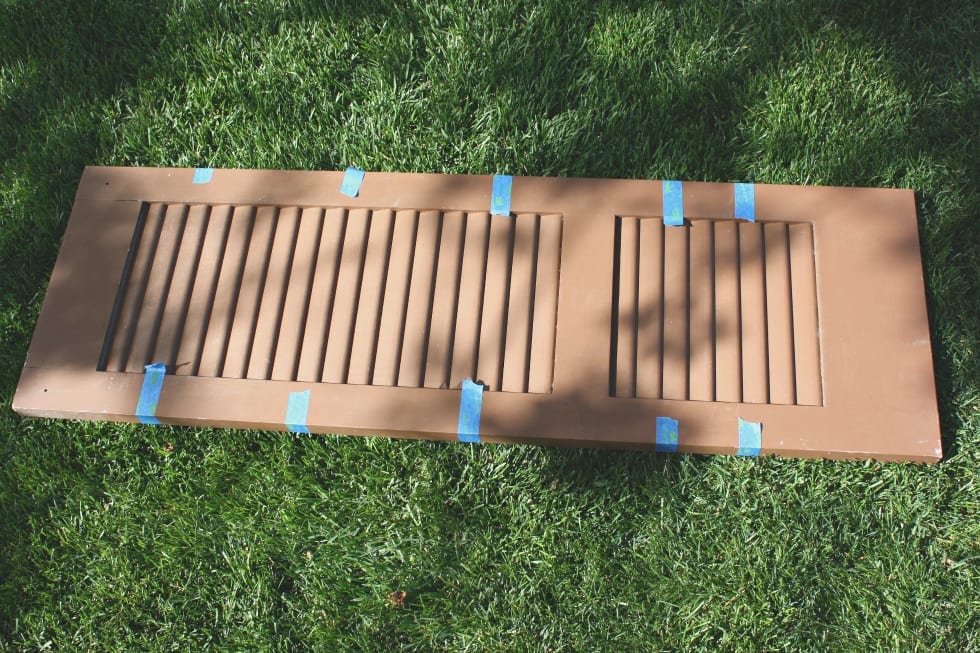
- Next I stopped by Lowes and headed to their glass section. They will cut glass for FREE for you! I hauled my large shutter into Lowes and they cut glass to fit in the two parts of my shutter. It only cost $10 for the glass and I had extra left over for other projects! Score! The kind gentleman working taped it on for me so the glass didn’t fall out on the drive home. (Hence the blue tape in the picture)

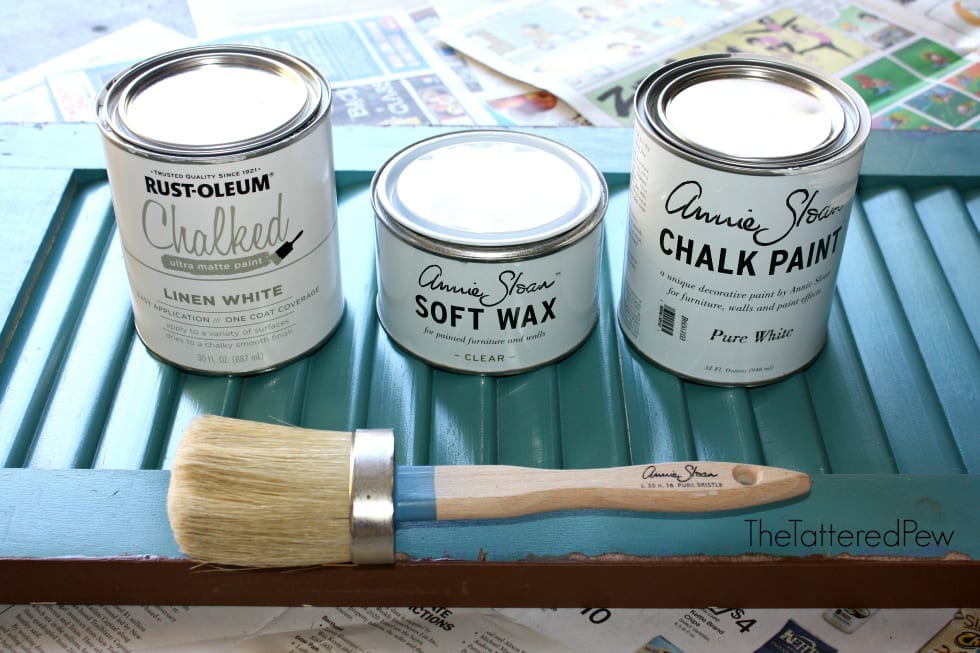
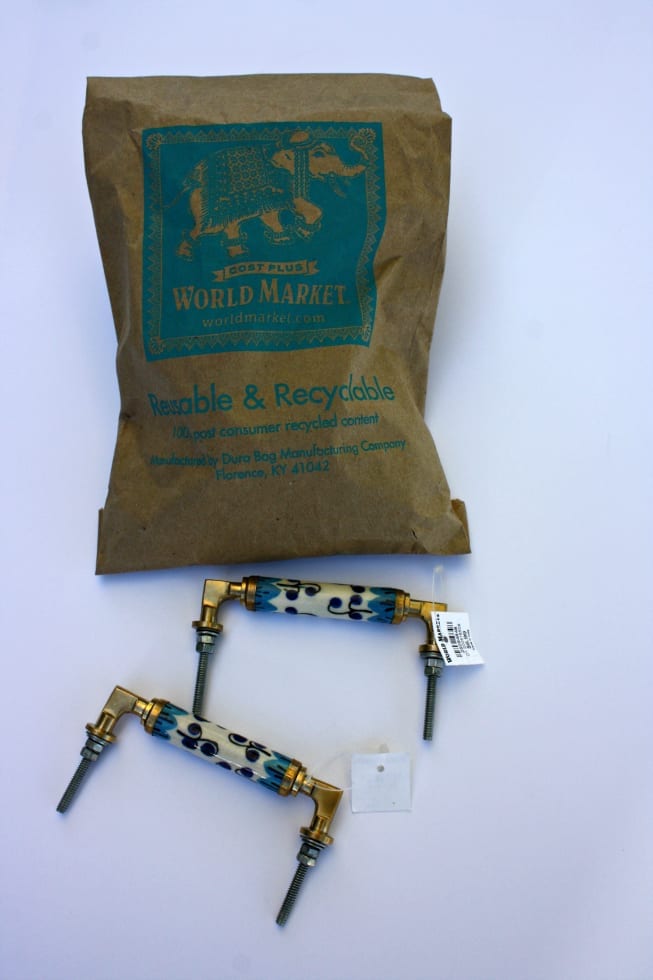
The blue tape is holding in the glass. - Next, you need to decide on the paint color and hardware. I decided to use Annie Sloan Chalk Paint in Pure White and purchased the handles from World Market. (My mom has used the Rust-oleum Chalk Paint brand featured in my picture below and it is easier to find and less expensive). I also used Annie Sloan clear wax. I chose chalk paint so I didn’t have to do any sanding. Because let’s be honest, who likes sanding? I like projects that are quick and easy! This shutter only took two coats of paint. And very little wax. I like to use old baby burp cloths when I apply my wax because they seem to leave a smooth even coat.
Supplies-paint, wax and brush. 
- Next, I waited two days for the paint and wax to dry. Then I drilled two holes in each end of the shutter. Once the holes were drilled through the shutter I grabbed the hardware from World Market and attached them on the back side with the bolts that came with the handles.

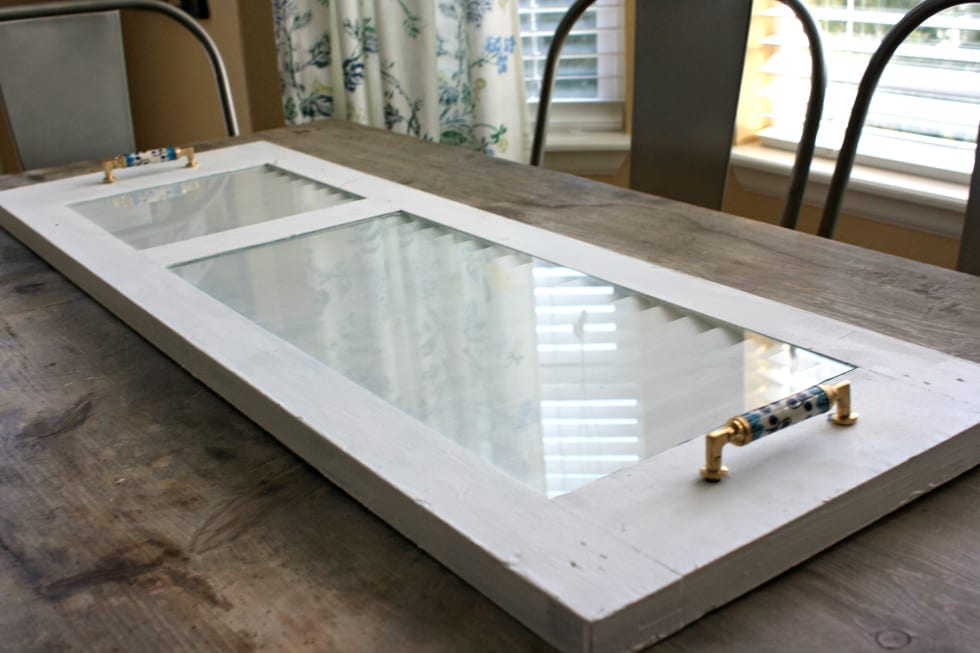
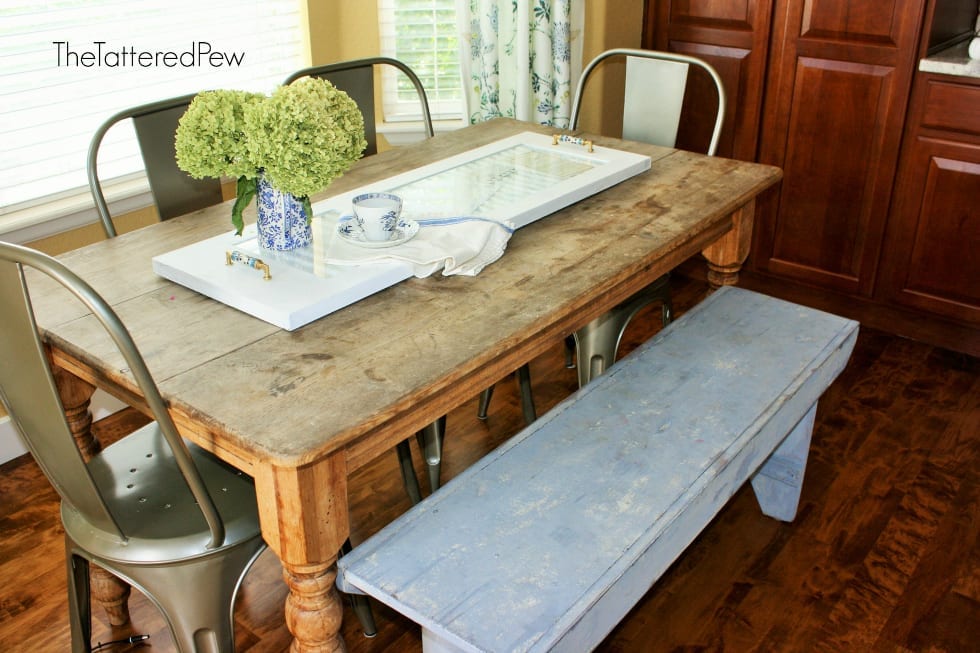
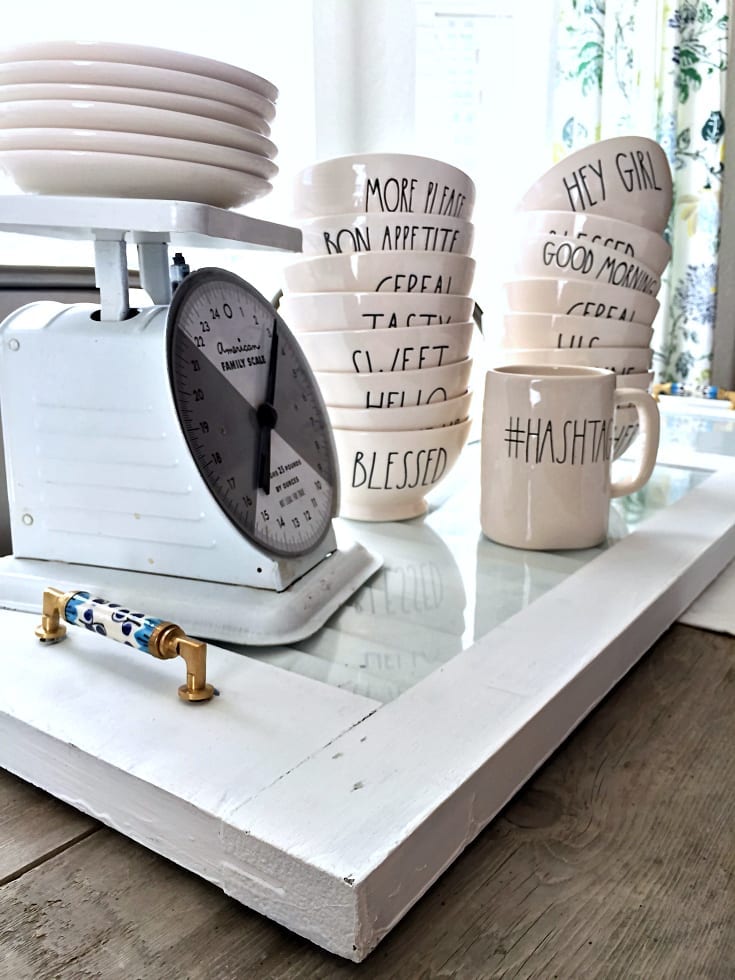
- Finally, I added the glass carefully in the shutter. The glass fit perfectly! That’s it…your shutter is complete! So easy and fun! I love it on my kitchen farm table. I even added some special family recipes under the glass for the final special touch! The glass is removable so it’s easy to change out your accents!
the perfect showcase for our special family recipes. Thanks for stopping by! I hope you enjoyed this quick and simple DIY! Here is an updated picture of how I have been using my tray recently…to display my Rae Dunn!

xoxo, KELLY


That turned out amazing!
Thank you Lindsey! I love it too and was shocked how easy it really was!
Wow, that looks amazing! Such a simple project with a big result.
Thanks! It truly was simple…and fun!
Turned out beautiful!! Loved the tutorial. As s junker myself I have several shutters in my garage waiting to be repurposed!
Thanks Ann! Do you have plans for your shutters?
I am thinking about adding them to a gallery wall I have planned. But until I see them on the wall I don’t know if they’ll be too overpowering!
Oh I love the idea of adding them to a gallery wall! Great idea!
Really cute ! Fun to use too!
Thank you sweet Trina!
So cute!!
Thanks Rhiannon! It was so fun and easy to make!
Kelly,
This is super gorgeous!
I have to ask though, what is the reasoning behind using the wax after you have painted with chalk paint? I too and am using the Rustoleum Chalk Paint on a baby crib this weekend but I did not get any wax.
Jenena I just used the wax to seal the paint. You don’t have to use it at all if you like the matte feel that chalk paint leaves. The wax just adds another layer of protection. Hope that helps!
Love this project and such a great statement piece! The recipes were the perfect touch!
Thank you so much Yvette!
Very cute idea!
Thank you Greta! I so appreciate your feedback!
I love this idea with the old recipes. I have several in my moms handwriting and never thought of anything like this.
Thank you Brenda!There is just something special about recipes passed down through the family!
How creative is this! This post has given me some ideas….love it. Thanks for sharing for #iDIYedthat Kelly.
Thank you Lindsey! I love how you are bringing bloggers together through link ups and Instagram!
Woohoo! Great DIY! 👊🏻
Thank you Leigh!
I love love love this idea! What a cool way to repurpose! I’m so glad you linked up for I DIYed that! Can’t wait to see what else you share!
Thank you Jen! I can’t wait to share again. I love this tag and link up you have created!