

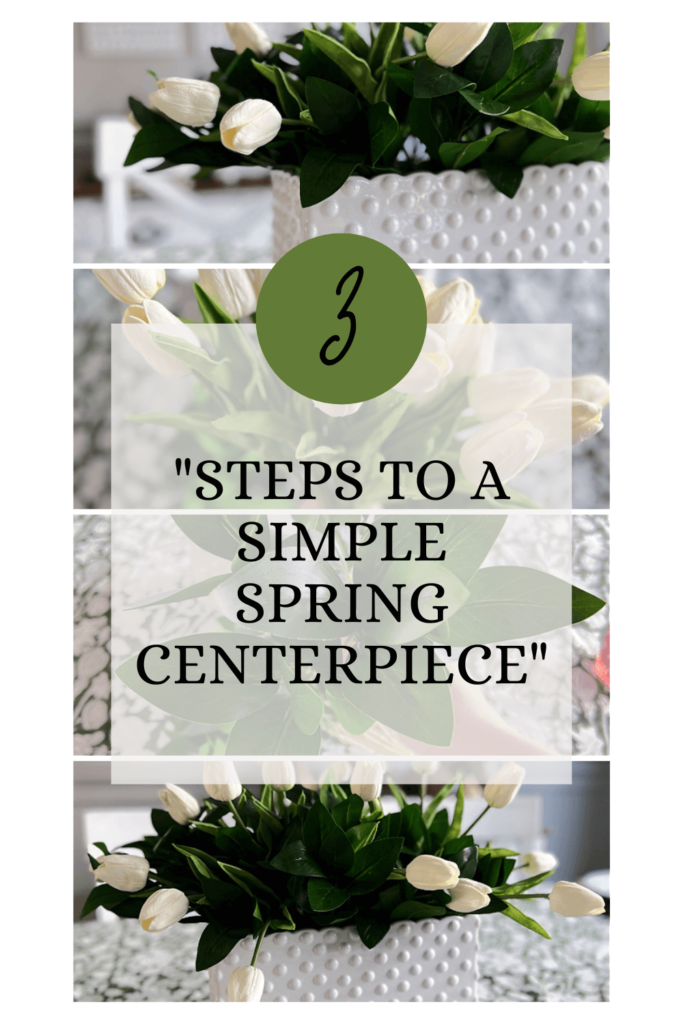
Simple 3 Step Spring Floral Arrangement
Ah, the beautiful colors and delightful aroma of Spring- just what we need after a long and dreary winter. Is there anything more uplifting than seeing beautiful flowers? Take your home decor to the next level by learning how to create simple yet stunning floral arrangements this Spring! With just 3 easy steps, it’s easier than ever to bring life and beauty into your home – without breaking the bank or having any previous experience.
Even if you’ve never attempted flower arranging before, this step-by-step guide will equip you with all the knowledge necessary for creating an unforgettable arrangement in no time!
*As an Amazon Associate, I earn from qualifying purchases. This post contains other affiliate links too for your convenience. Click here to read my full disclosure policy.
Simple 3 Step Spring Floral Arrangement
When it comes to flowers and floral arrangements during the Spring I am all about keeping it classy and simple.
So for this faux floral arrangement that I am sharing today you will be surprised to know that this only requires 3 items.
I know, crazy right?!
And you will be happy to hear that this is my simplest flower arrangement to date. Also, it might be one of my favorites!
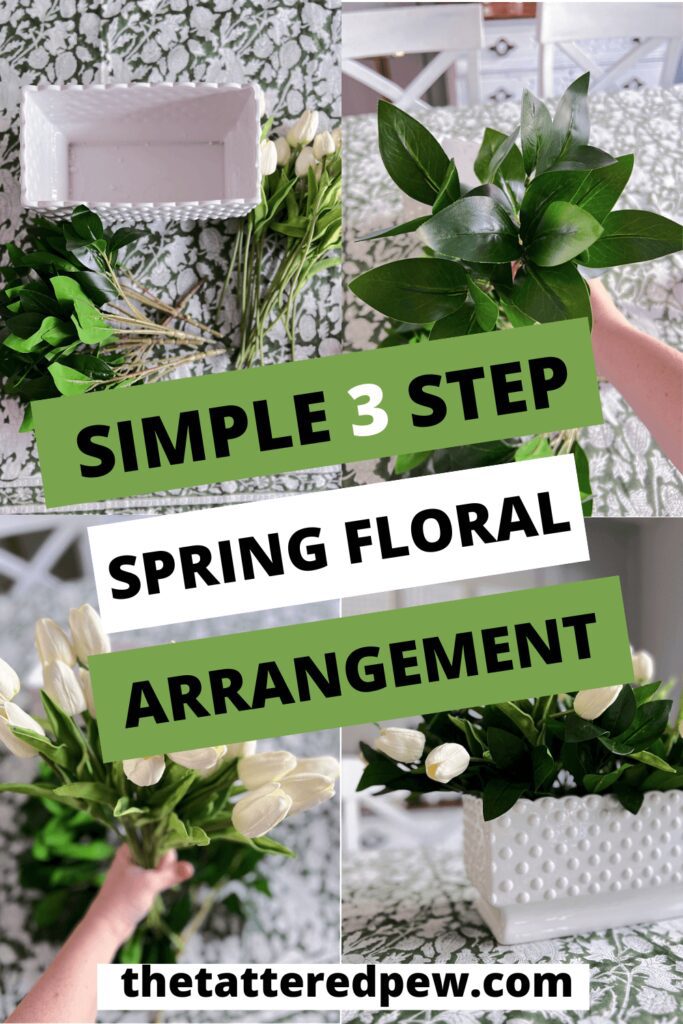
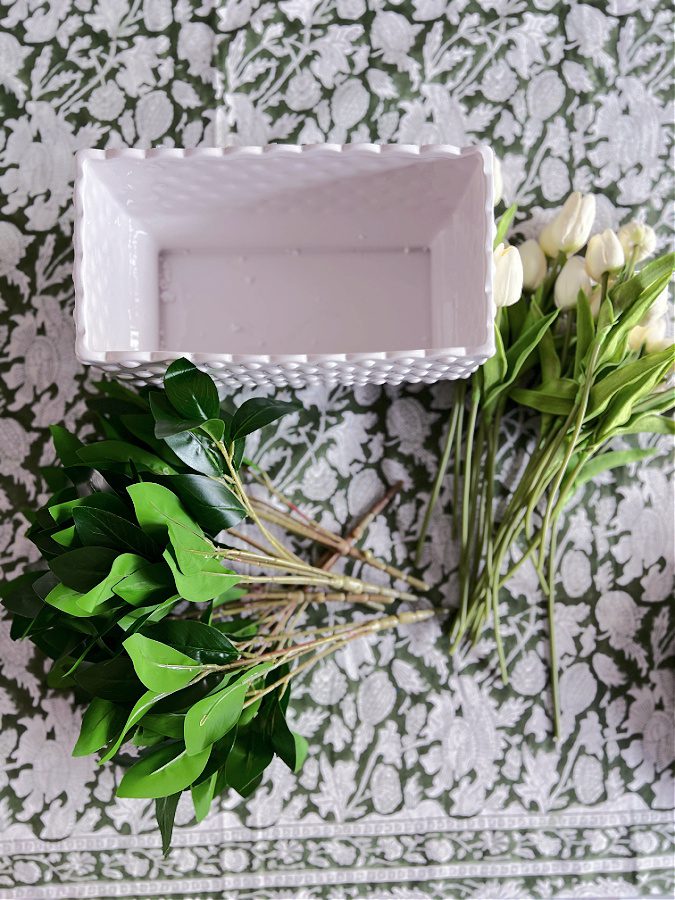
Supplies Needed for Spring Floral Arrangement
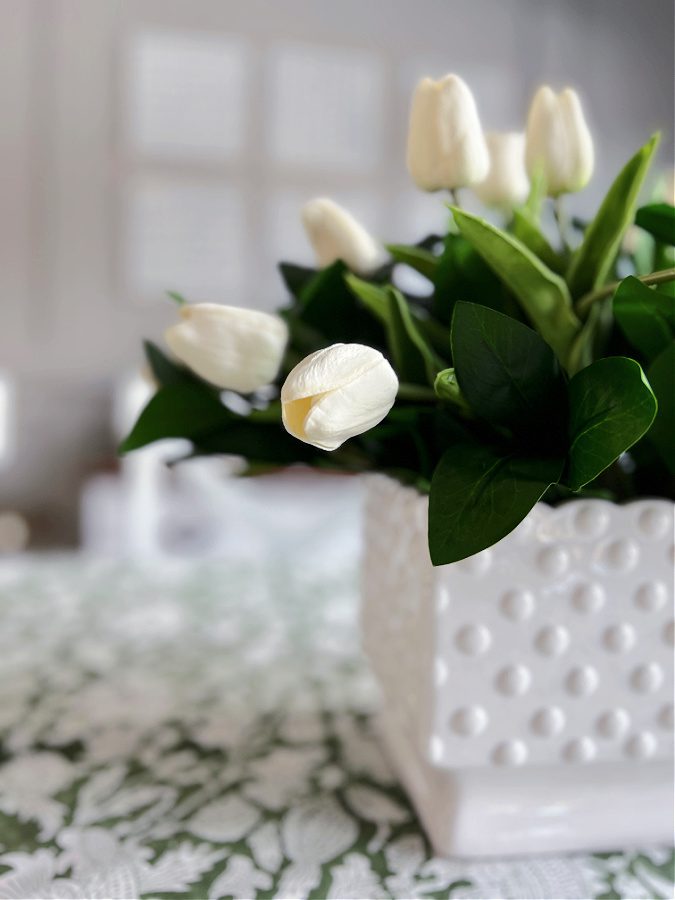
- white hobnail rectangular planter
- faux white real touch tulips
- greenery stems
- green block print tablecloth (Not a supply but my favorite)
Step 1 for your Faux Spring Flower Arrangement
The first thing you will need to do to create this simple Spring floral arrangement is to pick your vessel. I chose this rectangular, white hobnail planter that I found from the Creative Co-Op shop over on Amazon.
Isn’t she beautiful?
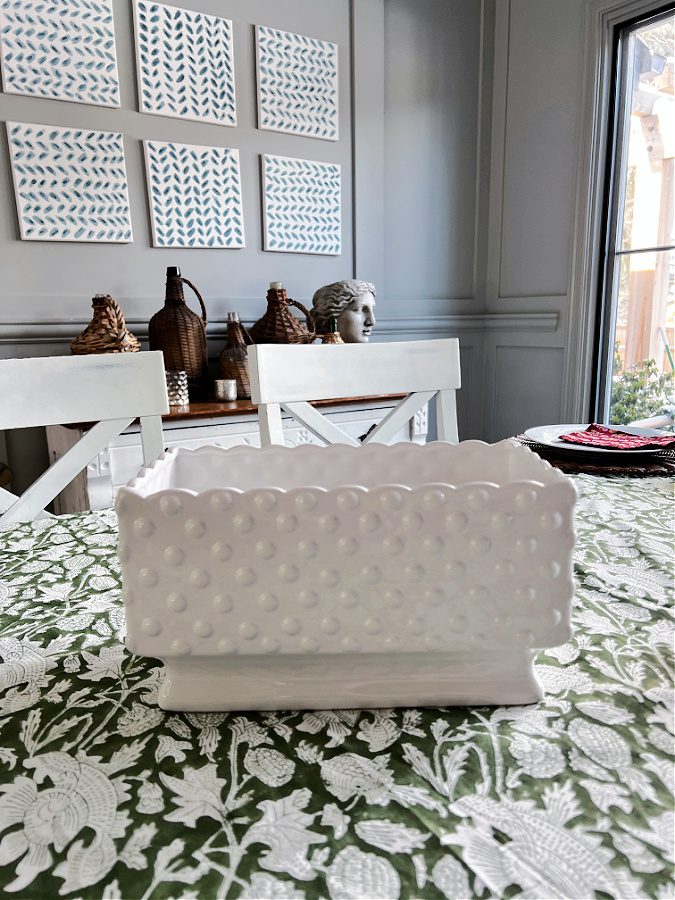
She is large enough to hold a lot and make a statement wherever you decide to display her. You can use this same one or chose another vase or planter you have on hand at home. The main theme should be that it is rectangular!
And the best part about this planter is that I didn’t even need to use a foam block.
Step 2: Choosing Spring Greenery
Next, pick out your greenery for the filler . I chose these greenery stems from Amazon. If you have the same ones as me you will use all 6 of the greenery stems to create the base of the arrangement.
If you are using different stems fill your planter until you don’t see holes and it looks full.
Make sure to spread out the leaves and shape them to make them fuller. This will help support the flowers once you add them to the planter.
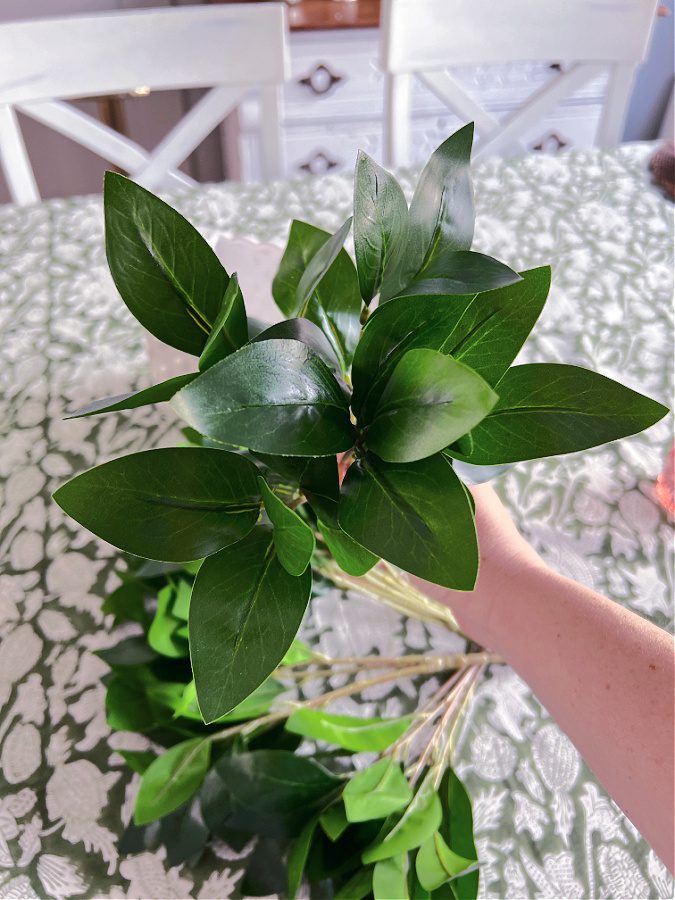
Simply put the greenery stems in to the planter at an angle. Having them at an angle allows them to lean against the sides and will help them not fall over. The base of the stems will weave together and end up holding the leaves in place!
Play with them a bit until they are to your liking. The leaves in my picture below got some good fluffing and arranging once I had them in place. I love how the leaves and the stems are bendable!
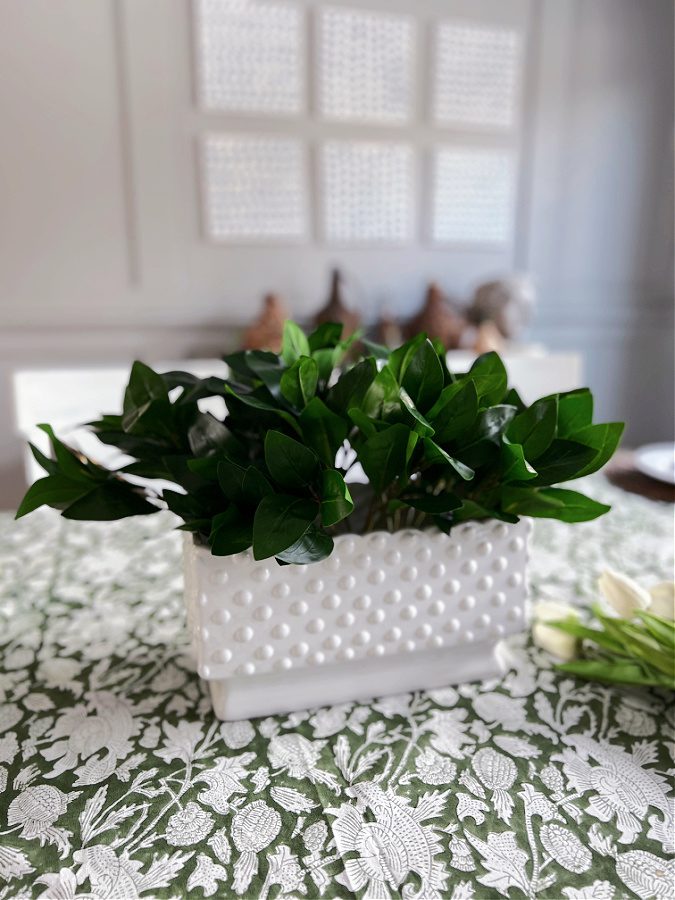
The greenery serves as the base for your arrangement and prepares the way for the flowers!
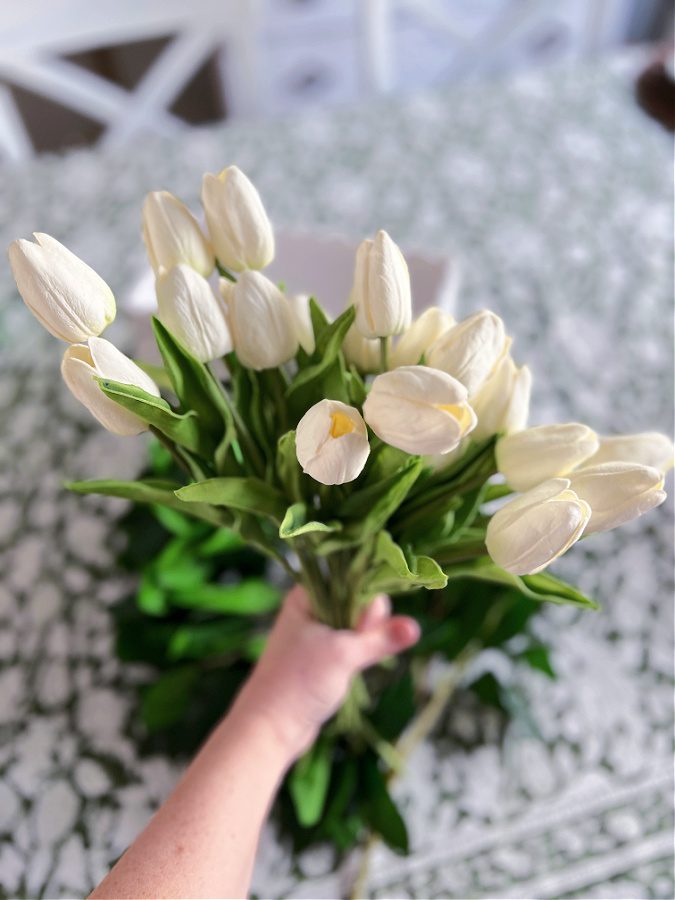
Step 3: Choose your Spring Flowers
Finally, grab your flower of choice.
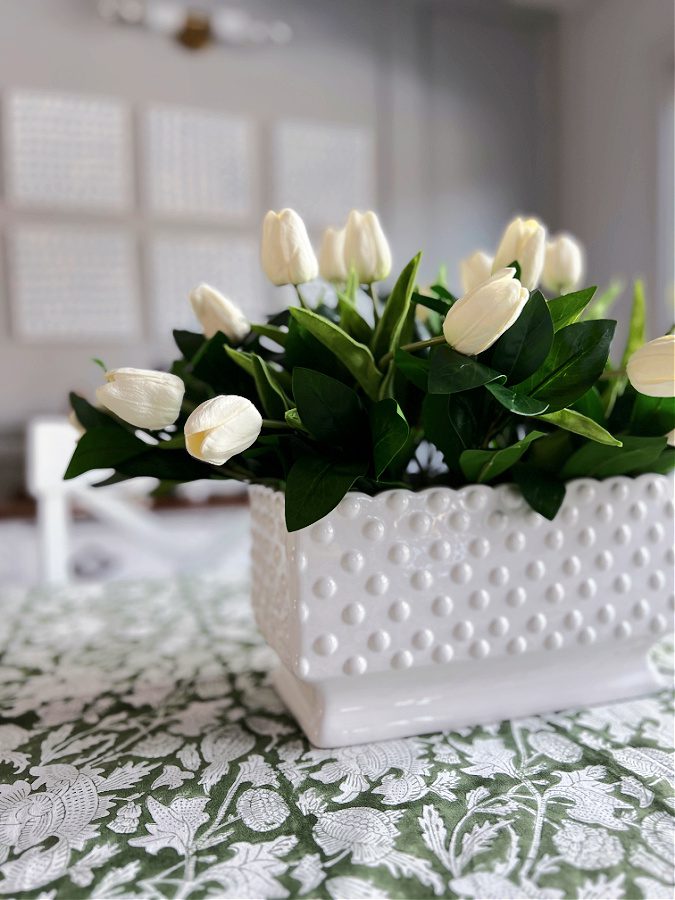
I chose to use my all white faux tulips. They are real touch and some of the best faux florals I have ever come across! For this simple Spring floral arrangement I used all 20 of the tulips that came together.
Once you have your flowers start poking them through the leaves. Look for spaces in the arrangement that need a pop of white (or color) from the flowers.
I walked around the arrangement making sure that I had placed flowers on all sides so the arrangement would look good from any angle!
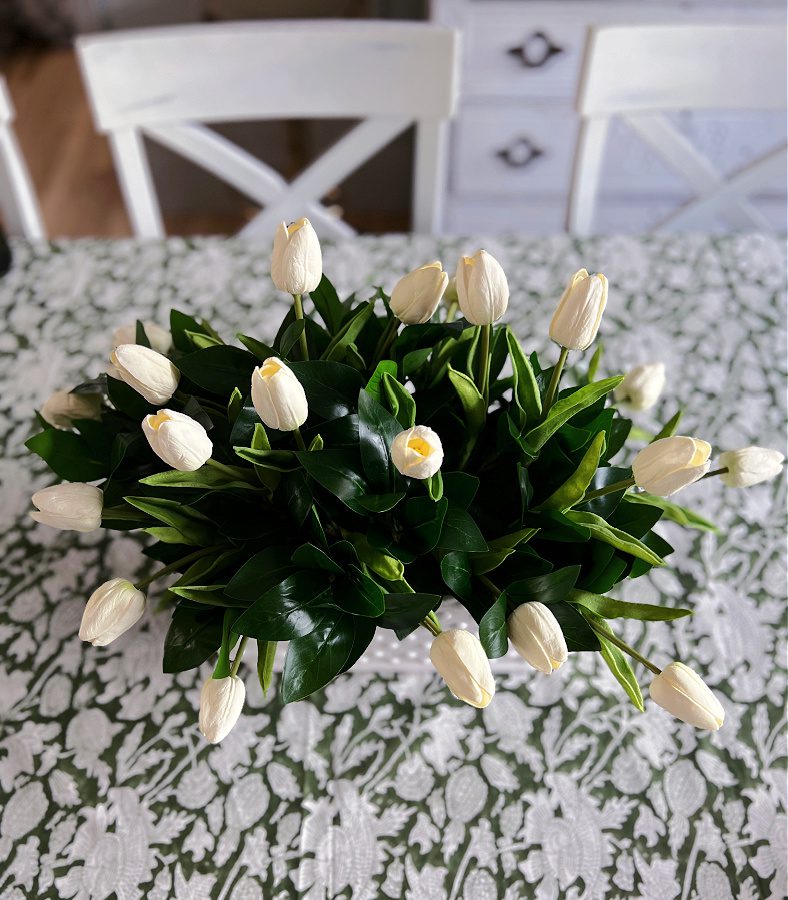
Once I had all 20 of the stems in I arranged them, bent the stems and leaves to make some look as if they were angled towards the planter or away for it. This gave it more of a natural look.
While I propped the ones in the middle up. This helped make the flowers look more realistic and gave the arrangement some depth.
I have had people visit our home and think these tulips are real! They are that good.
I just love how it turned out and how simple it really was!!! This honestly only took me 5 minutes. If I can do this you can too!
Ideas for Displaying Spring Floral Arrangement
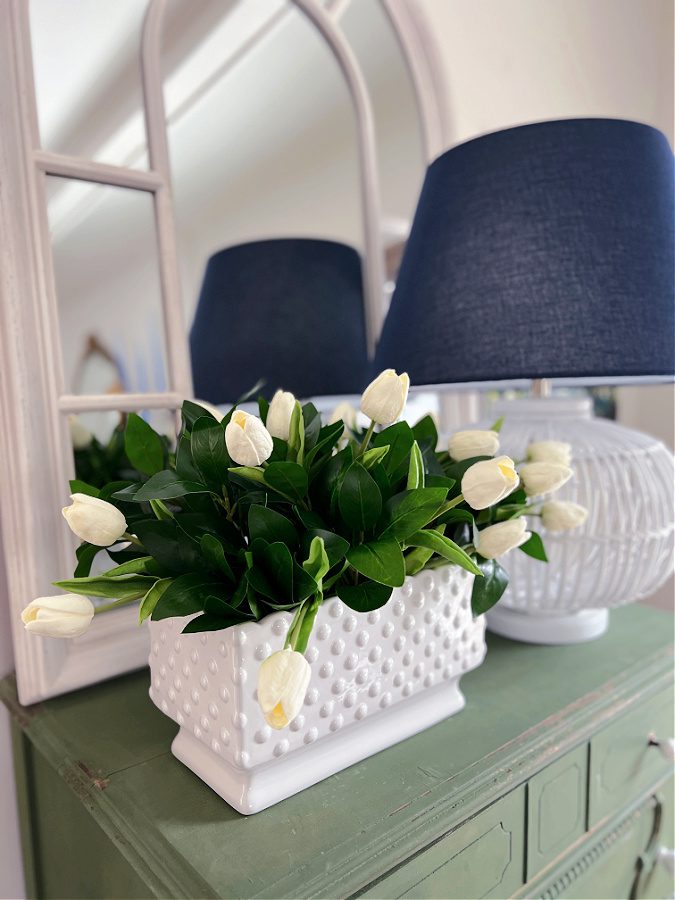
Once this simple 3 step Spring floral arrangement was complete you should have seen me! I was walking all over our house trying to decide where she would live this Spring.
The first stop was on top of my favorite boxwood green dresser. It looks as though she was made for this spot!
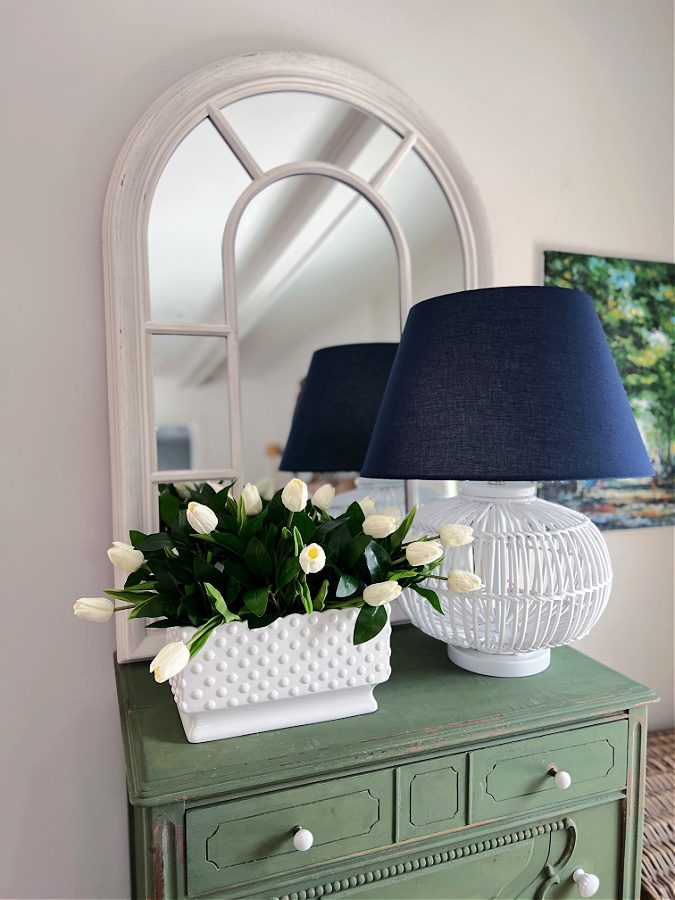
I also tried her over on our mantel. This arrangement contrasts so beautifully with so many different colors. I love the layered look she created with the mirror and mini lamp.
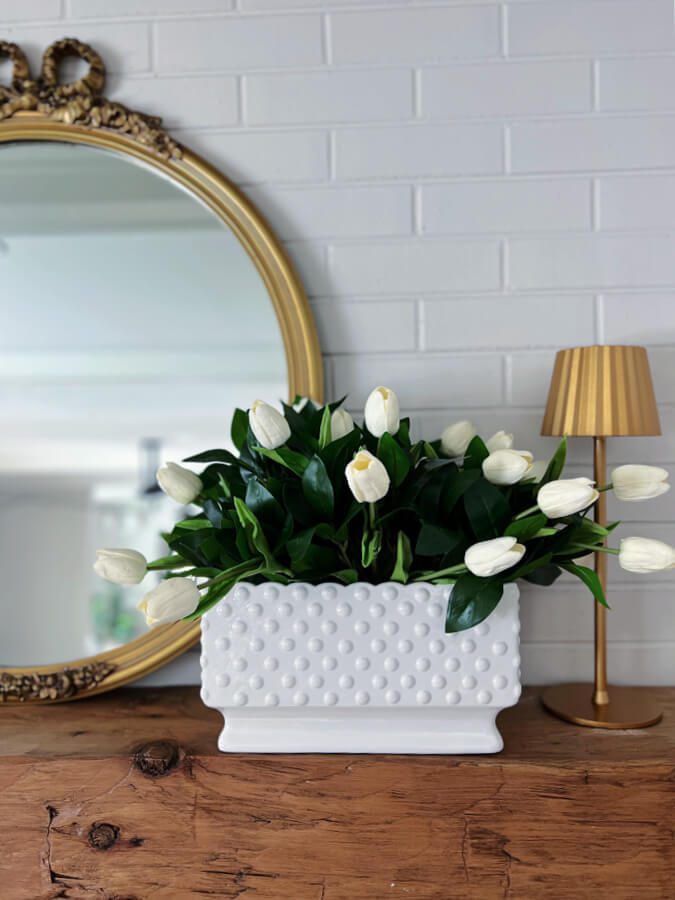
Of course my original intention was to have her as a centerpiece on our Spring dining table. We will see where she ends up. For now I am enjoying this lovely arrangement all over our home!
More Spring Floral Arrangements and Centerpieces
It’s no secret that I adore floral centerpieces. Of course faux ones are so easy because they require no care. But I also love to make real floral arrangements as well. Below are a few of my favorites from over the years, both real and faux.
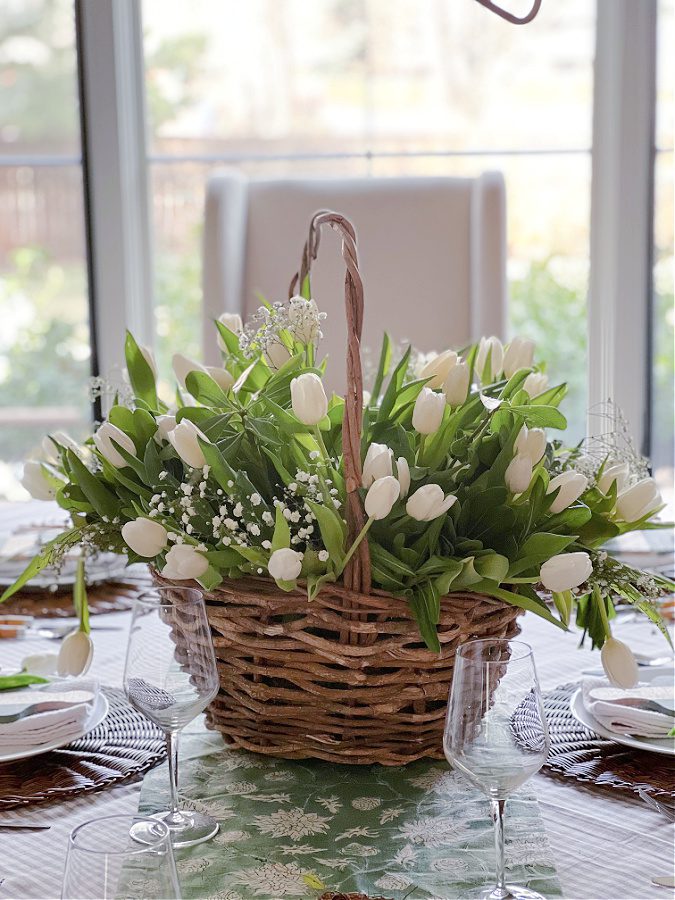
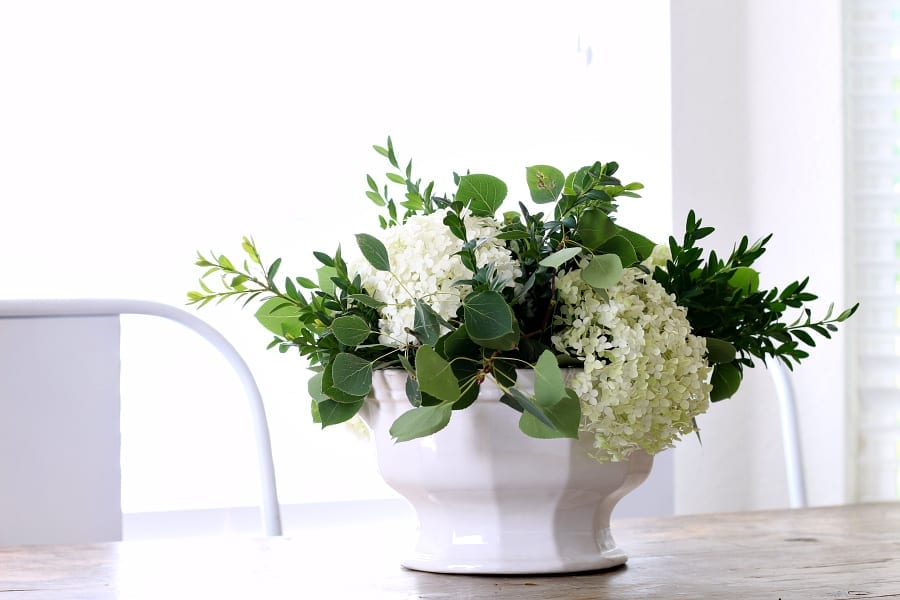
How to Make a Flower Arrangement in a Basket
I used real flowers for the arrangement below. I had fun arranging them in a basket. Notice that I have an affinity for green and white?!
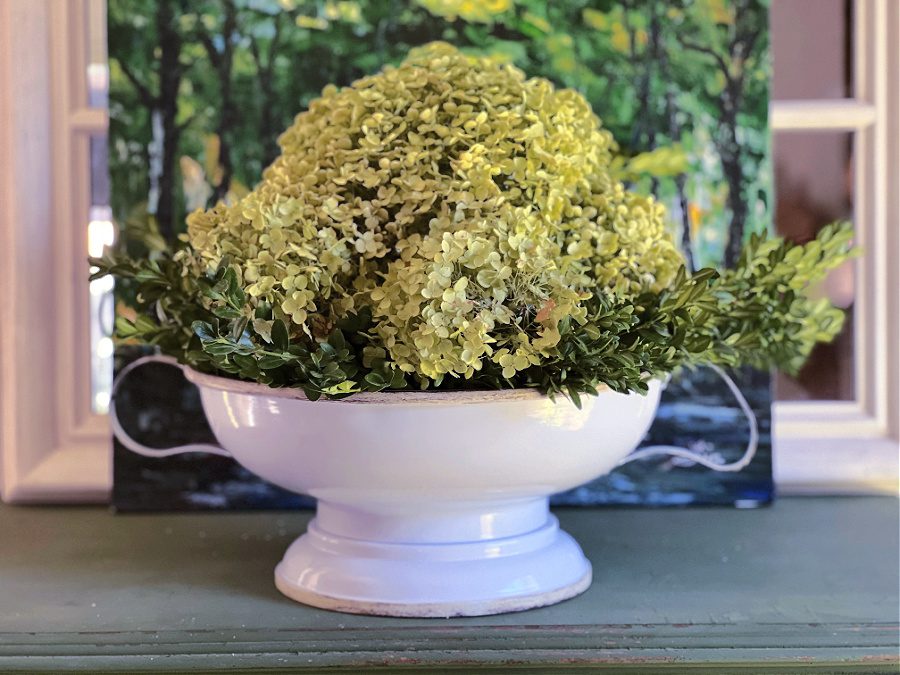
4 Simple Steps for Creating a Floral Centerpiece in a Pedestal Bowl
The flower arrangement below required no water and all of the greenery was from our yard!
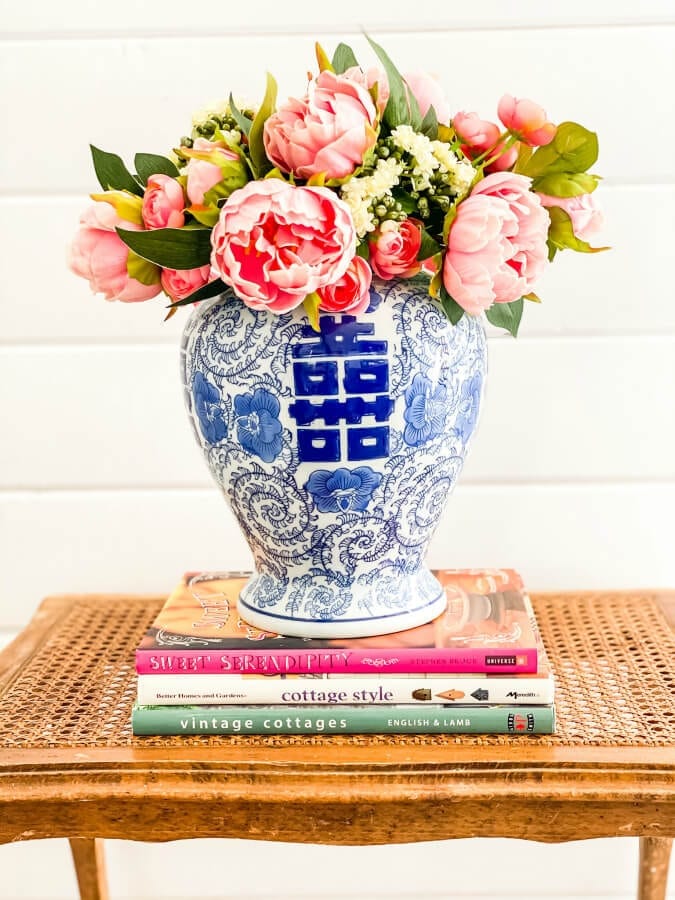
3 Ways to Style a Faux Flower Arrangement
This post shows how I arranged my faux peonies 3 different ways. I love how colorful and happy each of the arrangements are.
Low Hydrangea Centerpiece
Hydrangeas are also one of my favorite flowers so I had fun creating this low hydrangea centerpiece. Ironically it is also green and white. I guess when a color scheme works it works!
Simple 3 Step Spring Floral Arrangement
You now know the 3 simple steps to making a spring floral arrangement with tulips and greenery! Creating your own Spring centerpiece will surely make your home feel refreshed and bring cheer. You can also use similar techniques for more complex arrangements as you get more confident in creating arrangements yourself.
Decorating with flowers is such a wonderful way to bring beauty into our homes and celebrate the new season.
Now that you have all of the essential elements, use your creativity to choose other beautiful blooms, branches and foliage to add even more life and color.
Cherish the opportunity to arrange something beautiful from the comfort of your home! Are you ready to bring spring into your home with a simple floral arrangement? Create something beautiful today!
I’d love to have you hang out with me some more! Feel free to follow along with me on any of the platforms linked below.
LTK | Facebook | Instagram | Pinterest | Amazon
xoxo,
Kelly
Did you like this post? PIN it for later!

Love how easy this was. I ordered the greens and will attempt to make an arrangement!
Yay I can’t wait to see it!
Damn better then I could do
No you could totally do this!!!
I am in LOVE with this Kelly. So simple, but so beautiful! I am going to share a photo and link to your arrangement in my weekly recap on Saturday.
Hope you are having a fabulous week so far!
Aww thanks Jen! I sure do appreciate that!!!
I am in love with that hobnail vessel. It looks beautiful in the room. The perfect arrangement for spring.
Thank you, Tammy!