

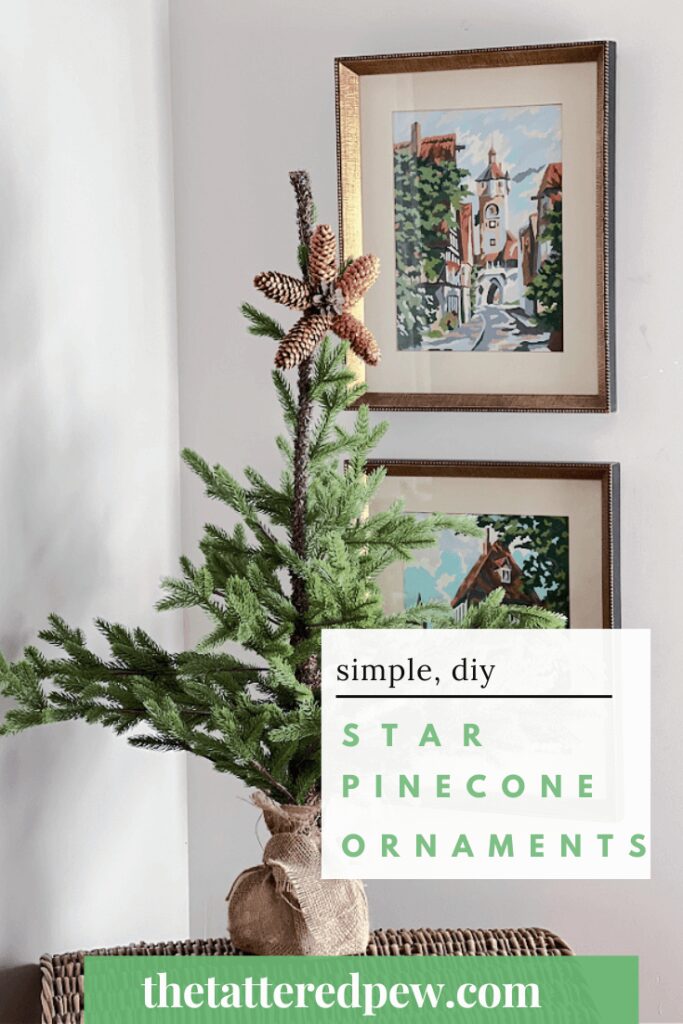
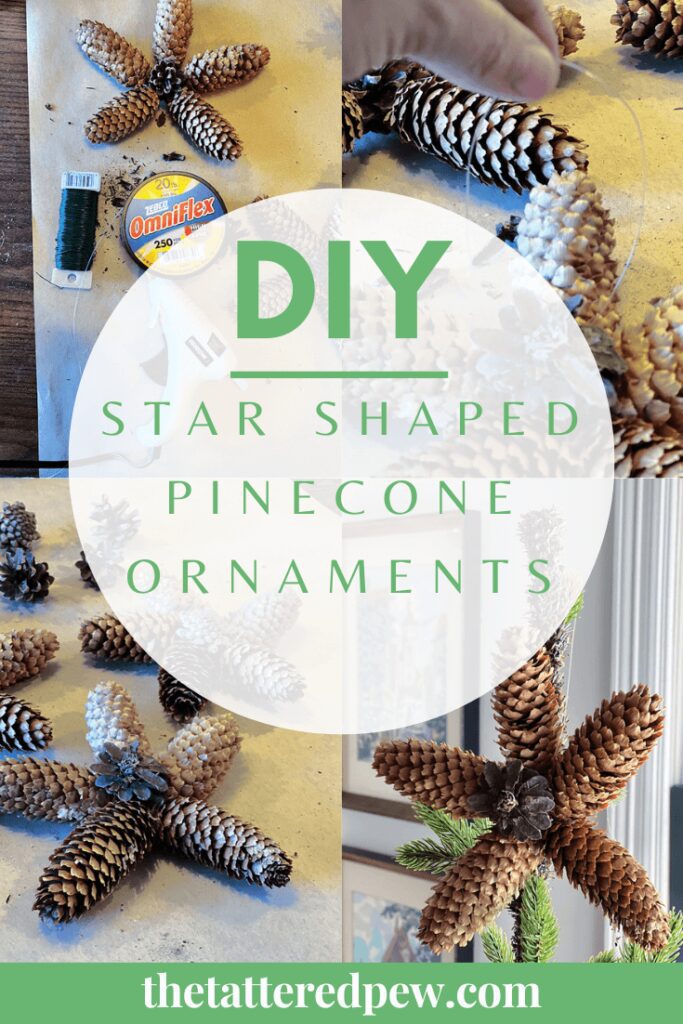
Simple DIY Star Shaped Pinecone Ornaments
Pinecones are one of nature’s simplest treasures. And they make the most charming ornaments when turned into DIY pine cone star ornaments! In this tutorial, I’ll show you how to make your own star-shaped pinecone ornaments using a few simple supplies. So grab some pinecones and get started!
*As an Amazon Associate, I earn from qualifying purchases. This post contains other affiliate links too for your convenience. Click here to read my full disclosure policy.
Celebrate the Holidays
Happy November! I am slowly dipping my toes into PLANNING my Christmas decor and if that is you too then you will love this post! Today I am joining Carol from Bluesky at Home and her celebrate the Holiday Blog Hop! There is some fabulous Christmas ideas linked for you at the end of my post.

If you are popping over from a fellow Colorado gal Laura of Everyday Edits and her post on how to Decorate an Apartment for Christmas , welcome! Next make sure to visit Micelle of Thistle Key Lane and her post on- Christmas Ornament Makeover with Paint.
Simple DIY Star Shaped Pinecone Ornaments
Now on to some pine cone fun!
It’s no secret that pinecones have been my go to in my decor lately. I love their texture, simple beauty and that I can grab them straight from our yard.
You know I love a good budget friendly project!
I used pinecones a ton in our fall decor this year and now I am excited to say that they will also be used in my winter and Christmas decor too! Oh goodness am I excited to be getting a jumpstart on these for the upcoming holidays!
- Natural and Simple Decorating Ideas for Fall
- Natural and Simple Fall Home Tour
- How to Prepare Pine Cones for Crafts or Decor
I was inspired to make these DIY pine cone star ornaments after my mom showed me a bunch of pinecone crafts and DIY pinecone ornaments over on Pinterest. Since I had an abundance in our yard I figured I should put them to good use. Here is what I came up with!
Supplies Needed for Star Shaped Pine Cone Ornaments
- Pinecones (if you don’t have any in your yard or area you can always check the local craft stores or grab some here!)
- hot glue gun
- glue sticks
- clear fishing line or green floral wire to hang ornaments
- craft paper (to cover your work surface)
- scissors or garden shears

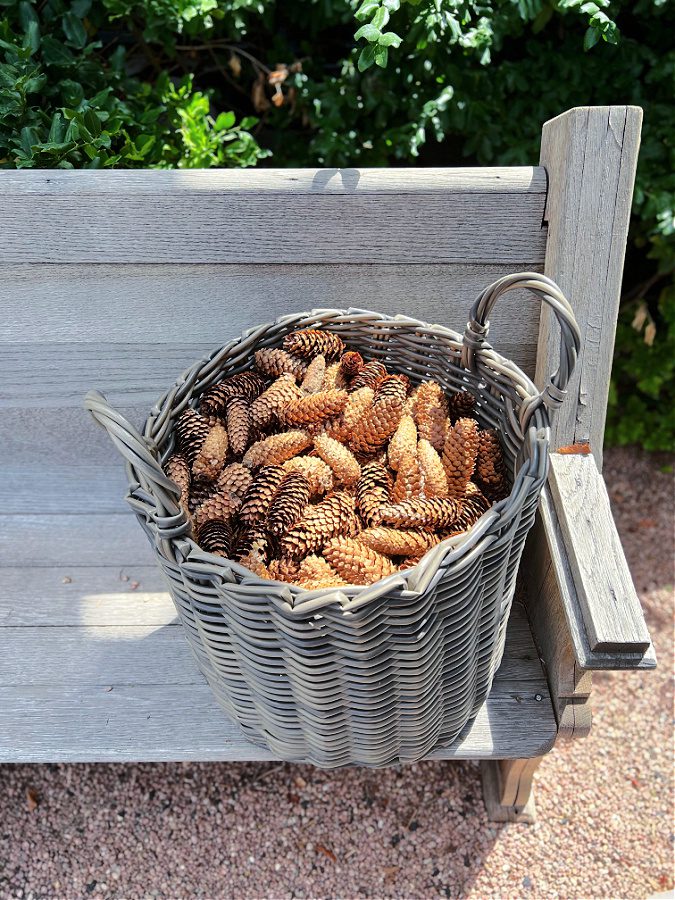
Gather and Prepare Pinecones for Ornaments
First things first you will have to gather up a lot of pinecones! We are lucky to have a huge backyard with a variety of pine trees. So, we have not one but two or three types of pinecones. I gathered an assortment!
Should I clean pinecones for crafts?
The answer is yes, unless you are ok with little bugs or sap or others items coming inside with your pine cones.
Do you need to bake pine cones before crafting?
Yes! I always try to bake mine at 200 degrees for 25-30 minutes if I don’t freeze them or store them in our hot garage. If you want to see the full step by step directions you can find my method by reading my post on how to prepare pinecones for crafts or decor!
If you live near me and need some I have plenty and I am always willing to share!
*Tip- If you don’t have pinecones in your yard try asking friends or family to collect some for you, go on a nature hunt or simply grab some at your local crafting store or on-line!
How To Make Pine Cone Star Ornaments
I ended up trying a few different ways of assembling the ornaments. Here is the first way!
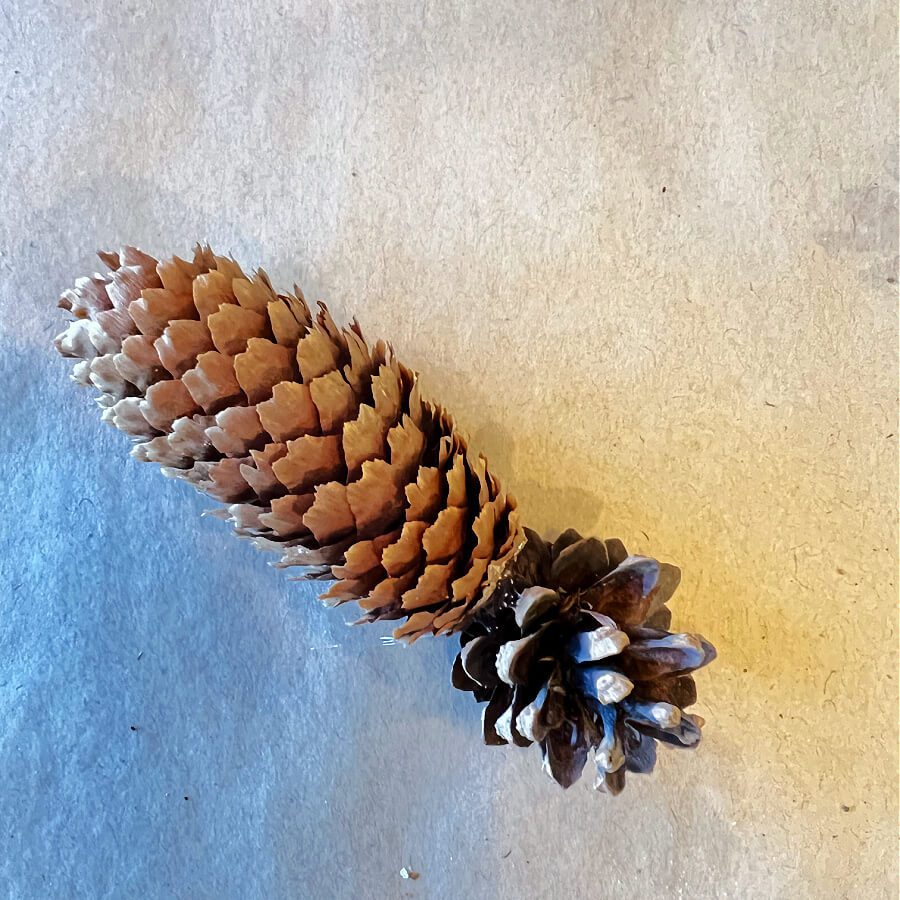
Option 1: Attach Large Pinecones to Center Small Pinecone
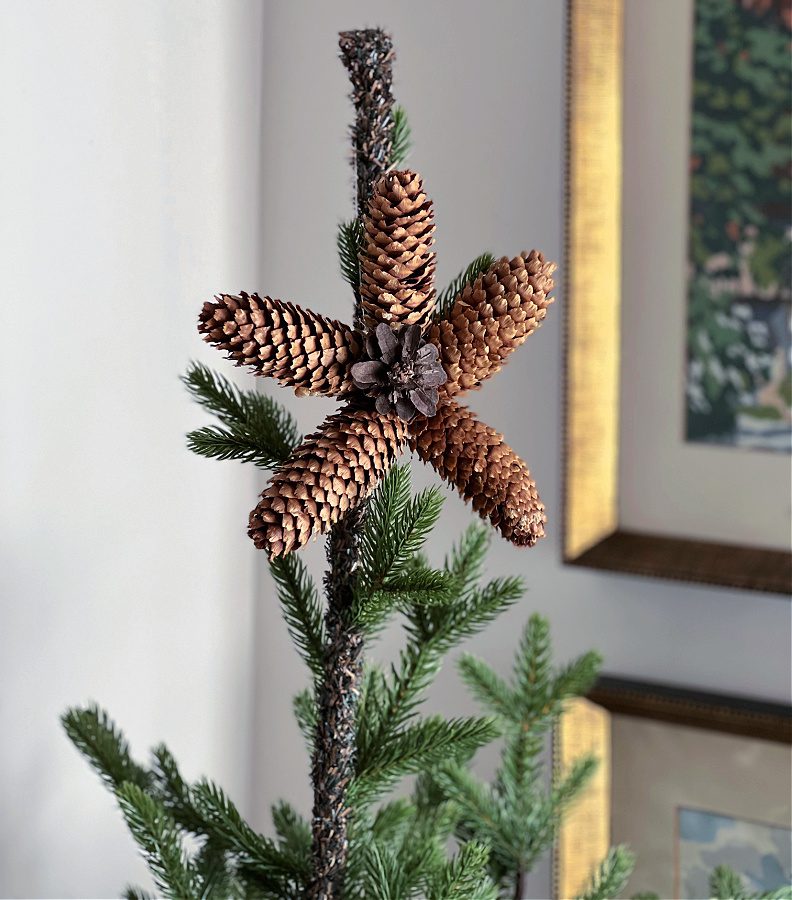
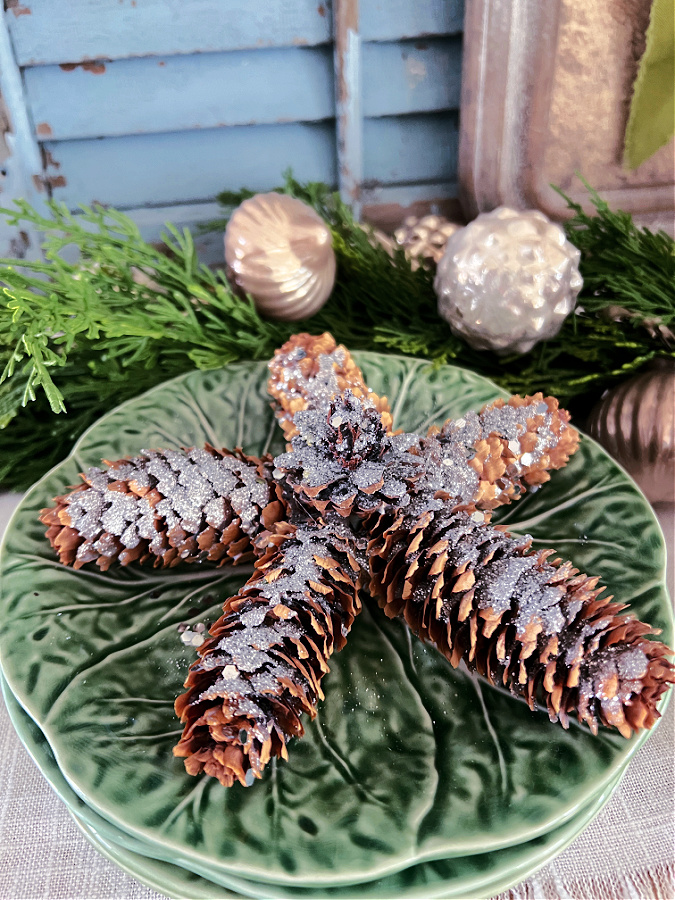
- Lay out 5 longer pinecones on your craft paper in the shape of a star.
- Find a smaller pinecone for the center.
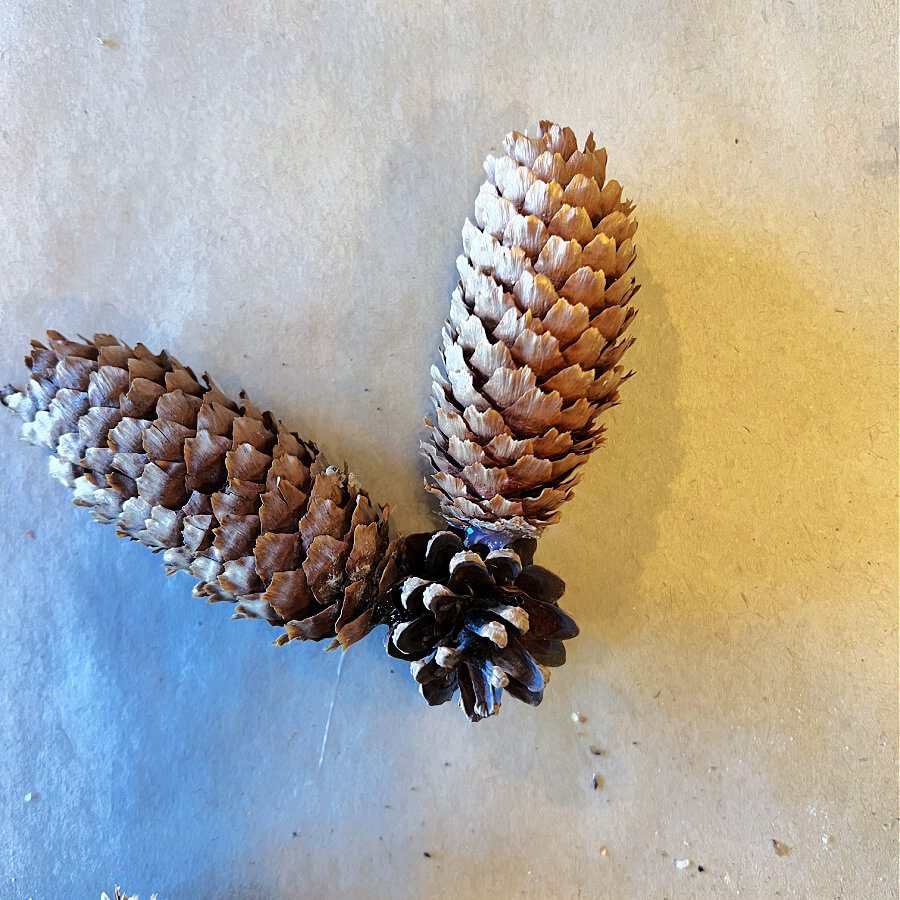
- Add hot glue to the bottoms of the longer pinecone as well as the hot glue to the small pinecone. Stick them together and hold for 20 seconds to make sure glue has bonded.
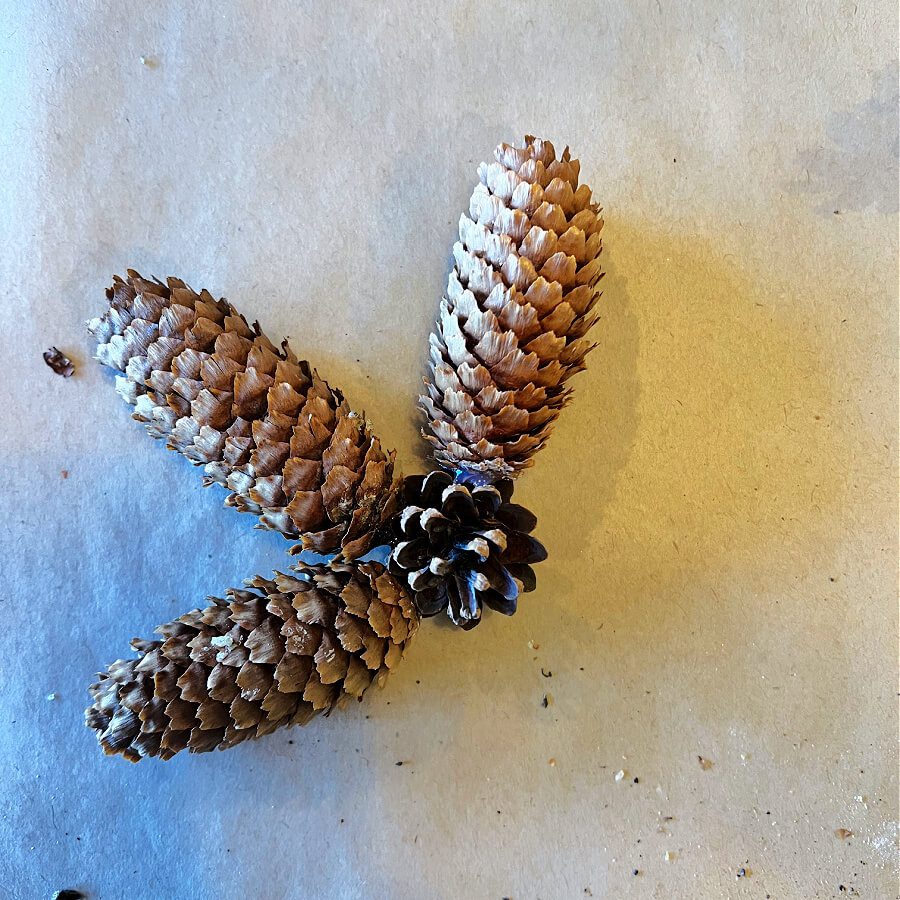
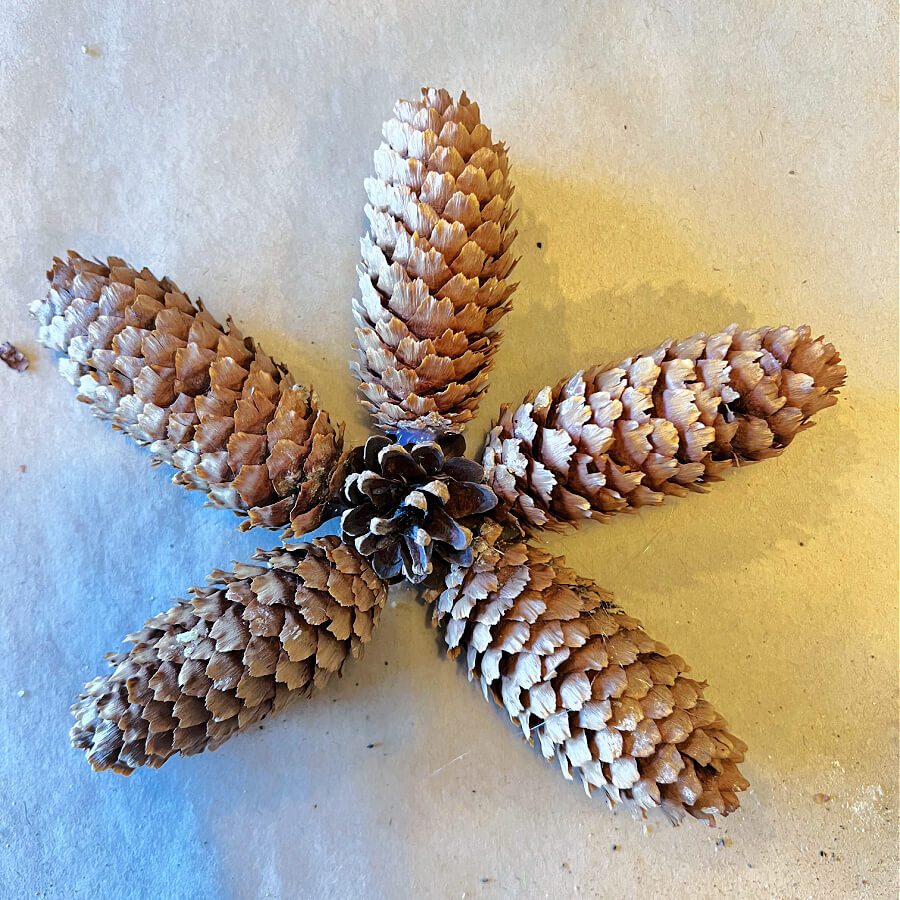
- Repeat this step until all larger pinecones are attached to the smaller one and your pinecones form a star shape.
Option 2: Attach Large Pinecones to Each Other
The second way I assembled them was a lot quicker!
- Lay out your longer 5 pinecones in a star shape.
- Add hot glue to the sides of each larger pinecone at the ends. (one at a time)
- Press the longer pinecone next to it, then repeat, until you have glued and attached all 5 longer pinecones together. You will have a star shape with a small hole in the center.
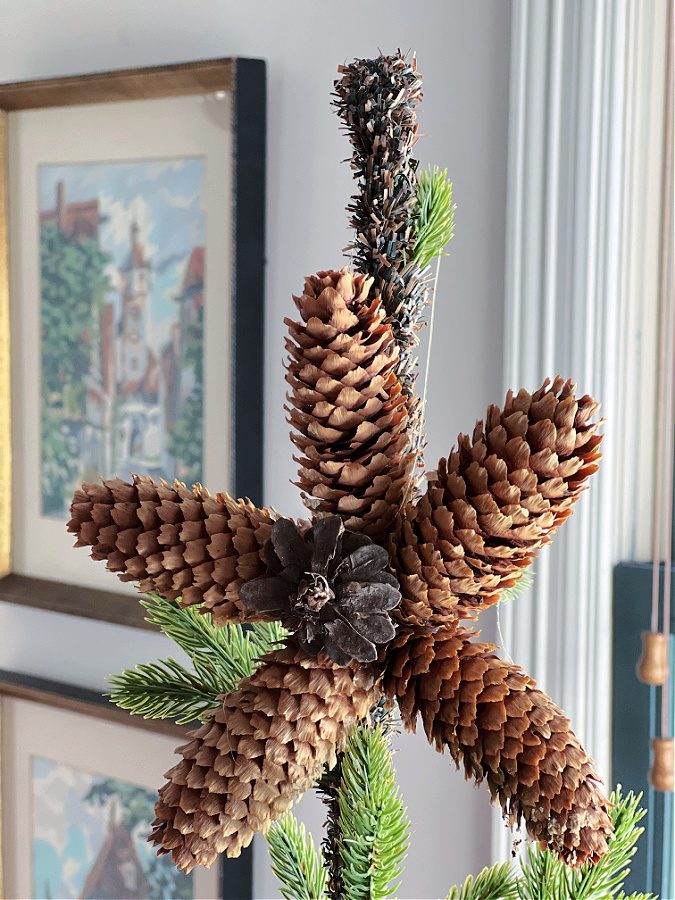
- To fill the hole grab your smaller pinecone and decide if you want the flat surface up or down. Add glue to that side. I tried both ways and liked them both.
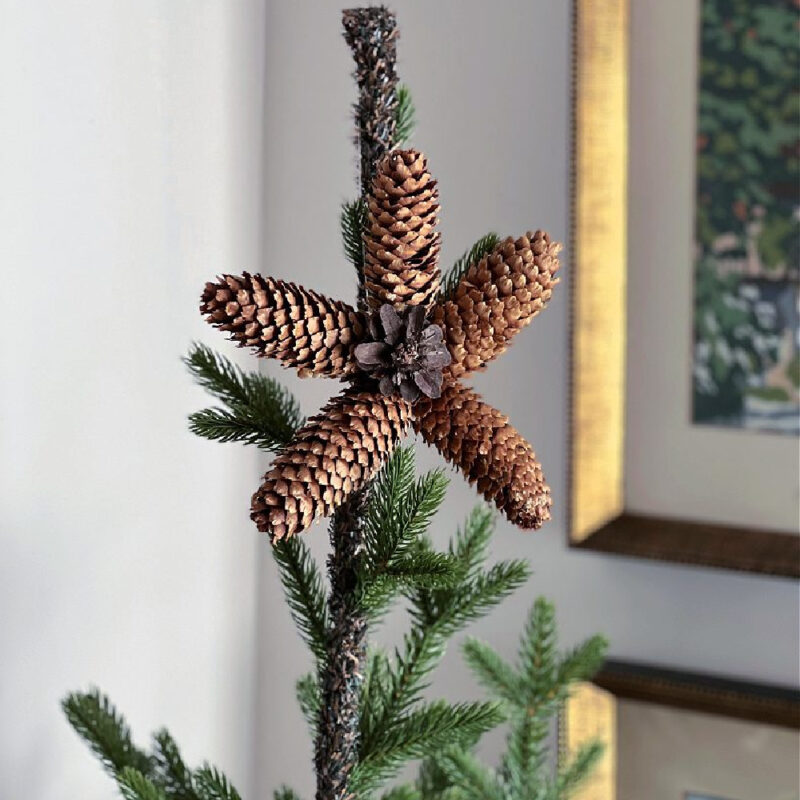
- Extra step: to make your pinecone flatter I used scissors to cut and twist off the top. See picture below!
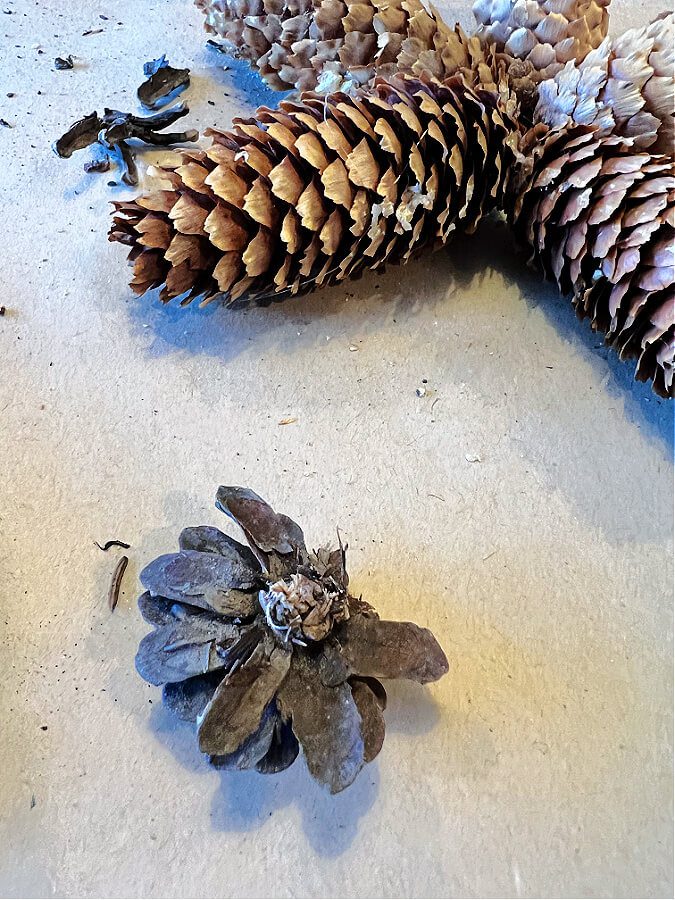
In the picture below you can see how I experimented with attaching the smaller pinecone in the center of the ornaments. That’s the best part about making crafts of DIY projects, you get to experiment and make them your own!

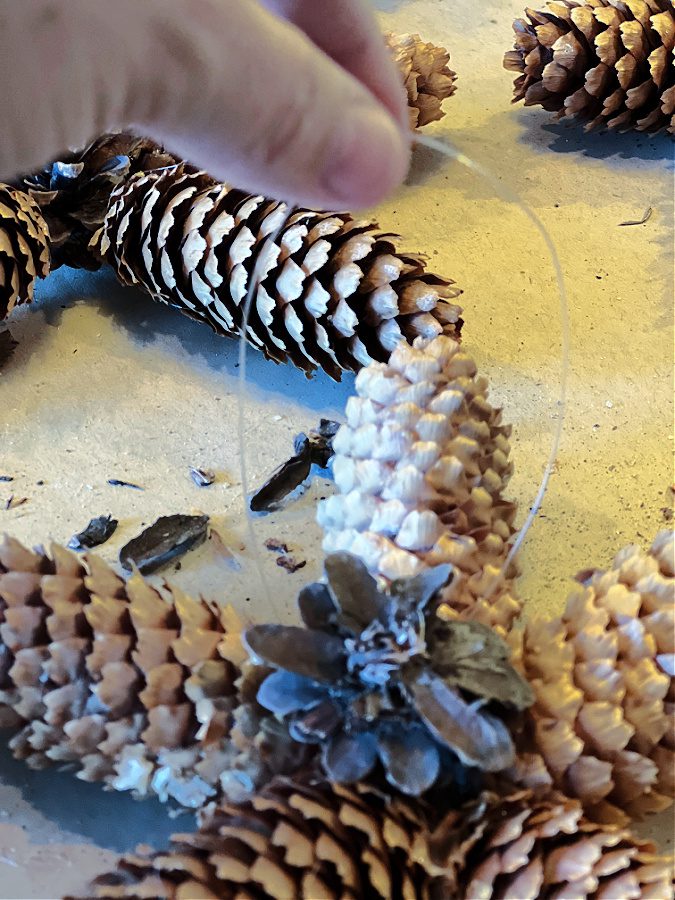
Hanging Your DIY Pine Cone Star Ornament
Once your DIY pine cone star ornaments have dried you can simply attach fishing line through the center hole (like I did) or use green floral wire to create a hook to hang them by. I like the clear fishing line because you can’t see it and it is a simple way to hang these anywhere quickly!
You could also hot glue a loop onto the back then use a traditional ornament hook to hang these from your tree.
Ways to Use DIY Pine Cone Decorations
After making about 10 of these DIY pine cone star ornaments and seeing how quickly they came together I started thinking about other uses for them.
How pretty would these be hanging along our fence out front? Maybe with some green garland?
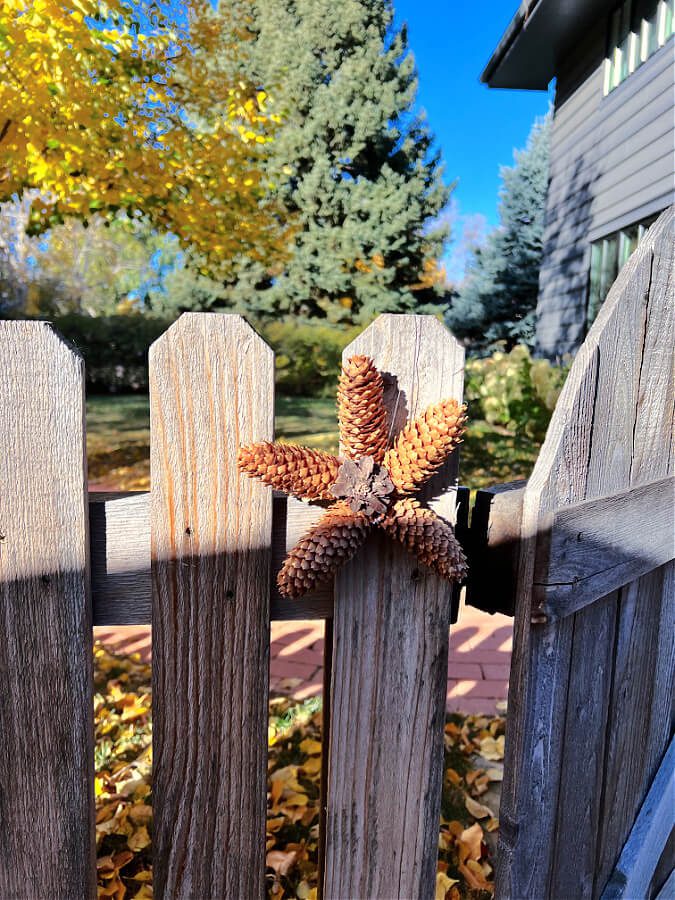
Or how about turning it into a garland for your mantel or hanging these from your windows or stair railings. Goodness so many ideas come to mind besides just hanging these star shaped ornaments on your tree.
How would you use them?
More Simple DIY Pine Cone Star Ornament Ideas
- Painted Pine Cone Stars: Paint your pine cones in various colors or metallic shades, let them dry, then arrange and glue them into a star shape for a festive look.
- Glittery Pine Cone Star: Apply craft glue to the tips of the pine cone scales, sprinkle glitter all over, and let them dry. Assemble the glittered pine cones into a star and add a ribbon.
- Pine Cone and Jute Star: Attach pine cones together to form a star, then wrap jute twine or rustic twine around the pine cones for a natural, rustic look.
- Ribbon-Wrapped Pine Cone Star: Wrap different colored or patterned ribbons around the pine cones to cover them completely and secure them at the tips, forming a star.
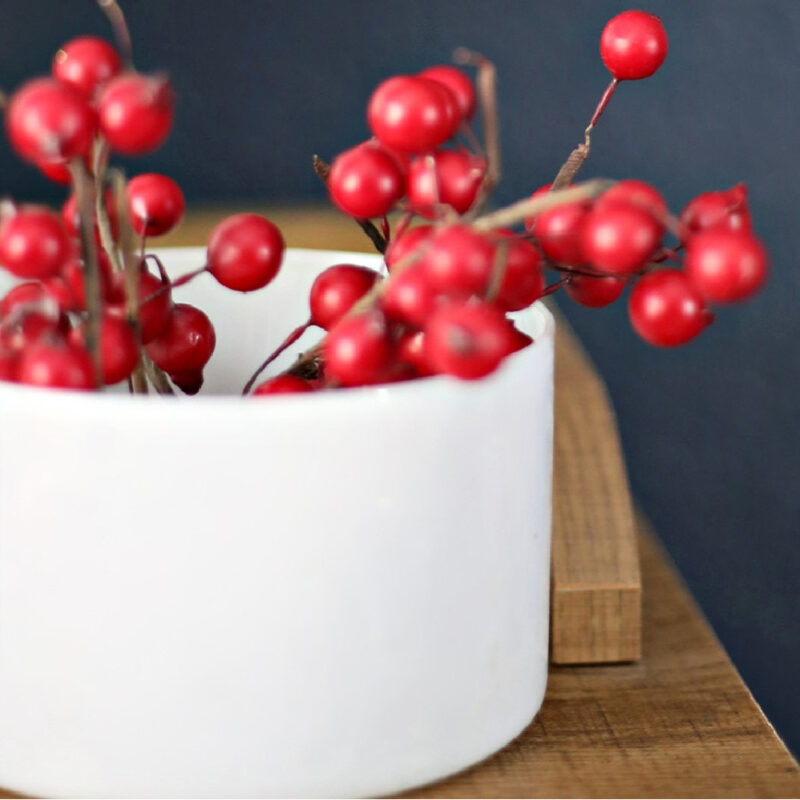
- Pine Cone Star with Berries: Attach small faux berries or cranberries to the tips of pine cones using hot glue, then assemble the decorated pine cones into a star shape.
- Miniature Pine Cone Star: Create a smaller version of the pine cone star with mini pine cones, and use it as a cute addition to a wreath or as a tree ornament.
- Pine Cone and Burlap Star: Wrap burlap ribbon around each pine cone and secure it at the tips, then arrange the pine cones into a star and add a burlap bow for a cozy, rustic look.
- Scented Pine Cone Star: Infuse your pine cones with holiday scents by adding a few drops of essential oils (like cinnamon, pine, or citrus) before creating the star shape.
- Rustic Pine Cone Star with Twigs: Combine pine cones with small twigs to form a star, securing them together with twine or hot glue for a natural, woodland-inspired ornament.
- Pine Cone Star with Felt Accents: Cut small felt shapes, such as stars, hearts, or snowflakes, and attach them to the pine cones. Assemble the pine cones into a star shape and hang with a ribbon.
- Pine Cone Star with Mini Ornaments: Glue miniature holiday ornaments or mini baubles to the pine cones, then arrange them into a star and hang with a decorative ribbon.
- Wooden Bead and Pine Cone Star: Combine pine cones with wooden beads to create a unique star ornament. Thread beads onto twine and attach the pine cones at the points.
- Pine Cone Snowflake Star: Attach pine cones to create a snowflake pattern, and sprinkle them with fake snow or white paint for a wintery effect.
- Pine Cone Star with Mini Lights: Add small battery-operated fairy lights to your pine cone star for a magical, illuminated ornament.
- Pine Cone Star Garland: String several pine cone star shaped ornaments together to create your own garland to hang on a tree or mantel.
- Bleached Pine Cone Star Ornaments: Once you have created your DIY pine cone ornaments why not try bleaching them to make them lighter?
Common Questions About Making Pine Cone Christmas Ornaments
How do you glitter a pine cone?
- Start by laying out your materials in a well-ventilated area, preferably outdoors, or cover your workspace with newspaper or a drop cloth to make cleanup easier.
- Begin by applying a thin, even layer of craft glue to the tips and edges of the pine cone scales. You can use a paintbrush or a foam brush for this.
- Next, hold the pine cone over the shallow container or tray and sprinkle the glitter evenly onto the glue-covered areas. Gently tap or shake the excess glitter into the container.
- Allow the glittered pine cone to dry for a few hours or as per the glue manufacturer’s instructions.
- Once the glue is completely dry, you can shake off any loose glitter and make any touch-ups if needed.
- Your glittered pine cone is now ready to use for your holiday or seasonal decorations!
How do you preserve pine cones for decorations?
- Preheat your oven to a low temperature, around 200°F (93°C).
- Line a baking sheet with aluminum foil to catch any resin drips.
- Place the pine cones on the baking sheet in a single layer, ensuring they are not touching.
- Bake the pine cones in the preheated oven for about 30 minutes. This will help kill any insects or larvae and remove excess moisture.
- After baking, let the pine cones cool completely.
- Your preserved pine cones are now ready for use in your DIY projects or as decorations. They should last for quite a while. See even more details in my post on how to prepare pinecones for crafts or decor!
What is the best glue for pine cone crafts?
For pine cone crafts, a good craft glue or hot glue gun works best. The choice depends on your project and personal preference:
- Craft Glue: Craft glue, like Tacky Glue or Elmer’s Craft Bond, works well for most pine cone crafts. It’s easy to apply and dries clear. It’s great for glittering, attaching embellishments, and making wreaths.
- Hot Glue Gun: A hot glue gun is ideal when you need a quick, strong bond. It’s perfect for securing pine cones to wreaths, making garlands, or creating more permanent decor. Just be cautious, as hot glue can be, well, hot!
What Other Crafts Can I Make with Pinecones?
If you love pinecones and using them in your decor like I do then you might also enjoy these pinecone ideas listed below.
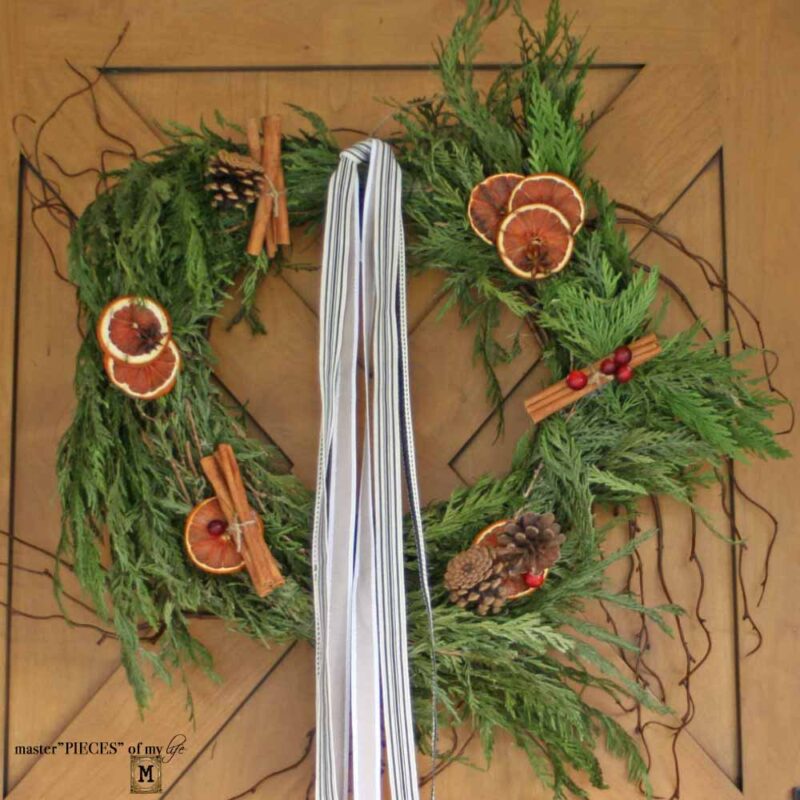
- Pine Cone Wreaths: Create beautiful wreaths by attaching pine cones to a wreath form. You can leave them natural or paint and decorate them to match your seasonal or holiday decor. See my favorite dainty pinecone wreath on our mantel!
- Pine Cone Centerpieces: Make unique centerpieces for your dining table by arranging pine cones in a decorative bowl or around a candle like I did here. You can also add seasonal elements like acorns, dried flowers, or faux berries. See my simple organic and easy to make fall centerpiece!
- Pine Cone Garland: String pine cones onto twine or ribbon to make a rustic garland. Hang it across a fireplace mantle or drape it along a stair railing.
- Pine Cone Trees: Glue pine cones to a cone-shaped piece of cardboard or foam to create adorable pine cone trees. Add mini ornaments, ribbon, and a small star on top for a festive touch.
- Pine Cone Place Card Holders: Turn pine cones into charming place card holders by attaching a small card with a guest’s name to the top. These are my favorite pinecone placeholders I used at Thanksgiving!
- Pine Cone Animals: Get creative and make pine cone animals like owls, hedgehogs, or squirrels by adding googly eyes, felt, and pipe cleaners.
- Pine Cone Flowers: Paint and decorate pine cones to resemble flowers. Arrange them in a vase for a long-lasting, eye-catching floral display.
- Pine Cone Bird Feeders: Smear peanut butter or suet on pine cones and roll them in birdseed. Hang them in your garden or on trees to attract feathered friends.
- Pine Cone Snowflakes: Glue pine cones in the shape of snowflakes and paint them white. Add a ribbon for hanging, and you have a rustic snowflake ornament.
- Pine Cone Luminaries: Hollow out the centers of pine cones and place small LED tea lights inside for a warm, natural glow. I can’t wait to try this one!
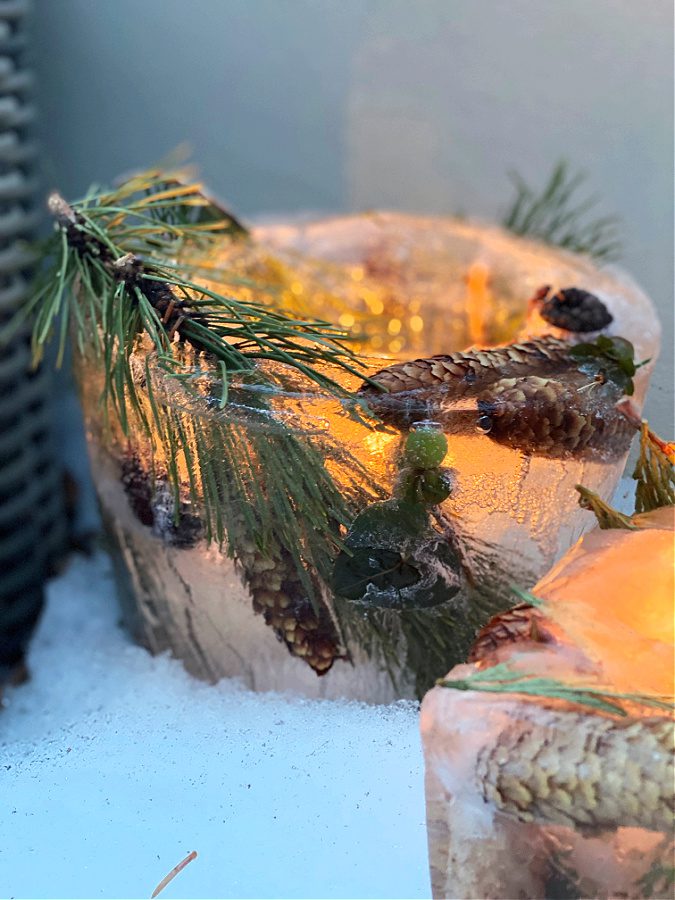
- Pine Cone Ice Votives: Simply gather natural elements along with pine cones, freeze them and add a candle for stunning outdoor ice lanterns.
- Pine Cone Place Mats: Create rustic place mats by gluing pine cones to a piece of burlap or felt. You can make them as small individual mats or a larger table runner.
- Pine Cone Wall Art: Arrange and glue pine cones in an artistic design on a canvas or wooden board for unique wall decor.
- Pine Cone Photo Holders: Attach a clip or small clothespin to a pine cone, and use it to hold photos, notes, or cards.
- Pine Cone Ornaments: In addition to stars, you can make various pine cone ornaments, such as angels, reindeer, or traditional ball-shaped ornaments.
- Pine Cone Mobiles: Hang decorated pine cones from a mobile frame to create a whimsical decoration for a nursery or playroom.
Now that you know how to make these beautiful ornaments, what will you create? I’d love to see your finished products! Share photos of your star-shaped pinecone ornaments in the comments below. And if you have any other ideas for fun things to do with pinecones, let me know – I’m always looking for new craft projects to try. Thanks for reading, and happy crafting!
Now I hope you will make sure to visit these Christmas decor ideas linked below, from my friends!
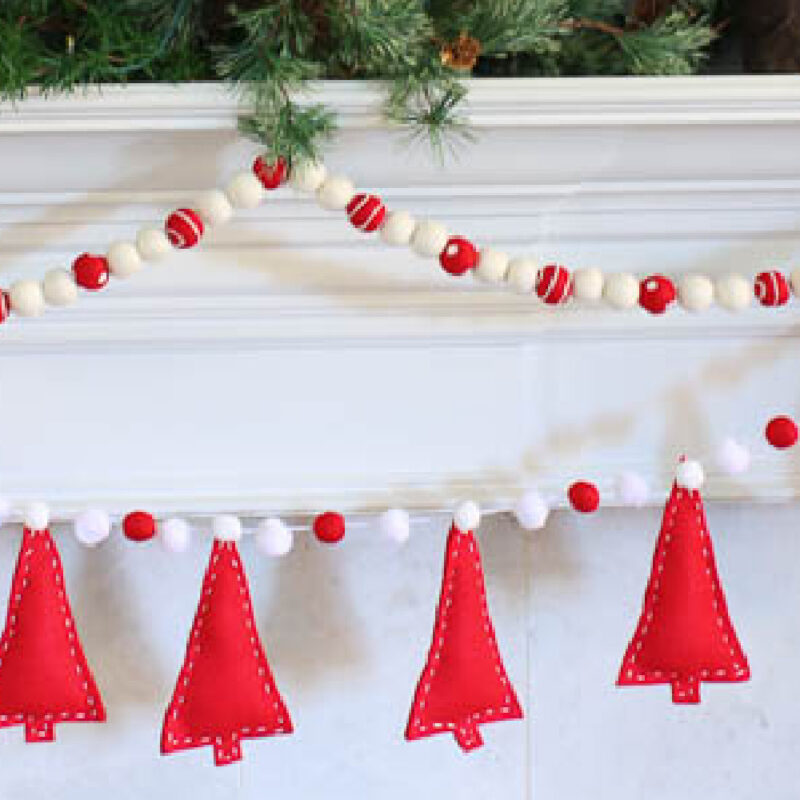
Bluesky at Home – How to Make the Cutest Christmas Garland
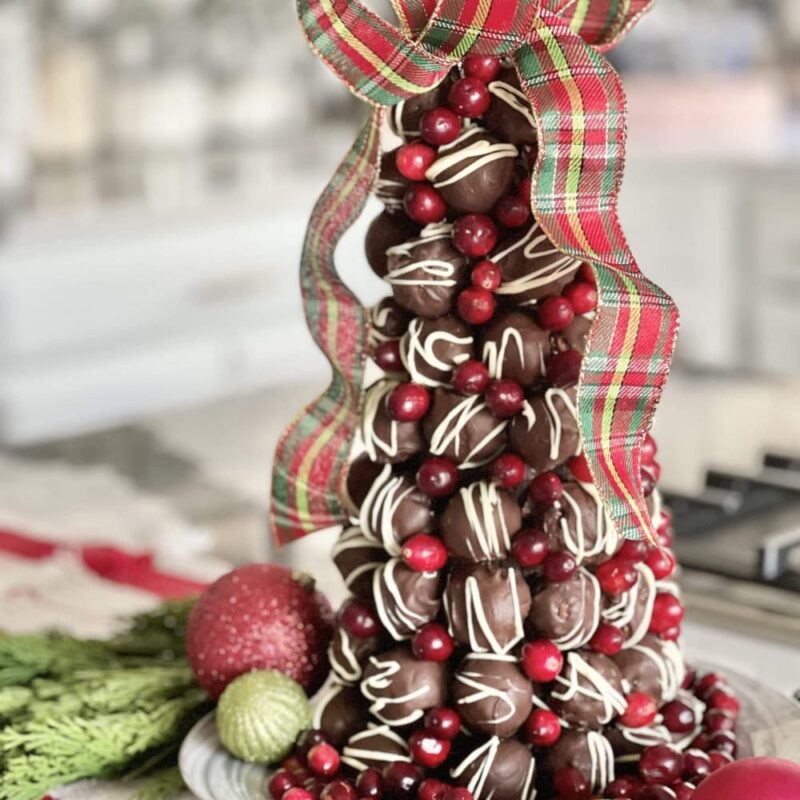
Sonata Home Design – How to Make a Chocolate Truffle Christmas Tree

Peacock Ridge Farm – Gift Wrapping Ideas for the Holidays
White Arrows Home – A Holiday Table Spode Christmas Tree China
Masterpieces of My Life – Organic DIY Christmas Tree
Everyday Edits – How to Decorate an Apartment for Christmas
The Tattered Pew – DIY Star-Shaped Pinecone Ornaments
Thistle Key Lane – Christmas Ornament Makeover with Paint
Hen and Horse Design – Easy DIY Advent Wreath
Saved by Salvage – DIY Faux Grapevine Wreath
Perfecting Place – Simple Ways to Decorate with Bottle Brush Trees
I’d love to have you hang out with me some more! Feel free to follow along with me on any of the platforms linked below.
LTK | Facebook | Instagram | Pinterest | Amazon
xoxo,
Kelly
Did you like this post? PIN it for later!
This is such a great idea! I have so many pinecones. I may just make a couple with my granddaughter! Thanks for sharing. 💛
Yes such a great activity to do with kiddos! Have fun!
Kelly,
This is such a cute idea. I don’t have pinecones shaped like these but maybe something similar I can try. I’d like to share a link on my Sunday Dirt Road adventures.
Thank you Rachel, I would love that!
OH EMMMMM GEEEEE Kelly!!! These are ADORABLE! I had to post on FB! Thank you for an easy way to bring nature into decorating once again!
Nicole
ha ha! You are the cutest! Thank you for sharing and I am SO glad you love them!!!
These turned out so cute, the possibilities are endless!
Thanks mom! so excited to use them!
What a fun idea! Thanks for sharing for us! Pinned.
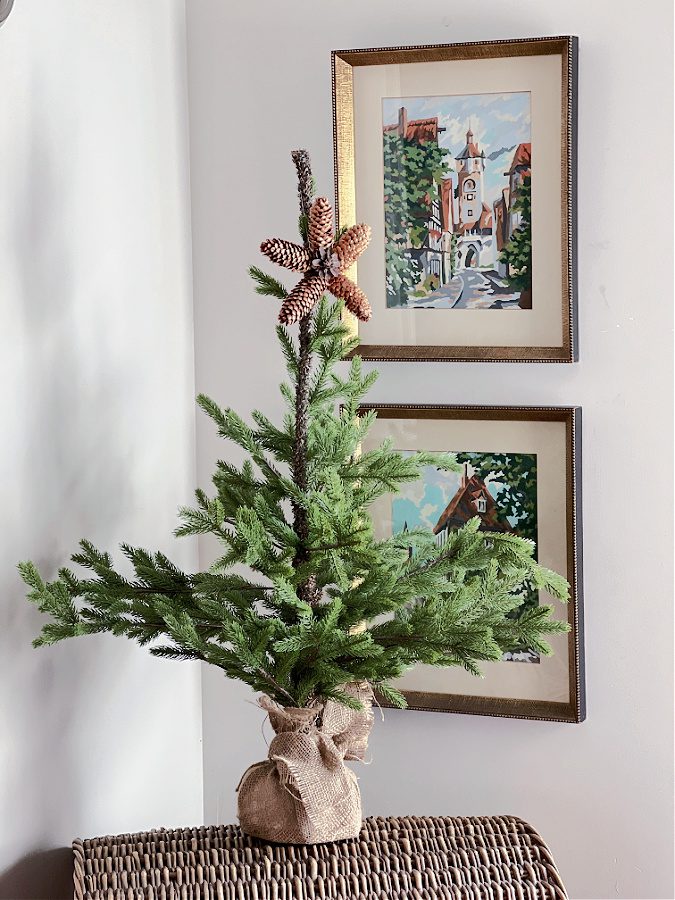
Kelly what a great idea!!! I love the tree topper! I have so many pine cones laying around too. Pinned!
It’s natures ornament!
Kelly,
I love this idea, and we have the supplies on hand! YAY!!
I plan on making these, and pinned for future reference.
Hugs to you dear friend,
Brendt
Oh wonderful that makes me so happy! Have fun!
I love this type of pinecone. Do you have Spruce trees? They sure make the perfect start shaped ornament or tree topper. I’m going to dig through my pinecones and make one for our tree this year! Pinning!
Thank you Michelle and yes, we have several! They are the perfect tree topper for sure! Thanks for pinning:)
HI Kelly, These pinecones look amazing! What a great idea!
SO pretty! xo laura
Thank you Laura!
This is such a great idea. I love it. Hugs to you.
Thank you, Renae! Hugs!
These are adorable, Kelly!! I love using items that Mother Nature provides for home decor and crafts, especially! The addition of the glitter is particularly Christmas-y. Thanks so much for sharing!! Pinned!
I like the look of these so rustic
Thank you!
I love decorating with pine cones and these are fabulous. You are so lucky to have so many in your backyard. I forage them everywhere I go and love using them in so many ways. Thanks for the inspo. Pinning! XO- MaryJo
Kelly, what a great idea. I love the natural feel of these pinecone ornaments. I just found a bag of them in a fall box but I’m going to use them at Christmas. I didn’t know you had to bake them first! Thanks for that tip. So glad you shared this idea at Celebrate the Holiday.
Love this idea, Kelly. I have so many pinecones in my backyard similar in shape to these. I need to add these to my Christmas craft list! Thanks so much for sharing!
Such a great post Kelly. I love the natural elements of pinecones and you’ve ‘topped’ it off so perfectly. Thank you for sharing this tutorial!
I absolutely love this ornament Kelly!